Recording Video with the Xbox Game Bar
Written by Eric Wyatt (last updated February 1, 2021)
In other articles, we discussed setting up Xbox Game Bar settings and familiarized ourselves with the application. This article goes over an overlooked feature of the Xbox Game Bar, one that doesn't require playing any video games or even having one installed on your computer.
As someone who writes about how to use Windows computers, it can be daunting to correctly write or even verbalize how to accomplish something within the operating system. At times it seems easier to be able to show a person how to do it. In the past, this was a tricky thing. You could use Remote Assistance and connect into the other individual's system, but you both have to be available at the same time. You could also physically be in the same location, but that's not helpful when great aunt Trudy lives 2,300+ miles away.
What if there was a way that you could record yourself doing the task and then send the file to them or post it online somewhere, where they can access it and see exactly what you are doing? This is where the Xbox Game Bars video capture feature can be helpful.
Once you have enabled Xbox Game Bar access to "Record game clips, screenshots, and broadcast using Game Bar" within system settings you can begin capturing video. The first time you want to record a video through the Xbox Game Bar, follow these steps:
- Open the application you wish to record. The Xbox Game Bar records using the last window you have active before moving on to step 2.
- Launch the Xbox Game Bar by pressing Win+G. This opens the Xbox Game Bar. It should look the same way it did when you familiarized ourselves with it previously.
- If needed, be sure your audio or microphone is set up properly. Do this with the Audio widget. You can adjust all the audio settings to the way you prefer.
- When ready, press the Record button—the round button, second from the right, in the Capture widget. This opens a small record pop-up bar, typically on the right side of your screen the first time you use it. (See Figure 1.)

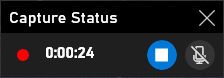
Figure 1. Xbox Game Bar video recording indicator box.
- Use your application as desired, the application that you want to record in your video.
- When completed, press the Stop button in the small record pop-up bar. You can also press Win+Alt+R to stop recording.
When you have completed your recording, Windows displays a "Game clip recorded" popup message. You can click on this message to open the "Captures" folder within File Explorer. Alternatively, you can also click on the "Show all captures" link within the Capture widget.
A few things to keep in mind as you begin using the Xbox Game bar to record your videos:
- ¥ Your computer's video card needs to be able to support one of the encoders used by the Xbox Game Bar—AMD VCE, Intel Quick Sync H.264, or Nvidia NVENC. If your computer cannot record video you will get a message when you try saying: "Sorry, this PC doesn't meet the hardware requirements for recording clips."
- ¥ Once you are comfortable with your audio settings and how recording works you can bypass steps 1-4 and start a recording by pressing the Win+Alt+R keyboard shortcut. This will start and, as outlined in step 5, stop your screen recording.
- ¥ Screen capture only works on one application window at a time. It does not record multiple screens. This means you cannot record switching from, say, Edge Chromium to Microsoft Word.
- ¥ While screen capture records only one window, it will record audio from other windows/applications.
- ¥ You can access the capture folder outside of using the Xbox Game Bar by going to "This PC/Videos/Captures."
Now you're all set to begin recording your screen quickly and then share those videos with whomever you need to.
This tip (12416) applies to Windows .
Author Bio
Eric Wyatt
Eric Wyatt is a swell guy (or so his friends tell him). He is a formally trained designer and branding expert, bringing a wide range of skills to his Tips.Net articles. Learn more about Eric...
Edge Chromium Keyboard Shortcuts
Navigate Edge Chromium quickly using keyboard shortcuts. This tip discloses the full list of available shortcuts within Edge.
Discover More
Setting Process Affinity
When your computer has a multi-core processor or multiple processors you can control how tasks or processes take ...
Discover More
Edge Chromium: Clearing All Data on Close
On public computers, it is important to clear all website data between user sessions. Changing Edge Chromium settings ...
Discover More
Improve Performance by Turning Off 3D Effects
Windows does a lot of nuancing to provide the user with a pleasing visual experience. All this attention to detail, ...
Discover More
Downloads and Storage Sense
Storage Sense can free up limited storage space on your computer automatically. Make sure you don't have it delete files ...
Discover More
Change the Default Name for New Folders
By default, when a new folder is created in Windows 10, the folder is titled "New Folder." Using the Registry, you can ...
Discover More
Comments