XPS documents are simple to create. Any Windows application that permits printing can produce an XPS file. Let's say that you are creating a Word document that contains various fonts and graphics, and that you want to digitally sign it and distribute it without fear of someone else modifying it. This is a good case for creating an XPS document.
Once you have your Word document the way you want it, click its File tab, then click Print. Instead of printing to the default printer, select the printer called "Microsoft XPS Document Writer" then click the Print button. Instead of your document coming out on the printer you'll be prompted to enter a file name. (See Figure 1.)
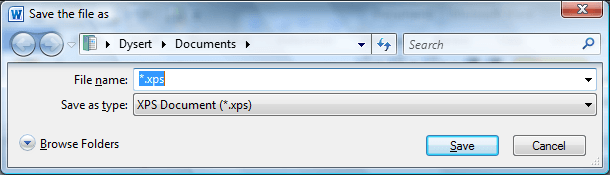
Figure 1. Creating an XPS file.
Enter the location and name of where you want your XPS file to be created, and click Save. You have now created your XPS document.
The XPS document can now be shared with others and they can view the document as you intended it to be viewed. (In order to see the document, all someone needs to do is to double-click the XPS file.)
![]()
![]()
![]() This tip (13017) applies to Windows 7, 8, and 10.
This tip (13017) applies to Windows 7, 8, and 10.
If you work in an office with many users, your system may have access to a group of printers. Here's how you can set up ...
Discover MoreWindows 10 allows for quick and easy printing of your photos at standard photo sizes. You can start printing your photos ...
Discover MoreWant to easily create a PDF file from your favorite program? Windows 10 makes it easy with a built-in PDF printer driver. ...
Discover MoreThere are currently no comments for this tip. (Be the first to leave your comment—just use the simple form above!)
Copyright © 2026 Sharon Parq Associates, Inc.

Comments