On rare occasions, a Windows Update may have adverse effects on your system. In times like these, you may decide to remove the update in order to have the system run without it. To do this, follow these steps:
- Display the Control Panel.
- Click the Programs category.
- Under the Programs and Features heading, click View Installed Updates. Windows displays the Installed Update screen. (See Figure 1.)
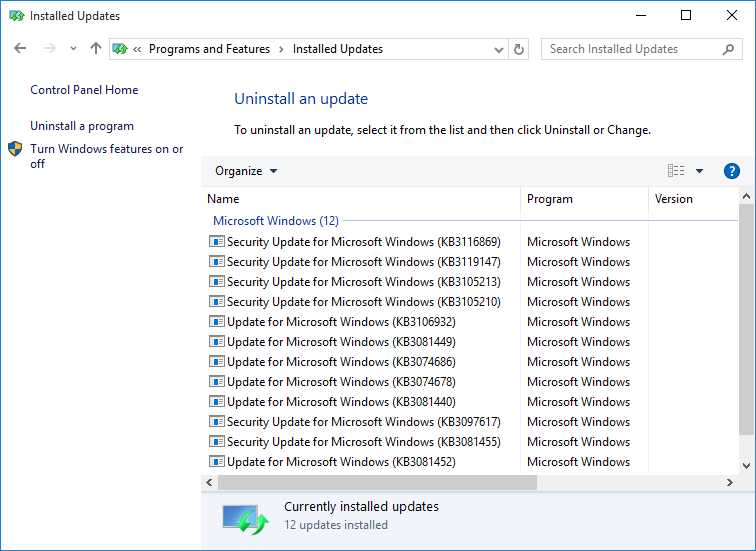
Figure 1. Windows Update history screen.
- Select the update you want to remove by clicking on it once. The screen changes slightly, displaying an Uninstall link just to the right of the Organize drop-down list.
- Click the Uninstall link. Windows asks you if you really want to uninstall the update.
- Click Yes. The update is uninstalled.
When you're finished uninstalling updates, close the Control Panel window. You may also need to restart your system to finish an uninstall.
Author Bio
Barry Dysert
Barry has been a computer professional for over 35 years, working in different positions such as technical team leader, project manager, and software developer. He is currently a software engineer with an emphasis on developing custom applications under Microsoft Windows. When not working with Windows or writing Tips, Barry is an amateur writer. His first non-fiction book is titled "A Chronological Commentary of Revelation." Learn more about Barry...
Increasing the Number of Restore Points
You may feel constrained by the low number of restore points your system is keeping. You can increase the disk space ...
Discover More
Understanding Libraries
Windows Libraries are a great extension to the functionality of Windows Explorer. Libraries are similar to folders in ...
Discover More
Creating a System Repair Disc
Doing a one-time create of a system repair disk can be worth its weight in gold if you find yourself unable to boot your ...
Discover More
Disabling Windows Shake
Windows Aero Shake minimizes open windows with a simple gesture. You can disable this feature using the Registry Editor.
Discover More
Listening with One Ear
If you use a single speaker to listen to your computer audio, you may be missing out on some sounds. Two quick changes to ...
Discover More
Understanding Optional Features
Windows 10 includes many features that are not enabled by default. Discover how to turn on or off the optional features ...
Discover More

Comments