Each user account can have a picture associated with it. This is the picture you see on the Welcome screen and on the Start menu. The picture can be one of the pictures that are built into Windows 7, or you can choose your own.
If you want to change your account's picture in Windows 7, go to Start | Control Panel | User Accounts and Family Safety | Change Your Account Picture. Windows immediately shows you a large number of built-in pictures. (See Figure 1.)
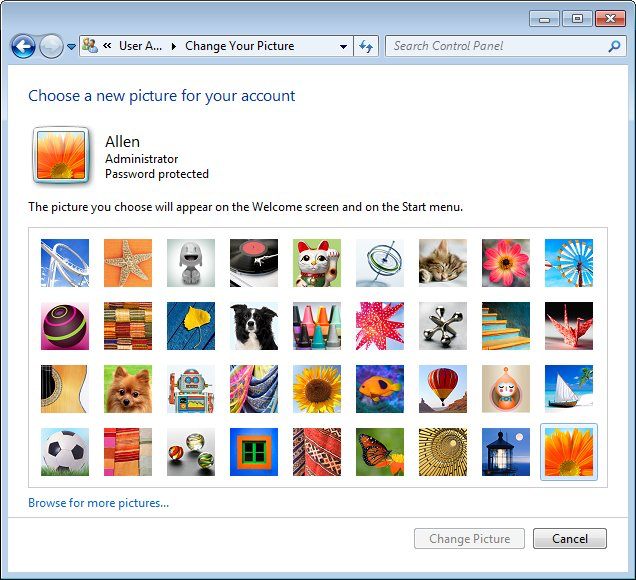
Figure 1. Changing your account's picture.
If you want to use one of the built-in pictures, simply select the desired picture and click the Change Picture button. You can also set your picture to be something else by clicking the Browse for More Pictures link and browsing your computer for the picture you want to use. As before, once you choose your picture, clicking the Change Picture button immediately changes the picture for the account.
In Windows 10 changing your account picture changed. One of the biggest changes is that Windows no longer provides built-in pictures. To change your account picture, follow these steps:

Figure 2. The Create Your Picture Section of the Settings Window.
With many computers and operating systems being visually similar, modifying your account picture provides you a way to personalize your Windows computer.
![]()
![]() This tip (12472) applies to Windows 7 and 10.
This tip (12472) applies to Windows 7 and 10.
Add an extra level of security to your computer to protect your data. A PIN allows for added peace of mind and use.
Discover MoreUser Account Control is a security mechanism that defends against malware or accidents from making system-level changes ...
Discover MoreWindows supports three different types of user accounts. The type of account associated with a user is determined by how ...
Discover MoreThere are currently no comments for this tip. (Be the first to leave your comment—just use the simple form above!)
Copyright © 2026 Sharon Parq Associates, Inc.

Comments