Donna often prints rather long documents from her system. It has happened more than once that after she clicks the "Print" button, she discovers that she shouldn't have been so hasty. Donna wonders about the best way to stop the printer from printing whatever she sent to it in error.
Donna's experience is not that unusual, so learning how to stop or delete a print job is an essential skill. When you issue the print command, the material isn't immediately sent to the printer. Instead, it gets queued to print through the use of special system files that are created for the print job. If you want to stop or delete the print job before it gets to the printer, you can do so. In fact, there are several ways you can stop or delete a print job.
One way to stop or delete a print job is to use the print queue for the printer. If you are using Windows 7 go to Start | Devices and Printers. If you are using Windows 8 or Windows 10, display the Control Panel and click View Devices and Printers (under the Hardware and Sound heading). Windows displays the Devices and Printers dialog box. If you scroll down in the dialog box you'll see the various printers that Windows knows about. (See Figure 1.)
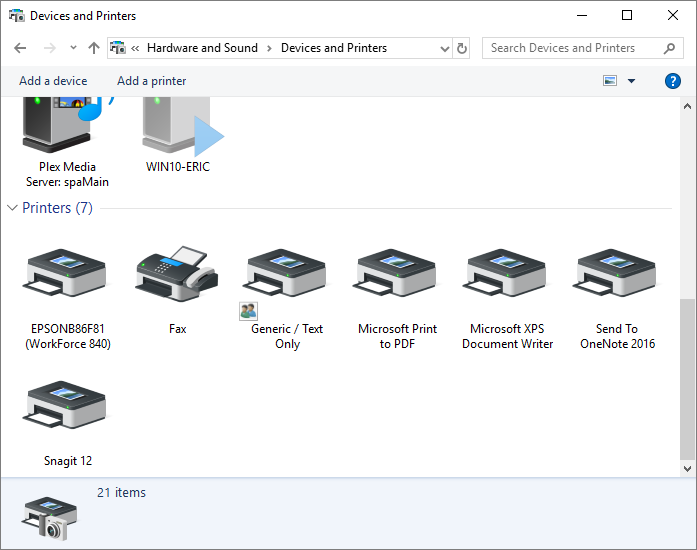
Figure 1. The Devices and Printers dialog box.
Right-click the printer to which your job was queued (the printer to which you printed) and select See What's Printing from the resulting Context menu. (You could also just double-click on the desired printer.) Windows displays another dialog box, this one showing what print jobs are being processed for your printer. This is generally referred to as the print queue. (See Figure 2.)
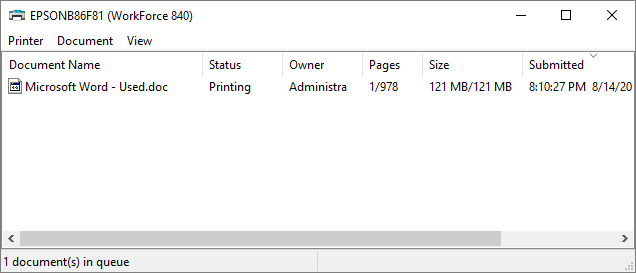
Figure 2. An example print queue dialog box.
You can now right-click the print job or select it and pull down the Document menu. In either case, click the Cancel option, and your job will be removed from the queue. You can also, if desired, select the Pause option to temporarily stop the job without deleting it. (A paused job can later be resumed or cancelled, as desired, using the appropriate menu option.)
There are other ways you can get to the print queue, as well. For instance, if you see the printer icon in the System Tray (right side of the Taskbar), you can double-click on it and Windows displays the printer queue.
On many systems you can also display the print queue by doing something to interrupt the printer itself, such as removing the paper tray or opening a service door. Windows detects that printing was stopped and displays the print queue.
Once you've cancelled the print job in the printer queue, understand that your printer might keep on printing for a bit. This is because most printers these days contain a large amount of memory that is able to receive information from your printer as fast as it can send it. So, even though you may have cancelled the print job in the queue, there may be many pages already stored in the printer itself. For this reason you should also use the controls on your printer to cancel whatever job it is currently printing.
If you cancel the job on the printer before you cancel it in the Windows printer queue, the job will continue to be sent from the computer and will again start filling up the memory on your printer. Make sure you cancel in Windows first, and then on your printer.
![]()
![]()
![]() This tip (12224) applies to Windows 7, 8, and 10.
This tip (12224) applies to Windows 7, 8, and 10.
If you work in an office with many users, your system may have access to a group of printers. Here's how you can set up ...
Discover MoreCreating an XPS document is as easy as printing a document. This tip explains how.
Discover MoreMany times, it helps to have a PDF of a file that can be distributed electronically when physical printouts are not ...
Discover MoreThere are currently no comments for this tip. (Be the first to leave your comment—just use the simple form above!)
Copyright © 2025 Sharon Parq Associates, Inc.

Comments