Just about everyone I know uses some search engine or another to do daily internet searches. These web search engines are amazingly fast. You enter a search term—no matter how obscure, such as "Wild Wilderness Moose"—and in roughly one second you can have 31,000,000 results. (Seriously; who knew there were that many results for "Wild Wilderness Moose?" It's crazy!) The speed and ability to do these searches have catapulted the world in being able to access information. What many internet users are unaware of, though, is that there is a large amount of information that your favorite search engine is gathering on you. Every time you search for something, a record is kept. This includes the site(s) you visit, ads you click, and more. An area that is helpful to look at from time to time is the information that is collected by these search engines and determine what information you want the search engine to keep and use in building its online profile of you. With Microsoft's Bing, you can do this easily and we will show you how to review this information and clear it if you wish.
It is important to understand that this information is more than just your browser history, which is stored locally. The information we are looking at is a collection of information from various devices when you signed into using your account.
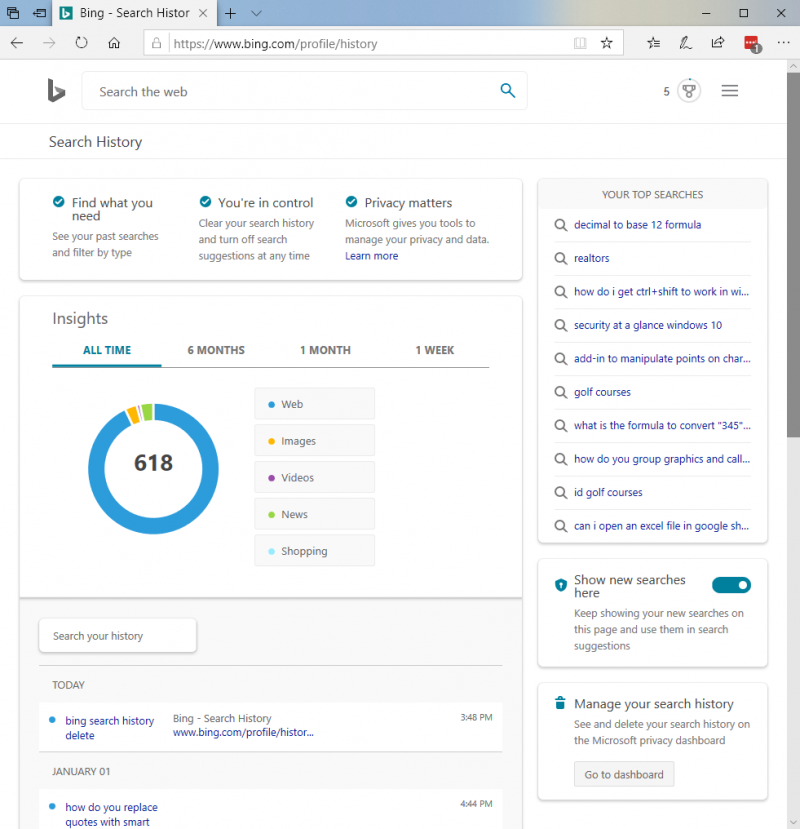
To access your information, go to https://www.bing.com/profile/history this opens a web page with the Search History for your Microsoft account. If you are not logged into an account, it will still show you the Bing search history for your computer. (See Figure 1.)

Figure 1. Bing search history.
Search History is divided into various sections to help you review what you have looked for in the past and understand the information a bit better. Right away you'll notice a pie chart that breaks up the history of your searches into categories such as Web, Images, Videos, and more. This data can be viewed in one of four ways: All Time, 6 Months, 1 Month, and 1 Week.
To the right of the pie chart, you will see a small section labeled "Your Top Searches." These are the search queries that Bing has identified as your most common searches. From these areas, you can begin to get a sense of the information that Bing is tracking about you.
Below the pie chart you'll see a listing of your most recent searches in chronological order starting with the most recent and then working backward. You are also able to search through these items using the search bar directly above the lists. Each entry will list the search term you looked for as well as the time you searched for it. There is also a small "delete" link that allows you to remove each item individually.
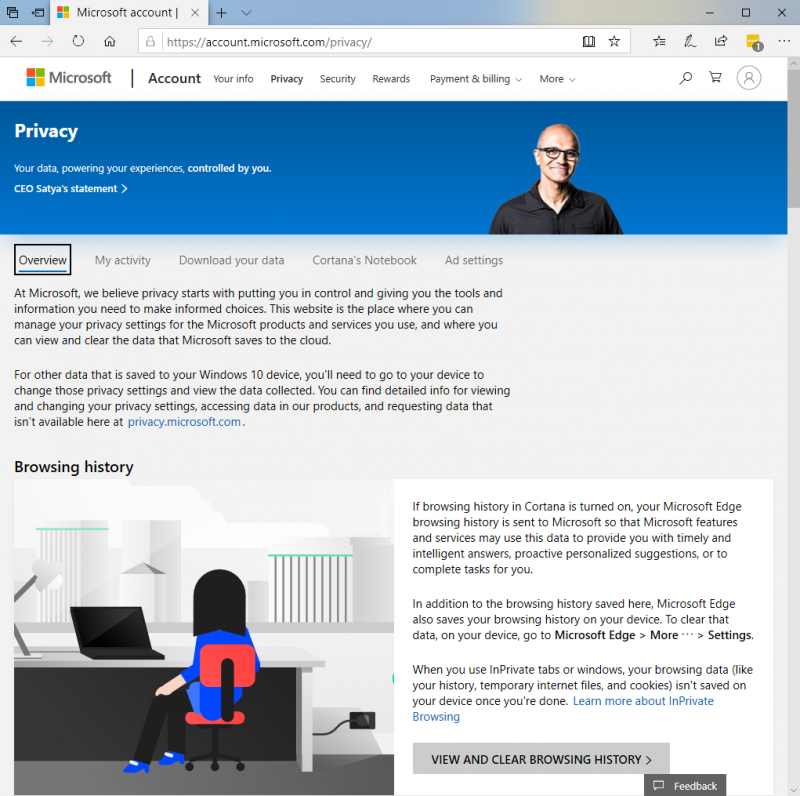
If you want to delete all of your search history, you can click on the Go to Dashboard button in the bottom right of the web page. This will open the Overview section of the Privacy Dashboard for your Microsoft account online. (See Figure 2.)

Figure 2. The Overview section of the Privacy Dashboard.
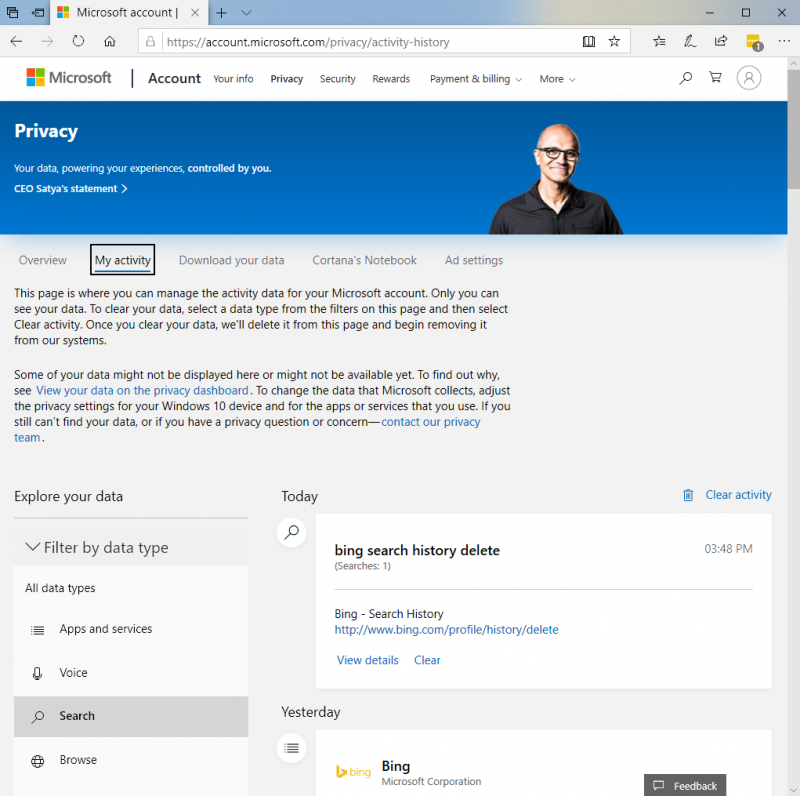
From here you can go through and learn more about the information that Microsoft has gathered on you, download an archive of the information, or even change your ad settings. If you want to delete all of your search histories, you can choose the My Activity section of the Privacy Dashboard. Your data is then offered to be filtered by one of six data types. To purge the search history, click on the "Search" Data type. This displays a list of searches similar to the list on the Search History page. (See Figure 3.)

Figure 3. The Search data type of the My Activity section of the Privacy Dashboard.
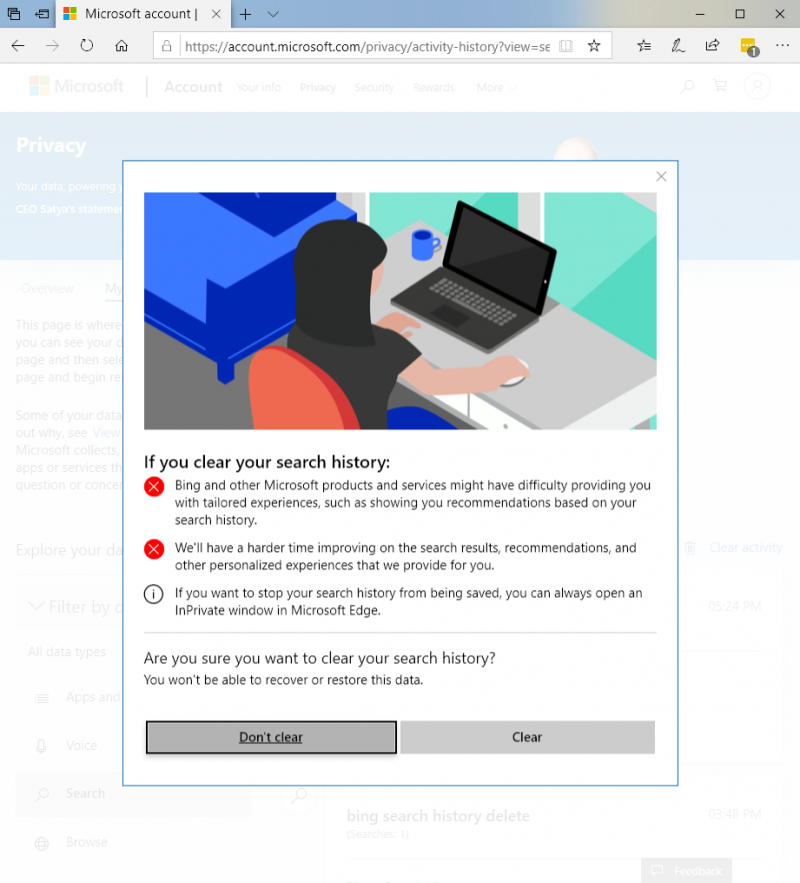
Again, you are presented with your search history information in chronological order and can delete (now labeled "clear" instead of "delete") each entry one at a time or remove all data. To remove all of the searches, click on the Clear Activity Link at the top of the list. Immediately you are warned about what will happen if you delete all of your search history. If you are OK with what deleting this data will do, press Clear. This removes all of your search history. When you are done you can close or navigate away from the Privacy Dashboard. (See Figure 4.)

Figure 4. The Warning Pop-up alerting you to deleting all of your search history.
Keeping track of the information being stored about your computer usage is a good way to keep on top of your privacy. If you are concerned about ongoing privacy tracking, you can turn on private browsing in your web browser or use a non-tracking search engine such as Duck-Duck-Go.
![]() This tip (13722) applies to Windows 10.
This tip (13722) applies to Windows 10.
Action Center provides you with a quick overview of security and maintenance issues and allows you to drill down to the ...
Discover MorePart of the security system built into Windows involves notifying you when changes are about to occur to your system. ...
Discover MoreForgetting your administrator password may be cause for panic because there is no supported way to discover it. Before ...
Discover MoreThere are currently no comments for this tip. (Be the first to leave your comment—just use the simple form above!)
Copyright © 2026 Sharon Parq Associates, Inc.
Comments