Sync Center is used in conjunction with offline files. It gives you some level of control over the synchronization between a network file and its corresponding offline file. To use Sync Center in Windows 7, click the Start button, type "Sync Center" (without the quotes), and press Enter. Windows displays the Sync Center screen. If you are using Windows 10, type "mobsync" (without the quotes) in the Search bar and press Enter. (Mobsync is the name of the program that runs Sync Center.) (See Figure 1.)
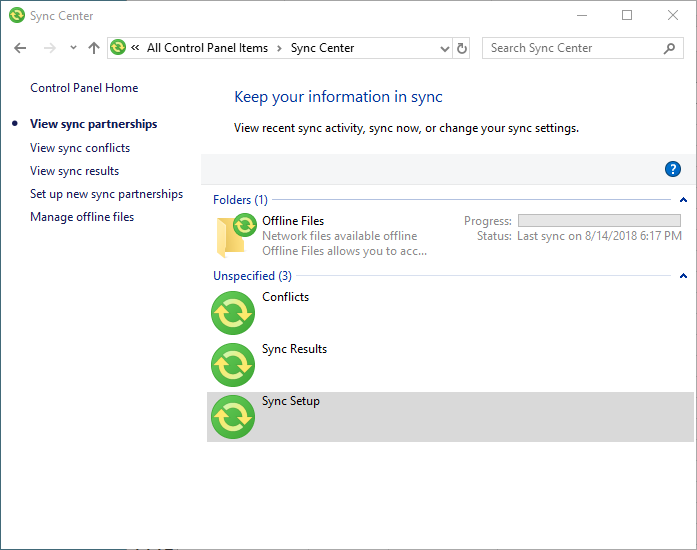
Figure 1. Sync Center main screen.
To immediately sync your offline files with those on the network, click the Offline Files folder, then click Sync on the toolbar. The progress bar shows the progress of the sync. You can double-click any of the "Unspecified" items to see details about that item. For example, if you double-click Conflicts the screen shows you which items are in conflict (i.e., were edited both on the network as well as offline) and did not sync. You can then indicate how you'd like to resolve the conflicts.
If you double-click Sync Results, you'll be presented with the details (errors, warnings, and other sync information) about the most recent sync activity.
By double-clicking the Sync Setup item you're given the opportunity to set up new sync partnerships. (A sync partnership is a relationship between an offline file and its on-network counterpart.)
If you click the Manage Offline Files link at the left side of the Sync Center, Windows displays the Offline Files dialog box. (See Figure 2.)
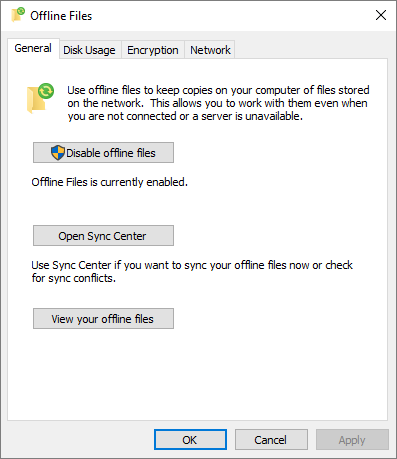
Figure 2. Dealing with offline files.
From here you can disable your offline files, return to the Sync Center, or view individual offline files.
From within Sync Center you can create a schedule so that your offline files are synchronized automatically. Invoke Sync Center again and click the Offline Files folder. Notice the word "Schedule" appears just above it (circled in red below). (See Figure 3.)
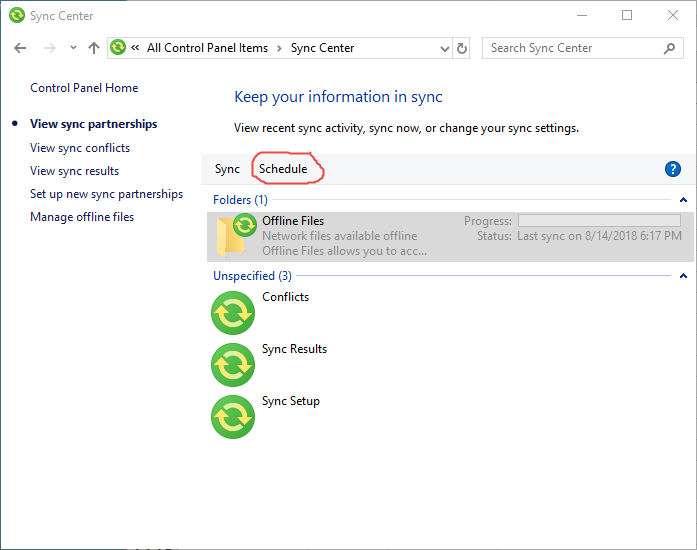
Figure 3. Setting up a sync schedule.
When you click Schedule, a wizard starts that enables you to indicate which items should be synced, when the sync should occur, and how often it should repeat.
Please note: It is possible that when you try to run Sync Center you'll see an error message: "You have no sync partnerships set up on this computer. Click Setup New Sync Partnerships to Get Started." If this happens, you will need to click on the Manage Offline Files link on the left of the Sync Setup window. Windows shows the Offline Files window mentioned earlier. Click on the Enable Offline Files button, then click OK. You will need to restart your computer to apply the setting you just selected. Once your machine restarts you can go through and setup Sync Center.
![]()
![]() This tip (13065) applies to Windows 7 and 10.
This tip (13065) applies to Windows 7 and 10.
If you need access to files on a network but aren't always on the network, you may find that the offline files feature of ...
Discover MoreNeed to add some addition drive space to your system? Why not consider adding what Windows calls a 'storage space?' This ...
Discover MoreGraphics files have additional attributes that other files don't have. This tip describes how you can display these ...
Discover More2024-05-02 01:06:09
Alina
Hi
Does the sync center work well? I would like to use it on two external backup drives. My computer is getting full and I want to move my files to the two external drives but they need to sync so the changes I make on one drive can be reflected on the second one.
Thank you
Copyright © 2026 Sharon Parq Associates, Inc.

Comments