ReadyBoost is a technology introduced in Vista that promised to provide a performance enhancement by simply plugging an appropriate USB thumb drive (or something equivalent) into your computer. Since access to memory is supposed to be faster than access to disk, the theory is that the additional memory from the thumb drive is used instead of disk access, thereby improving performance. I think the jury is still out on whether ReadyBoost actually provides a measurable performance increase.
If you want to see if ReadyBoost will help you, you have to know some conditions first. For one thing, if your primary disk is a Solid State Drive, ReadyBoost is disabled when reading from that drive. Some requirements for your thumb drive are:
It must have a capacity of at least 256 MB, with at least 64 KB of free space.
It must have an access time of 1 ms or less.
It must have at least a 2.5 MB/sec throughput for 4-KB random reads.
It must have at least a 1.75 MB/sec throughput for 1-MB random writes.
The best way to tell if your USB drive meets these requirements is to let Windows tell you. When you plug in your drive, AutoPlay will provide ReadyBoost as an option if it meets the requirements. If ReadyBoost is not presented as an option, that drive cannot be used for ReadyBoost.
On my Windows 10 PC, I do not have an AutoPlay configuration set for removable drives. I plugged in an exFAT-formatted USB drive, right-clicked it, and selected Properties. I then clicked the ReadyBoost tab and selected the middle radio button: (See Figure 1.)
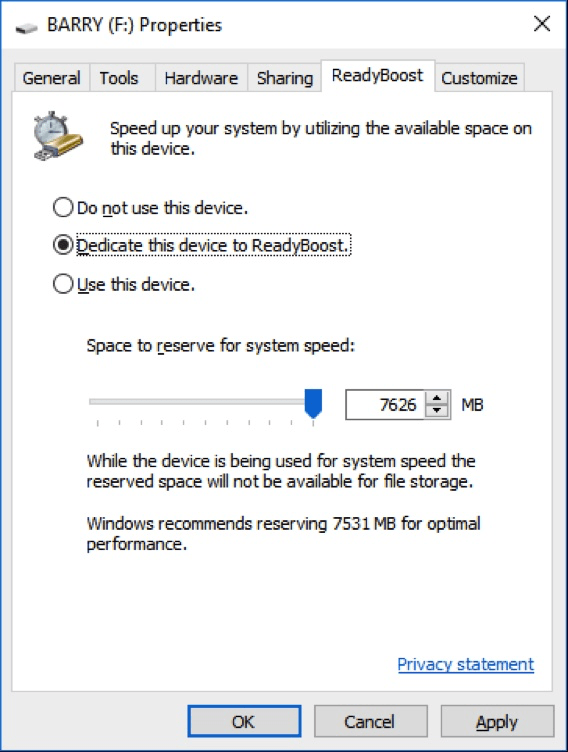
Figure 1. Preparing to use ReadyBoost.
Once I click OK, Windows creates the file ReadyBoost.sfcache on the drive and uses it as the primary cache.
Be aware of the fact that there are several variables in play that contribute to how much (or whether) benefit is obtained through ReadyBoost. For example, if your hard drive is fairly slow, then you may see some improvement by plugging in a proper USB drive. On the other hand, if the USB port happens to be on a fairly slow bus, then any advantage you might have gained could very well be lost as the data travels along a slow bus.
The good thing is that when using ReadyBoost, whether it's providing a performance advantage or not, you can freely remove the USB drive without worrying about losing data. This is because the thumb drive merely contains copies of the data on your hard drive. If the thumb drive goes away, the system reverts back to using the data directly from the hard drive.
As with many things in Windows, feel free to try ReadyBoost. You've got nothing to lose. You may not notice a performance gain, but then again you might.
![]()
![]() This tip (1770) applies to Windows 7 and 10.
This tip (1770) applies to Windows 7 and 10.
Tired of Windows showing you information in English when you'd much prefer a different language? Here's how to modify the ...
Discover MoreWindows installs updates automatically by default. If you want to review what updates have been installed, seeing the ...
Discover MoreThe Start screen can serve as your launching pad for whatever programs you desire. You can move tiles around on the Start ...
Discover MoreThere are currently no comments for this tip. (Be the first to leave your comment—just use the simple form above!)
Copyright © 2026 Sharon Parq Associates, Inc.

Comments