A More Private Start Menu

Written by Eric Wyatt (last updated August 5, 2019)

The Windows 10 Start menu has been a welcome return, after its brief disappearance in Windows 8. However, with the return of the Start menu, Microsoft included some changes concerning how it looks and what it does, such as the inclusion of tiles. One item included by default in the Start menu is a list of the most-used apps on the system. (See Figure 1.)

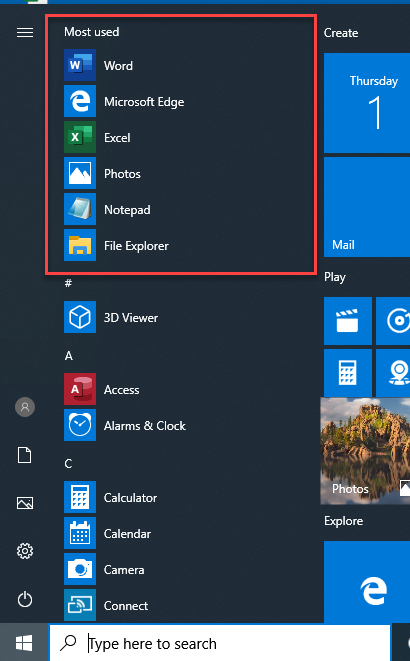
Figure 1. The most-used applications are shown in the Start menu.

While this can help you access these applications very quickly, you may wish for a bit of privacy from any potentially prying eyes. Fortunately, Windows 10 offers a very easy method of removing this list from your Start menu. Follow these quick steps to hide your most-used apps:

  1. Press the Windows key and type (without quotes) "Personalization," then press Enter. Windows displays the Personalization settings of the Settings dialog box.
  2. In the left-side pane of the dialog box click on Start. Windows shows the Start settings of the Personalization section of the Settings dialog box. (See Figure 2.)
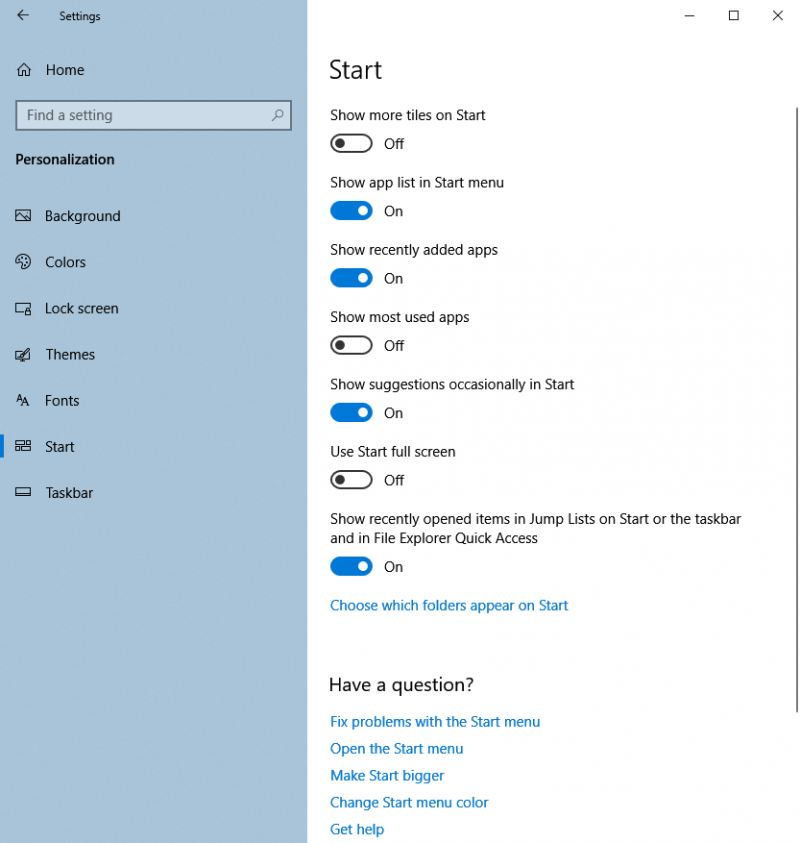
  3. Figure 2. The Start settings of the Personalization section of the Settings dialog box.

  4. Under Show Most Used Apps, click the toggle to turn it off.
  5. Close the Settings dialog box. Windows applies your setting automatically.

Now, any potentially prying eyes will not see your most-used apps if they happen to gain access to your computer. You can always turn this feature back on by simply repeating the steps above and turning the toggle to the "On" position in step 3.

 This tip (13658) applies to Windows 10.

Author Bio

Eric Wyatt

Eric Wyatt is a swell guy (or so his friends tell him). He is a formally trained designer and branding expert, bringing a wide range of skills to his Tips.Net articles. ...

MORE FROM ERIC

Search the Web Using the Run Dialog Box

The Run dialog box allows you to quickly run or start a program using quick keystrokes. The Run dialog box can also help ...

Discover More

Commands for Better Dictation

The Dictation feature in Windows 10 Fall Creators Update provides a quick way to enter text without typing. Knowing ...

Discover More

Using PowerShell to Find Your Wireless Signal Strength

Wi-Fi signal strength is important for faster, more consistent data transfers. You can use PowerShell to gain a more ...

Discover More
More WindowsTips

Changing Your Sound Theme

Don't like the sounds that Windows has chosen to play when system events occur? Here's how to change the sound theme that ...

Discover More

Sharing a Windows Theme with a Friend or Coworker

Being able to customize your theme is a great way to personalize your computer, but what if you want to share your theme ...

Discover More

Changing the Text Cursor Indicator

Windows 10 allows for customization of the Text Cursor Indicator. With simple customization options you make the ...

Discover More
Comments

If you would like to add an image to your comment (not an avatar, but an image to help in making the point of your comment), include the characters [{fig}] (all 7 characters, in the sequence shown) in your comment text. You’ll be prompted to upload your image when you submit the comment. Maximum image size is 6Mpixels. Images larger than 600px wide or 1000px tall will be reduced. Up to three images may be included in a comment. All images are subject to review. Commenting privileges may be curtailed if inappropriate images are posted.

What is one more than 9?

There are currently no comments for this tip. (Be the first to leave your comment—just use the simple form above!)


Newest Tips