The file system used by Windows includes support for automatic file/folder compression. You take advantage of this feature by creating compressed folders, and then every file that you copy or move to this folder automatically becomes compressed. This saves disk space, as compressed information takes less disk space than does uncompressed information.
When you use a compressed folder, its contents are automatically decompressed when they are read, so the compression and decompression all happen transparently. You pay a small price in CPU performance, but if disk space is at a premium, using compressed folders is a way to stretch your disk space a bit further.
Creating a compressed folder is easy. Follow these general steps:
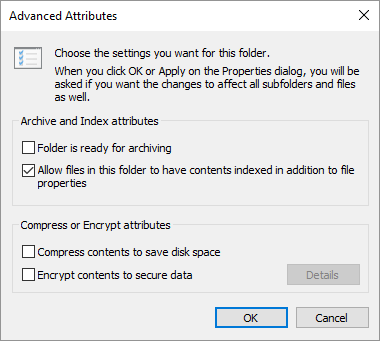
Figure 1. Enabling compression for a folder.
Your folder is now compressed, and any files you create in that folder inherit the compression attribute you just set. That means that those files will be compressed automatically. To disable the compression, repeat the same steps, but clear the check box in step 4.
Since the file compression happens at the file system level, all Windows utilities and software (e.g., Windows Explorer, File Explorer, Notepad, Microsoft Word, etc.) don't even know they're dealing with compressed files because compression and decompression happens automatically by NTFS.
There is one caveat with regard to compressed folders. According to Microsoft, if you move a file from a different NTFS drive into a compressed folder, it is automatically compressed. However, if you move a file from the same NTFS drive into a compressed folder, the file retains its original state, either compressed or uncompressed.
![]()
![]()
![]() This tip (5671) applies to Windows 7, 8, and 10.
This tip (5671) applies to Windows 7, 8, and 10.
Just as you can rename and delete individual files, so to can you rename and delete the folders that contain those files.
Discover MoreChanging a folder's icon is one way to make Windows a bit more personal. This tip describes how to do that.
Discover MorePartitioning your disk offers a quick and efficient means to make good use of your disk resources. By creating disk ...
Discover MoreThere are currently no comments for this tip. (Be the first to leave your comment—just use the simple form above!)
Copyright © 2026 Sharon Parq Associates, Inc.

Comments