Microsoft Edge does support extensions. The biggest thing to be aware of is that while many of them are free, some are not. I'll walk you through adding a free extension, so you know how to do it.
Start by clicking the More ellipsis at the upper-right of the Edge window. (See Figure 1.)

Figure 1. The More ellipsis.
Edge displays a drop-down menu. Towards the middle you'll find the Extensions option. Click the option and Edge pops up a new window containing the hyperlink "Get extensions for Microsoft Edge". Click the hyperlink and a new window is displayed where you can browse the available extensions. (See Figure 2.)
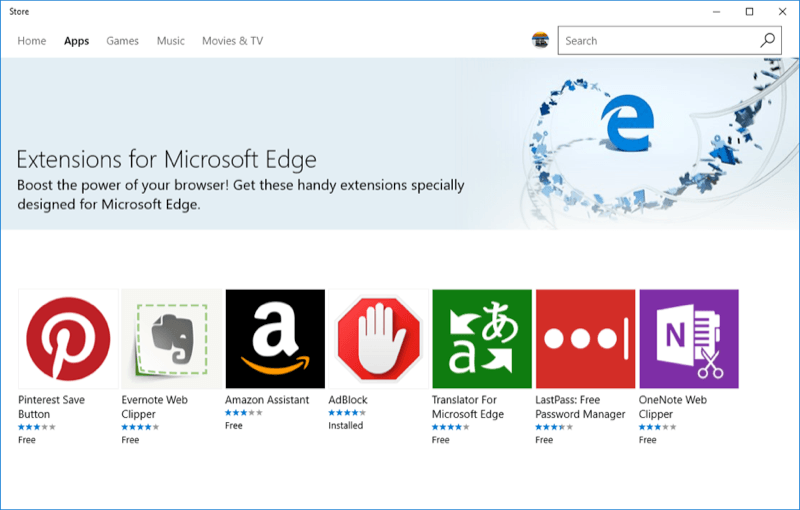
Figure 2. Some Edge extensions.
The new window is automatically opened to the Home menu item. You can browse through the many extensions in a number of ways. When you find one you want to try, click it. When you do, you'll be presented with another page that describes the extension, reviews, etc. Here is part of the page that is displayed for the AdBlock 2020 extension. (See Figure 3.)
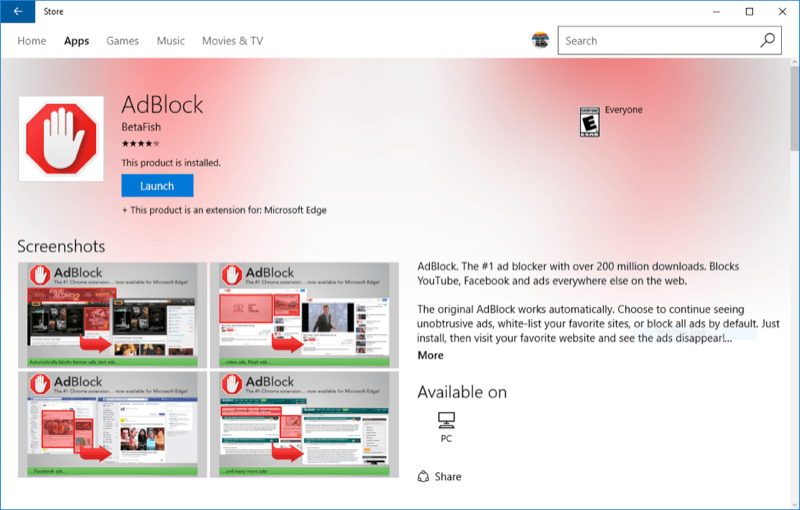
Figure 3. The AdBlock 2020 extension page.
One way to browse for extensions is to click the Home menu item on the Edge Add-ons page. If you know the name of an extension, you can also use the Search box to search for it. You can also search for extensions in the Microsoft Store at www.Microsoft.com/store. Let's search for a Calendar extension and install it.
When you're at the Store, click the Search box and type (without quotes) "Calendar" and press Enter. Up comes a screen that lists a variety of different calendar-related applications. (See Figure 4.)
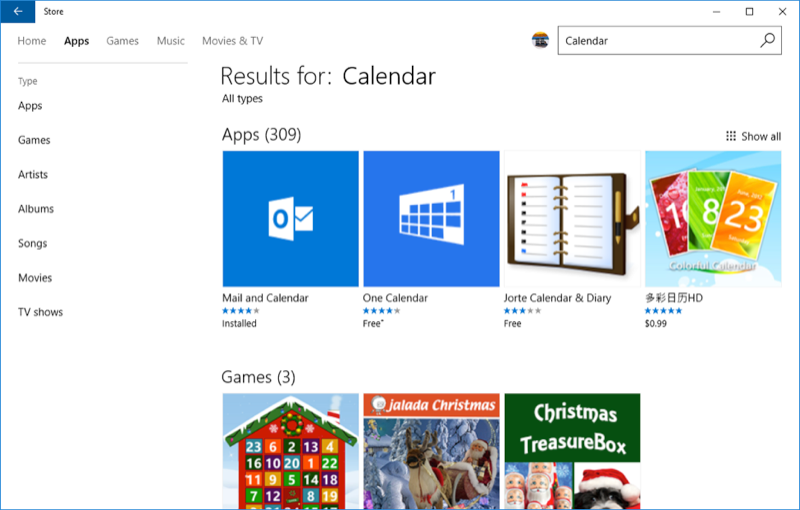
Figure 4. Searching for a Calendar app.
Let's install "One Calendar" (the third large icon from the left in the top row). Click its icon. Up comes its detail page: (See Figure 5.)
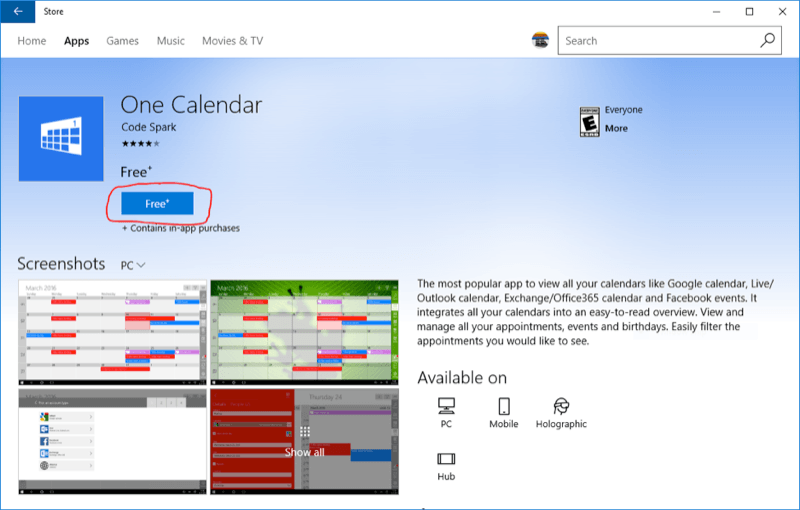
Figure 5. One Calendar's detail page.
In the far right is a blue button labeled "Get". Click the Get button. You may be taken to another page on the Microsoft Store. If so, click the Get button on this page. The system will then go through the (quick) process of downloading and installing the extension, and when that's finished a button will appear that says "Launch". Click the Launch button, and you will be led through a wizard to set up the calendar. When finished, close the Store window.
Some extensions can be launched directly from Edge, but others must be launched from the Store. One Calendar is of the latter variety, so to see your calendar you first click Edge's More ellipsis, click Extensions, click Get extensions from the Store, search for One Calendar, and finally click its Launch button. This is admittedly an ordeal, and I hope I've overlooked a shortcut, but at least that's one way to launch your extension. In the future, it is hoped that Microsoft provides a more direct way to launch the extensions.
![]() This tip (13494) applies to Windows 10.
This tip (13494) applies to Windows 10.
Microsoft's Edge Chromium allows for a powerful new feature called Profiles. These allow for one web browser to be used ...
Discover MoreWhen reading a webpage, e-book, or PDF, Microsoft Edge can quickly show you the meaning of a word that you might need to ...
Discover MoreYour DNS server is usually set by your Internet provider. You can change the default DNS to another server easily in ...
Discover MoreThere are currently no comments for this tip. (Be the first to leave your comment—just use the simple form above!)
Copyright © 2025 Sharon Parq Associates, Inc.

Comments