When you sign up for the Internet and finally get hooked up, your Internet Service Provider (ISP) will, by default, set your DNS server to that of your provider. The DNS (Domain Name Service) server is responsible for taking a URL (like you enter into your browser) or an e-mail address and translating it into the IP address that corresponds to the domain portion of the URL or e-mail address. An example of this is when you type "Windows.Tips.Net" into your browser, the DNS you use will compare the URL to a list of IP addresses and send you to the site.
Typically, the translation of an address to an IP address happens at speeds you don't notice, typically only taking milliseconds. At times your DNS may be a bit congested, or it might not be a very good server. This can cause your Internet usage to slow down a bit. To increase the speed at which you navigate the web, you might find it helpful to change your DNS server. The question you might be asking is 'why would I want to change my DNS server?' Other than a possible slight improvement in load speeds, the main reason is privacy and security.
While you might be using a web browser's InPrivate mode or incognito mode, this only keeps other users from seeing what you're doing. Truth is everything you send through your ISP is collected. Your ISP collects information regarding browsing habits and every site you visit. Any information that your ISP has connected to your account, they can generate a detailed list of information about you. This is where a public DNS comes in handy. It makes the gathering of information about your web activity harder.
Let's look at changing your DNS server:
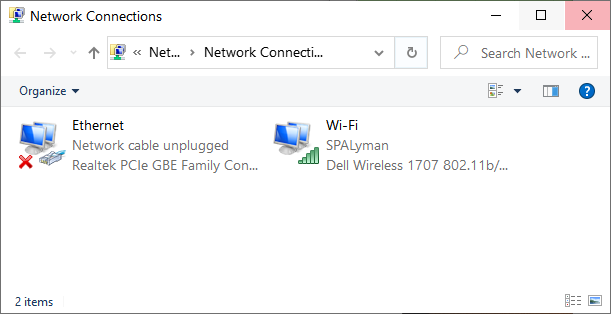
Figure 1. Network Connections within Control Panel.
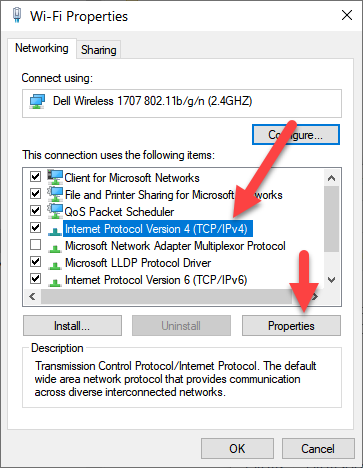
Figure 2. Wi-Fi Properties Window.
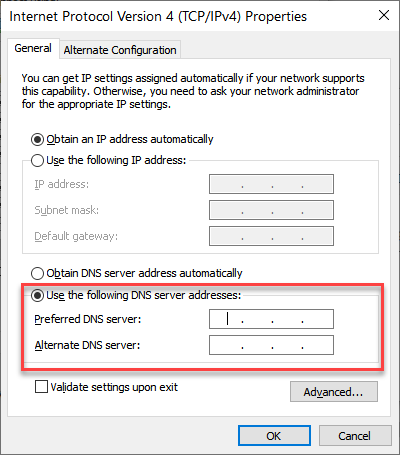
Figure 3. DNS server location of the Internet Protocol Version 4 (TCP/IPv4) Properties Window.
As you can see, changing the DNS server your computer uses is simple and fast. You might be wondering what DNS server to use, fortunately, this is easy as well. There are several options available, from Google to Cisco. Each server offers its own pros and cons. Before choosing one see what they offer and how they differ. For example, Cisco's option, OpenDNS, has a couple of options from free to paid tiers. Several offer IP blocking or little to no IP tracking.
Here are a few public DNS options you can check out:
Changing your DNS server can give you a speed boost while providing you some relief from internet tracking activities that your ISP may be engaged in. Before changing your DNS server make sure you have found the one that is best for you.
![]() This tip (13761) applies to Windows 10.
This tip (13761) applies to Windows 10.
Do you need to disable printing within Edge Chromium? You can use the Registry Editor to disable or enable printing.
Discover MoreIf you have files that you need to access from more than one device, or give access to someone else, Google Drive is a ...
Discover MoreMicrosoft's Edge Chromium allows for a powerful new feature called Profiles. These allow for one web browser to be used ...
Discover MoreThere are currently no comments for this tip. (Be the first to leave your comment—just use the simple form above!)
Copyright © 2026 Sharon Parq Associates, Inc.
Comments