In the early days of personal computers, screen savers were used for exactly what they suggest—saving the screen. They were used to prevent "CRT burn-in," where an image would become permanently imprinted on the phosphors of the display.
In modern times, screen savers aren't needed any more to save the screen because monitors aren't susceptible to the same burn-in that the old ones were. You may, however, still want to utilize screen savers because of the message or picture they display or because of they offer a bit of security.
To change your screen saver if you are using Windows 7 or Windows 8, display the Control Panel and click the Appearance and Personalization link. On the screen that appears, click the Change Screen Saver option under the Personalization group. Windows displays the Screen Saver Settings dialog box. The easiest way to get to the Screen Saver Settings dialog box if you are using Windows 10 is to type "screen saver" (without the quotes) in the Search box and press Enter. (See Figure 1.)
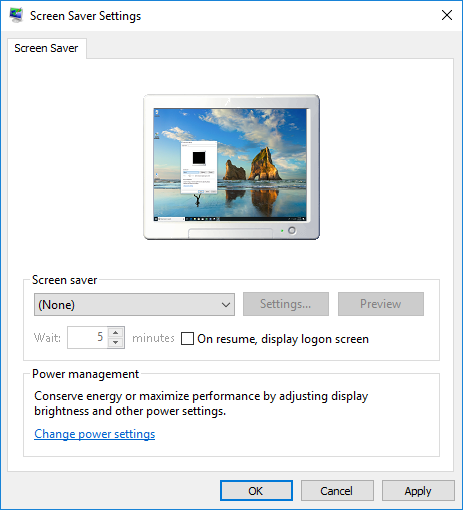
Figure 1. The Screen Saver Settings dialog box.
Click the arrow on the drop-down list and select from one of the available screen savers. If you want to see what it will look like "for real", click the Preview button. (When previewing the screen saver, moving the mouse will end the preview and return you to the Screen Saver Settings dialog box.) Some screen savers have additional settings you can specify to customize them. For example, the "3D Text" screen saver lets you specify custom text to be displayed, how it is to rotate, how fast it rotates, etc. Click the Settings button, if available, to see what options are available for the screen saver you choose.
The checkbox in the Screen Saver Settings dialog box indicates whether the user will be required to specify his/her credentials when the screen saver is deactivated. Leaving this box clear means that when the screen saver is deactivated the user can immediately resume working without having to login again. If you do set the checkbox, then the Wait control is enabled. This control is used to specify the amount of time the computer must be inactive (i.e., no user activity) before the screen saver kicks in.
When you are satisfied with your settings, click OK to dismiss the dialog box. The screen saver is immediately in play.
![]()
![]()
![]() This tip (12493) applies to Windows 7, 8, and 10.
This tip (12493) applies to Windows 7, 8, and 10.
Windows 10 allows for a window to become active by simply hovering your mouse over it. Discover how to turn this setting ...
Discover MoreWindows is rather configurable, especially when it comes to the user interface. Here's how you can modify the way that ...
Discover MoreWindows makes it easy to set your system to accurately reflect your regional settings. This tip sets you well on your way.
Discover MoreThere are currently no comments for this tip. (Be the first to leave your comment—just use the simple form above!)
Copyright © 2026 Sharon Parq Associates, Inc.

Comments