Sometimes, installing software or device drivers has an adverse impact on your system. Setting a Restore Point prior to an installation allows you to reset your system to its previous state in case you discover that installing the new software wasn't such a good idea. (Restoring your system from a Restore Point is covered in the next tip.) Restore Points only deal with system files, so none of your personal data is affected.
To create a Restore Point, follow these steps if you are using Windows 8:
- Move the mouse pointer into the very bottom-left corner of the screen and right-click. You should see a Context menu appear.
- Choose the System option. Windows displays the System area of the Control Panel. (See Figure 1.)
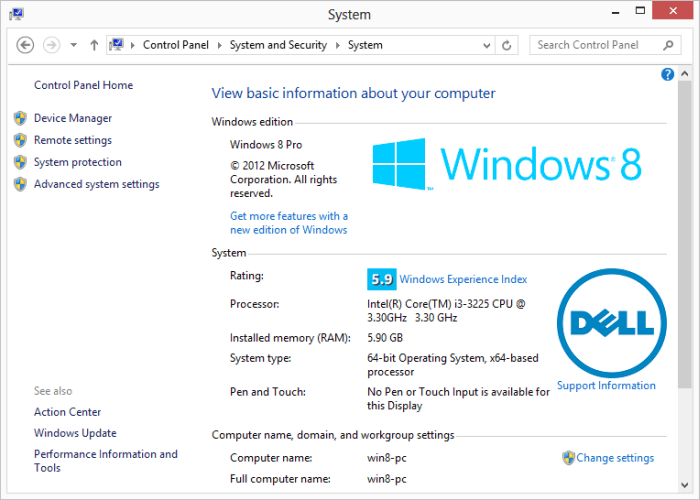
Figure 1. The System dialog box.
- Click the System Protection link at the left of the dialog box. Windows displays the System Protection tab of the System Properties dialog box. (See Figure 2.)
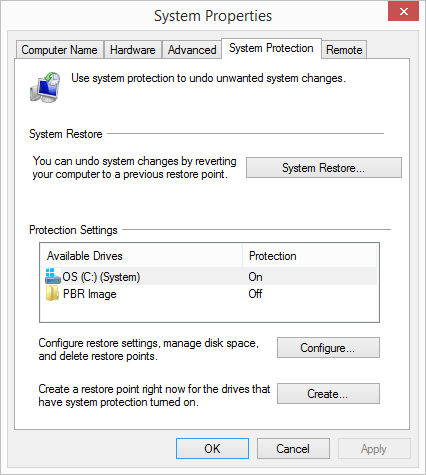
Figure 2. The System Protection tab of the System Properties dialog box.
- Select the disk (under the Protection Settings group) for which you want to create a Restore Point
- Click the Create button. Windows displays the System Protection dialog box, prompting you to enter a description for the Restore Point.
- Enter a description of your choosing. (A good idea is to enter a reason for your restore point.
- Click Create. Windows creates the desired restore point.
If you are using Windows 7 the steps are a bit different. (The biggest difference is how you get to the first dialog box.). Follow these steps:
- Click Start, right-click Computer, and select Properties from the resulting Context menu. Windows displays the System area of the Control Panel. (See Figure 3.)
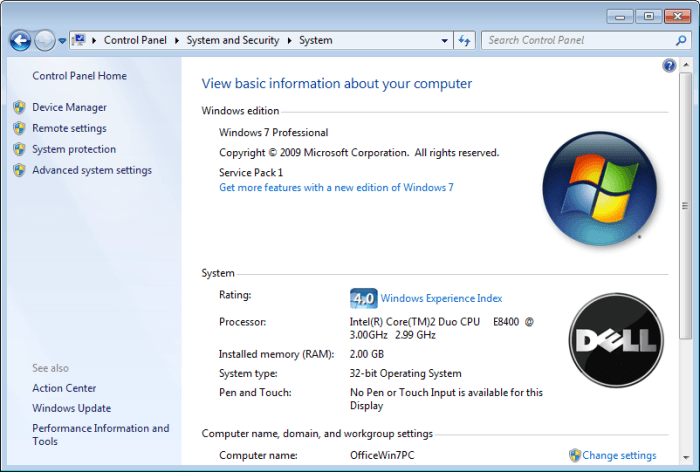
Figure 3. The System dialog box.
- Click the System Protection link at the left of the dialog box. Windows displays the System Protection tab of the System Properties dialog box. (See Figure 4.)
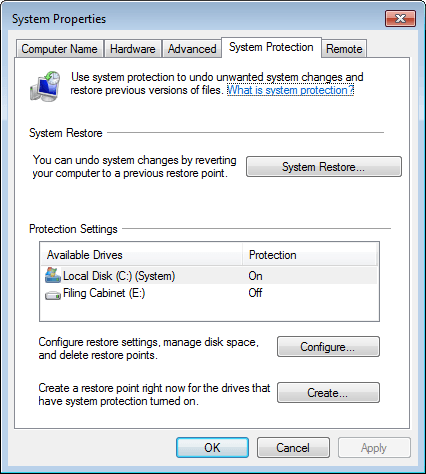
Figure 4. The System Protection tab of the System Properties dialog box.
- Select the disk (under the Protection Settings group) for which you want to create a Restore Point
- Click the Create button. Windows displays the System Protection dialog box, prompting you to enter a description for the Restore Point.
- Enter a description of your choosing. (A good idea is to enter a reason for your restore point.
- Click Create. Windows creates the desired restore point.

 This tip (12211) applies to Windows 7 and 8.
Author Bio
Barry Dysert
Barry has been a computer professional for over 35 years, working in different positions such as technical team leader, project manager, and software developer. He is currently a software engineer with an emphasis on developing custom applications under Microsoft Windows. When not working with Windows or writing Tips, Barry is an amateur writer. His first non-fiction book is titled "A Chronological Commentary of Revelation." Learn more about Barry...
Ways to Combine Two (or More) Text Files
There have probably been times when you've wanted to combine two or more text files into one. Windows provides a few ...
Discover More
Adding File Types to the Search Index
You can fine-tune Indexed Searches by adding file types to the search index. This tip tells you how.
Discover More
Understanding Windows SIDs
This tip presents some information about Windows SIDs (Security Identifiers) and shows you some tools that you can use to ...
Discover More
Displaying the PC Settings Screen
Need to customize how your Windows interface looks? If so, you'll want to use the PC Settings screen. This tip explains ...
Discover More
Renaming with Emoticons
Looking for new ways to rename your files or folders within Windows 10? Emoticons can be used to provide whimsy or extra ...
Discover More
Deferring Windows Updates
Are you bothered by when Windows decides to do its updates? If you want some control over when Windows downloads and ...
Discover More

Comments