A theme is a set of attributes that determines the look and feel of Windows. The visual and auditory characteristics of various Windows elements, like menus, icons, wallpaper, etc., can all be changed and this combination of characteristics is saved as a theme.
There are a couple of ways you can get to the Themes display. The quickest (for any version of Windows) is to right-click on an empty spot on the desktop and select Personalize from the Context menu. If you are using Windows 7 or Windows 8, another way is to go to Start | Control Panel | Change the Theme (which is under the "Appearance and Personalization" category). If you are using Windows 10, another way is to display the Control Panel | Appearance and Personalization | Navigation Properties (which is under the "Taskbar and Navigation" category) | Themes.
Regardless of which way you get there, Windows displays the Themes dialog box (Windows 7 and Windows 8): (See Figure 1.)
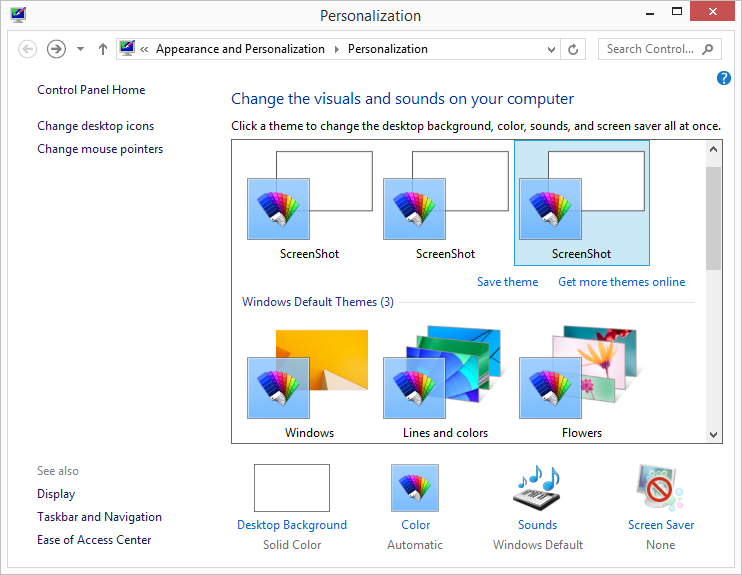
Figure 1. The Windows 8 Themes dialog box.
or the Themes window (Windows 10): (See Figure 2.)
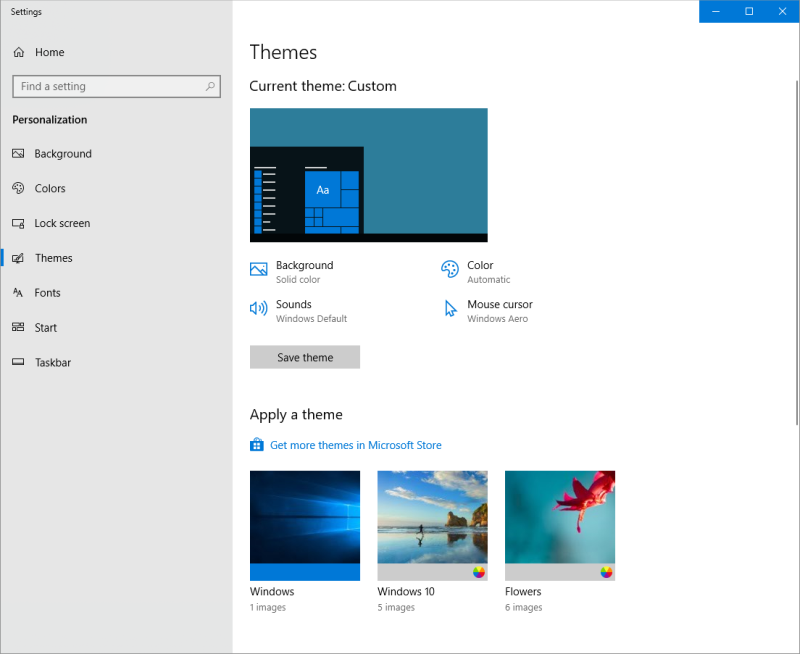
Figure 2. The Windows 10 Themes window.
The Themes dialog box is similar for both Windows 7 and Windows 8, but is quite different with Windows 10 as can be seen in the above figures.
By clicking on a theme, the system immediately resets according to that theme's characteristics and you will see (and possibly hear) the difference. There are four basic elements that comprise a theme. As can be seen in the Themes dialog box (Windows 7 and Windows 8), these elements are:
For Windows 10, the four basic elements that comprise a theme are:
Clicking on these links in the dialog box or window takes you to other dialog boxes or windows where you can modify the particular details of that element. For example, clicking the Desktop Background link (Windows 7 or Windows 8) takes you to a dialog box that allows you to change the background. (See Figure 3.)
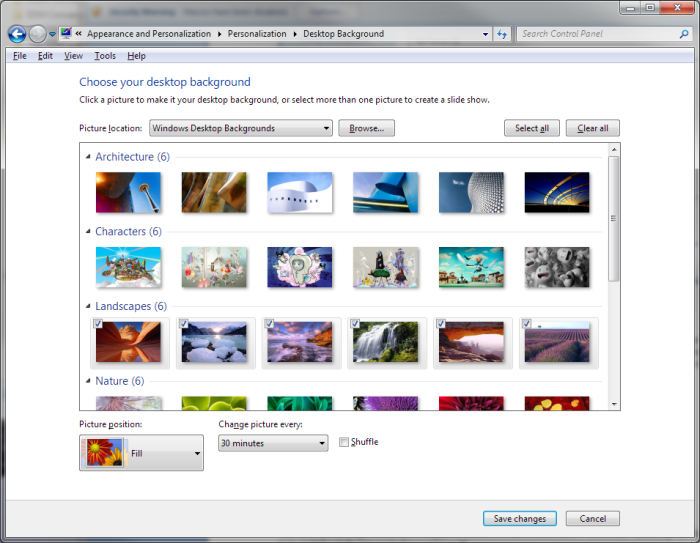
Figure 3. The Desktop Background dialog box.
Here, you can change your wallpaper and, if the theme you've chosen supports a slide show, you can tell the system how often to change the picture.
If you are using Windows 10, clicking the Background link takes you to the Background window that allows you to change the background. (See Figure 4.)
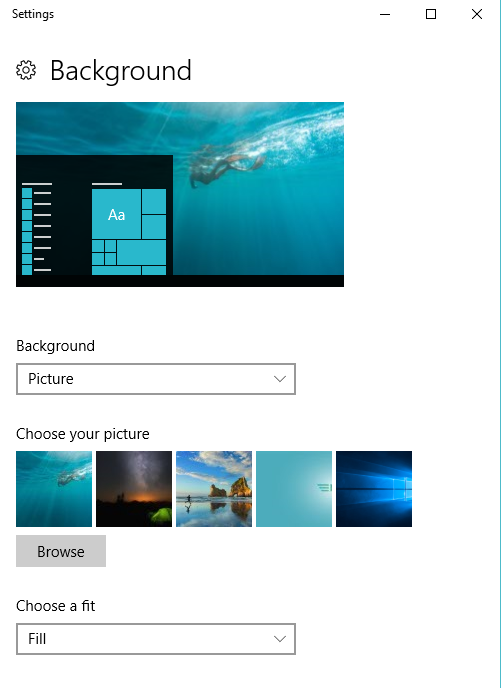
Figure 4. The Background window.
Here, you can change the background by picture, solid color, or slide show. You can browse through your pictures to choose one picture or several for a slide show and you can tell the system how often to change the picture.
For Windows 7 or Windows 8, clicking the Window Color link in the Themes dialog box takes you to a dialog box where you can change colors. Here, you can change the color of your window borders, Start menu, and the Taskbar. You can also tell the system to enable or disable transparency (which allows you to partially see through the borders of overlapping windows) and indicate how intense you want your colors to be. Clicking Save Changes puts the modified color scheme into effect. (See Figure 5.)
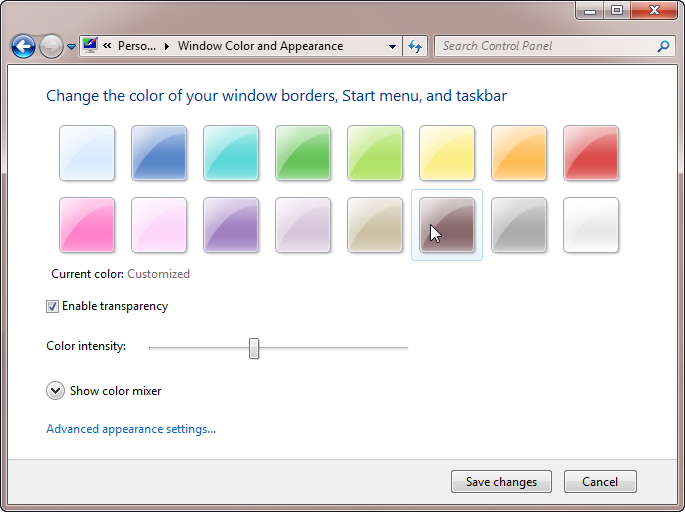
Figure 5. The Window Color and Appearance dialog box.
For Windows 10, clicking the Colors link displays the Color pane from which you can choose any of the listed colors or customize colors. You can also change the color of your Start menu, the taskbar, action center, and title bars. Other options allow you to turn on/off Transparency effects and choose your default app mode. (See Figure 6.)

Figure 6. The Colors window.
Clicking the Sounds link in the Themes dialog box takes you to a dialog box where you can modify what sounds Windows plays for different events. When you are satisfied with your settings (you can hear the selected sound by clicking the Test button), clicking Save As saves the settings as a new sound scheme and OK dismisses the dialog box. (See Figure 7.)
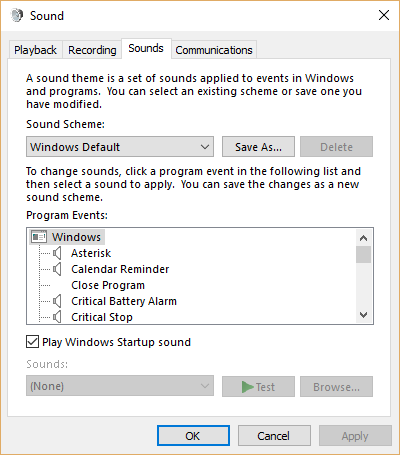
Figure 7. The Sound dialog box.
Clicking the Screen Saver link (Windows 7 and Windows 8) in the Themes dialog box takes you to a dialog box that allows you to modify the screen saver used by the theme. Here, you can select what screen saver you want to be displayed upon a given number of minutes of inactivity. If you want to see what the screen saver will look like, click the Preview button. (See Figure 8.)

Figure 8. The Screen Saver Settings dialog box.
Some screen savers have additional settings you can access by clicking the Settings button. For example, a Photos screen saver may have additional settings to allow you to specify what folder contains the pictures to be used and also control a possible slide show of the pictures.
The Screen Saver Settings dialog box also lets you indicate whether the system will prompt the user with login information, thus applying password protection to an idle system. Clicking OK saves your settings and dismisses the dialog box.
Clicking the Mouse Cursor link (Windows 10) in the Themes window takes you to the Pointers tab of the Mouse Properties dialog box. (See Figure 9.)
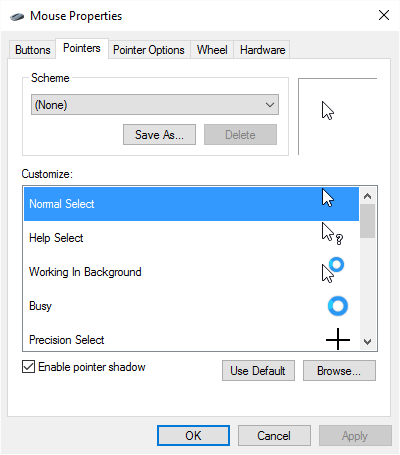
Figure 9. The Pointers tab of the Mouse Properties dialog box.
From here you can change the Scheme by choosing any of the options listed in the drop-down box. The option chosen changes the list in the Customize section of the dialog box. Clicking OK saves your settings and closes the dialog box.
Once you are finished customizing your Desktop, click Save Theme and this theme will be saved in your available themes.
![]()
![]()
![]() This tip (10110) applies to Windows 7, 8, and 10.
This tip (10110) applies to Windows 7, 8, and 10.
When you work on your computer late at night the glow from your computer monitor can affect your sleep. Why not setup ...
Discover MoreWindows provides a number of administrative programs that can be very helpful when managing your system. It's useful to ...
Discover MoreSafe Mode is an essential way to regain control of a system that fails to fully boot. Windows 10 doesn't come with a way ...
Discover MoreThere are currently no comments for this tip. (Be the first to leave your comment—just use the simple form above!)
Copyright © 2026 Sharon Parq Associates, Inc.

Comments