The "Recent Places" feature of Windows was introduced so that you could easily navigate among recently visited folders you accessed. The Recent Places list is one of the "Favorites" in the left pane of Windows Explorer, if you are using Windows 7 or Windows 8. If you are using Windows 10, "Recent Places" has been changed to "Quick Access," which is still located in the left pane of File Explorer.
By clicking Recent Places (Windows 7 and Windows 8) or Quick Access (Windows 10) you can see, in the right pane, the folders and/or files that you recently visited. You may consider this a privacy concern, though, so there are a few things you can do to alleviate this concern.
One thing you can do is to clear out specific places from the list. You do this by clicking Recent Places or Quick Access and, in the right pane, right-clicking the shortcut(s) you want to remove. In the resulting Context menu, choose Delete (Windows 7 or Windows 8) or Remove from Quick Access (Windows 10).
If you don't want to go through and clear items one at a time, you can clear the entire list. In Windows 7 or Windows 8, right-click the Recent Places item in the left pane, under Favorites, and select the Clear Recent Items List option from the resulting Context menu.
If you are using Windows 10, go ahead and right-click the Quick Access option in the left pane. In the resulting Context menu, choose Options. Windows displays the General tab of the Folder Options dialog box. (See Figure 1.)
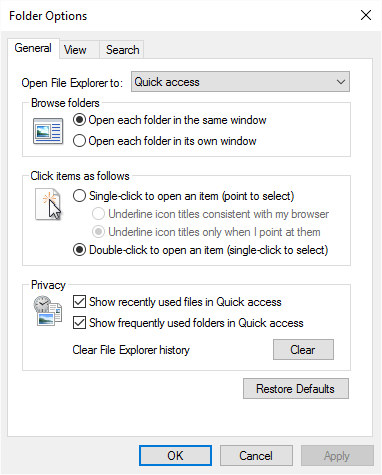
Figure 1. The General tab of the Folder Options dialog box.
Click the Clear button near the bottom of the dialog box, and all the Quick Access entries disappear. (There is no second chance, and you can't undo the action. Once you click, the entries are gone immediately.)
If you'd prefer that Windows not keep track of your recent places at all, you can turn off this feature. Note the two check boxes in the Folder Options dialog box. If you clear these check boxes, then Windows is more circumspect about what you've most recently accessed on the system.
If you are using Windows 7 you can turn off this feature by right-clicking the Start button and clicking Properties to display the Taskbar and Start Menu Properties dialog box. (See Figure 2.)
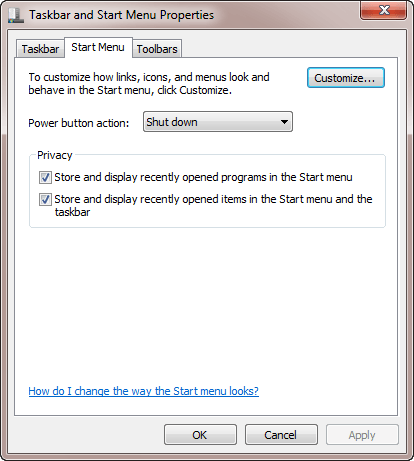
Figure 2. The Start Menu tab of the Taskbar and Start Menu Properties dialog box.
Note the two check boxes on the Start Menu tab. If you clear these check boxes, then Windows doesn't display what you've recently accessed on the system.
If you are using Windows 8 you can turn off this feature by right-clicking on the status bar and choosing Properties. In the resulting Taskbar and Navigation Properties dialog box, make sure the Jump Lists tab is displayed. (See Figure 3.)

Figure 3. The Jump Lists tab of the Taskbar and Navigation Properties dialog box.
Clear the two check boxes and Windows, again, doesn't display the recent places on the system.
If you turn off Recent Items, you might also want to remove it from your Favorites. This can be done while you're still working in the Taskbar and Start Menu Properties dialog box in Windows 7. Click the Customize button to display the Customize Start Menu dialog box. (See Figure 4.)
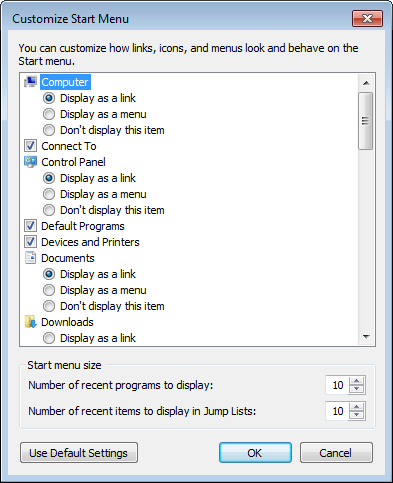
Figure 4. The Customize Start Menu dialog box.
Scroll down through the available options until you find the Recent Items check box. Make sure the check box is cleared and then close any open dialog boxes.
The easiest way to remove the Recent Items option from your Favorites in Windows 8 is to simply right-click on the option and choose Remove from the resulting Context menu.
![]()
![]()
![]() This tip (5838) applies to Windows 7, 8, and 10.
This tip (5838) applies to Windows 7, 8, and 10.
When you have multiple displays attached to your computer you might want to change how the Taskbar looks on your extra ...
Discover MoreYour computer's camera allows you to connect with people in engaging ways. Whether used to login to your computer or for ...
Discover MoreAs you no doubt know, Windows has a built-in clock that is used for a variety of purposes. This tip covers the various ...
Discover MoreThere are currently no comments for this tip. (Be the first to leave your comment—just use the simple form above!)
Copyright © 2026 Sharon Parq Associates, Inc.

Comments