It's good practice to take frequent, periodic backups of your system—at least what you consider to be the important files on your system. Many people do perform regular backups, but what some forget is that you must also be able to restore them if they're to be of any value. So, it is also good practice to occasionally try to restore data from a backup to make sure you're still getting good backups.
To restore from a backup if you are using a Windows 10 system, navigate to the Control Panel and click on Backup and Restore (Windows 7) link. Windows displays the Backup and Restore (Windows 7) portion of the Control Panel. [On a Windows 7 system, go to Start | Control Panel | Backup and Restore. Windows displays the Backup and Restore portion of the Control Panel.] (See Figure 1.)
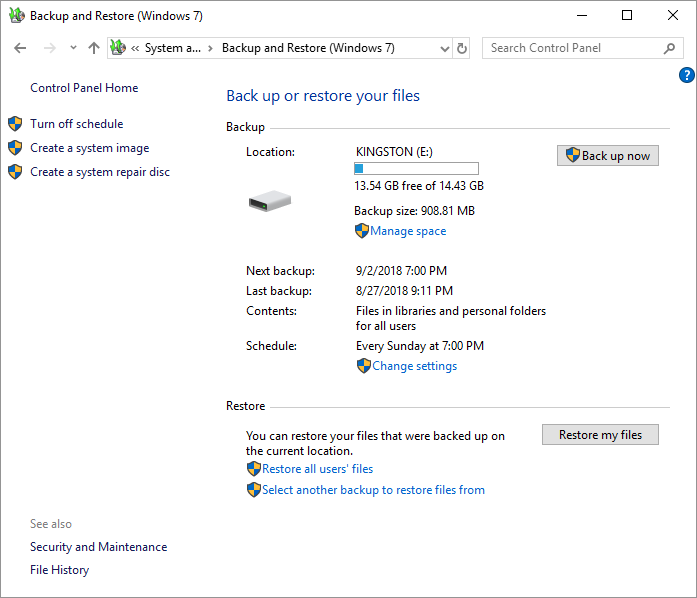
Figure 1. The Backup and Restore main screen.
Click the Restore My Files button, near the lower-right corner. Windows displays the Restore Files dialog box. (See Figure 2.)
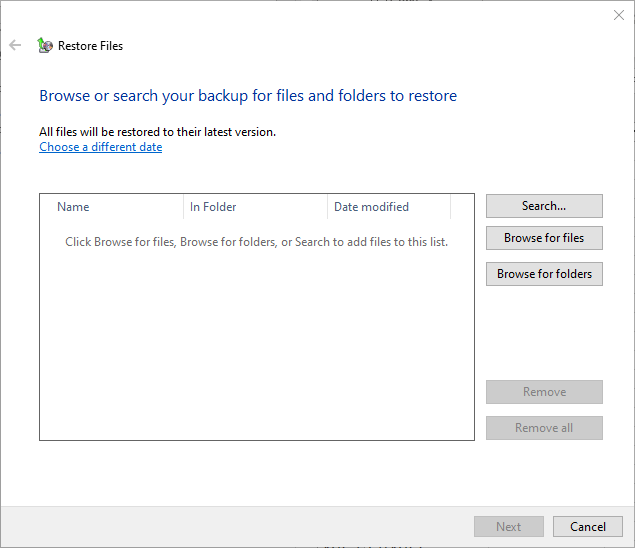
Figure 2. Choosing what to restore.
At this point you must click one of the Search, Browse for Files, or Browse for Folders buttons (right side of the dialog box) depending upon how you want to navigate to the backed-up folders/files. If you click Search, you are prompted to type in all or part of a file name or folder that's to be found. If you click Browse for Files, you are presented with a Windows Explorer-type window that you can use to drill down to the file(s) you're interested in restoring. Finally, if you click Browse for Folders, you are presented with the same sort of window, but it's used to select an entire folder to be restored.
Once you have selected the folders and/or files you want to restore, the Next button is enabled in the Restore Files dialog box. Click Next to proceed to the next step in the restore procedure. (See Figure 3.)
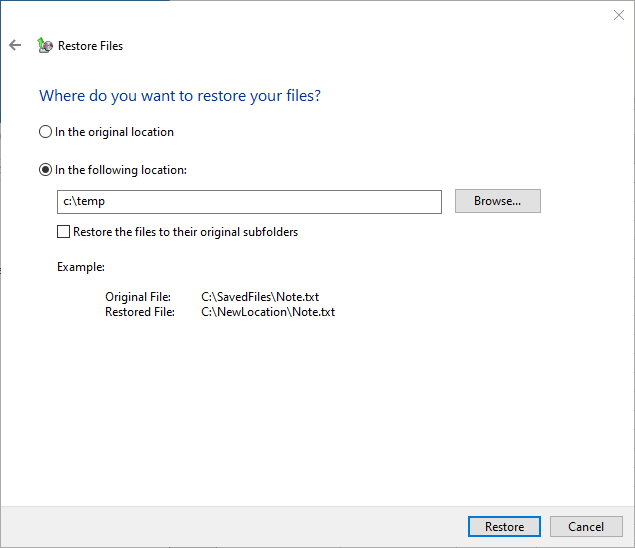
Figure 3. Choosing where to restore.
At this point you tell the system whether you want to restore your items to their original locations or to different locations. Choose either radio button to indicate where you want your items restored to and click the Restore button. Your selected files and folders will then be restored to the location you specified.
![]()
![]()
![]() This tip (5828) applies to Windows 7, 8, and 10.
This tip (5828) applies to Windows 7, 8, and 10.
Many times, the automatically created Thumbs.db file is more trouble than it's worth. If you want to stop Windows from ...
Discover MoreA hidden file that the system uses to speed performance of your viewing folders containing pictures is called Thumbs.db. ...
Discover MoreIf you ever want to copy user accounts, documents, pictures, etc., from one computer to another, you'll find that Windows ...
Discover MoreThere are currently no comments for this tip. (Be the first to leave your comment—just use the simple form above!)
Copyright © 2026 Sharon Parq Associates, Inc.

Comments