One of the settings you can adjust for User Account Control (UAC) is when an administrator is to be notified when system-level changes (e.g., program installations or system-wide changes that affect all users) occur. How you adjust this notification level depends on the version of Windows you are using:
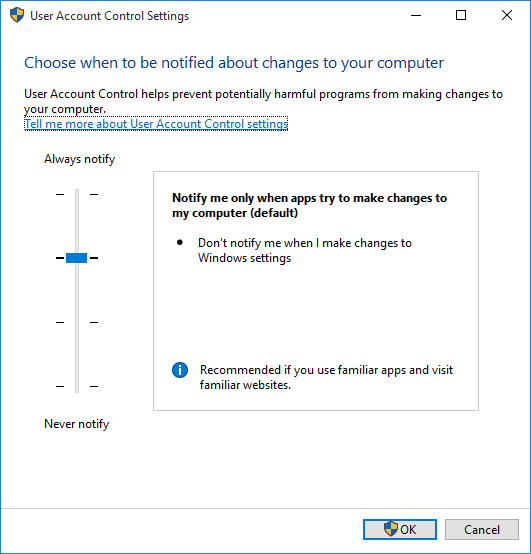
Figure 1. The User Account Control Settings dialog box.
There are four levels of UAC notification. If the slider is all the way down, then all notifications from UAC are turned off. The next notch up causes you to be notified only when programs try to make changes to the system, and you are not notified when you (as the user) make changes to Windows settings. The next notch up (second from the top) is the default setting. It provides the same notification level as the third notch from the top, plus your desktop is dimmed when you are notified. If you move the slider all the way to the top, you will always be notified when programs try to install software or make changes to the system as well as when you make changes to Windows settings.
If you're interested in making changes to UAC settings beyond the notification level, you can provide finer detail by setting local security policies on your system. If you are using Windows 7, you can get to the policy editor by choosing Start | Administrative Tools | Local Security Policy. If you are using a later version of Windows, use the Search box to find "Local Security Policy." (You will need to run the editor while logged in as Administrator on your system.)
When the editor is running, it looks similar to the Windows 10 editor shown here as the Local Security Policy dialog box. (See Figure 2.)
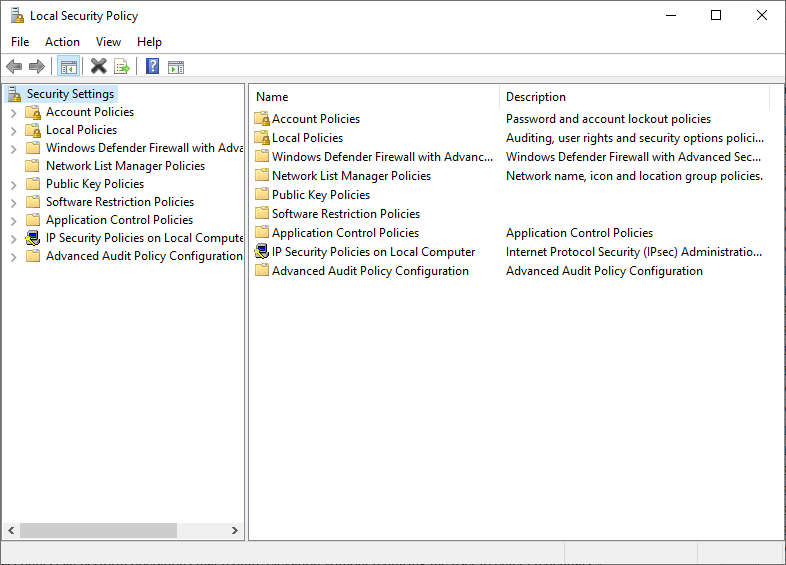
Figure 2. The Local Security Policy dialog box.
In the left pane, click the Local Policies item, then in the right pane, double-click the Security Options item. The expanded screen includes settings that can control how UAC works. (See Figure 3.)
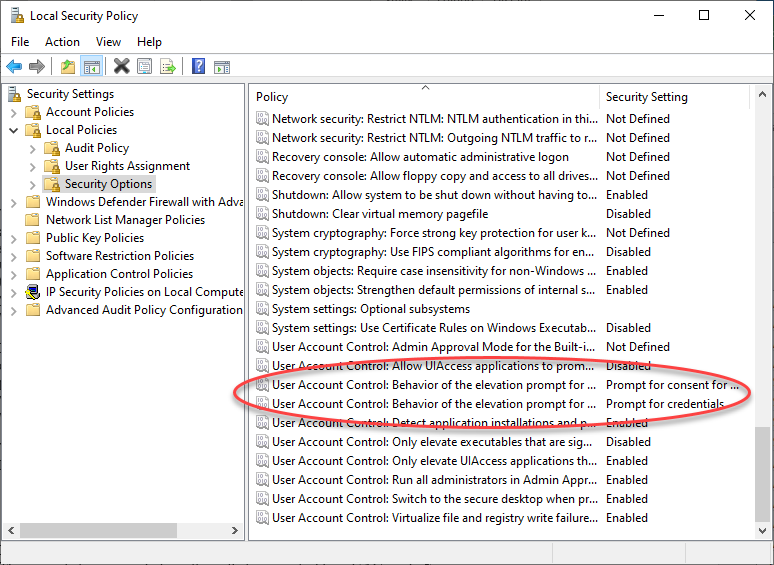
Figure 3. Changing UAC settings in the Local Security Policy dialog box.
There are ten UAC-related policy settings that you can change. While the details of all these settings are too much for this tip, you can learn about each setting by right-clicking the policy, selecting Properties, and clicking the Explain tab. The two policies that are circled in the figure, for example, dictate the behavior of the elevation prompt for administrators and for standard users.
For administrators, having the Security Setting set to "Elevate without prompting" means that privileged accounts can perform operations that require elevation without requiring the user to enter credentials.
For standard users, having the Security Setting set to "Prompt for credentials" means that the non-privileged user is prompted to enter administrator credentials when an operation requires elevation of privilege.
Assuming you have administrator privileges, you can change any or all of the policy settings by right-clicking the policy, selecting Properties, and making the change. Click OK to have the change take effect.
![]()
![]()
![]() This tip (3602) applies to Windows 7, 8, and 10.
This tip (3602) applies to Windows 7, 8, and 10.
Passwords on user accounts are a great way to enhance security for a computer system. Here's how you can add a password ...
Discover MoreWindows allows you to set up individual user accounts in case there are multiple people using the same computer. Here's ...
Discover MoreYou can switch between users (and come back) without having to close down your current workspace. This tip tells you how ...
Discover MoreThere are currently no comments for this tip. (Be the first to leave your comment—just use the simple form above!)
Copyright © 2026 Sharon Parq Associates, Inc.

Comments