The Snipping Tool is a handy Windows utility that allows you to snip a portion of your display to be saved, edited, mailed, etc. The tool is a bit like doing a print screen, except that it lets you capture an arbitrary portion of the display.
Most people have the Snipping Tool on their desktop (or pinned to the taskbar), so launching it is simply a matter of double-clicking its icon (or clicking the icon in the taskbar). If you don't have the Snipping Tool on your desktop, you can launch it in Windows 7 by going to Start | All Programs | Accessories | Snipping Tool. In Windows 8 you can press Win+C to display the Charms bar. Then, in the Search box, type "snipping" (without the quotes) and press Enter. In Windows 10 type "snipping" (without the quotes) and press Enter.
Once the tool has been launched, the display fades a bit to facilitate your capturing of whatever part of the screen you wish. The tool's control window also appears. (See Figure 1.)

Figure 1. The Snipping Tool's control window.
At this point, you can cancel the snipping operation by closing the window, or you can continue using the tool. If you click the Options button, Windows displays the Snipping Tool Options dialog box. (See Figure 2.)
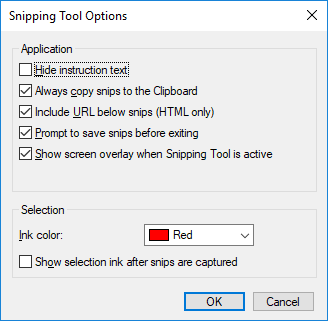
Figure 2. The Snipping Tool Options dialog box.
Typically, you only need to set your options once, as they are saved for subsequent uses. The Mode drop-down list (New drop-down list if you are using Windows 7 or Windows 8) is used to specify what type of screen capture you want to do. There are four options in the drop-down list:
Whatever you choose in the drop-down list is persistent, meaning it is saved for subsequent uses.
Assuming you've chosen one of the first two snipping methods, at this point you can click and drag your mouse around the part of the screen you want to capture. When you release the mouse, the captured image appears in the Snipping Tool dialog box. (See Figure 3.)
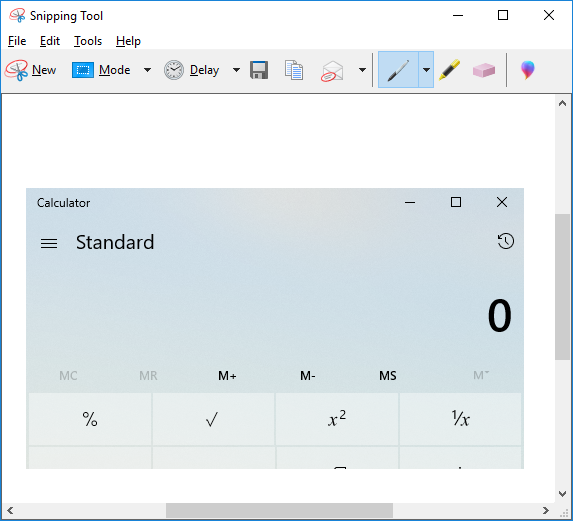
Figure 3. The Snipping Tool dialog box is used to display what was captured.
Using the tools in the Snipping Tool dialog box you can annotate, edit, highlight, erase, save, and email the image. You may want to copy the image to the Clipboard so that you can paste it into another application. Or you may want to save the image to a file for subsequent processing. When you're finished with your snip, you can close the dialog box as normal or select File | Exit.
![]()
![]()
![]() This tip (12558) applies to Windows 7, 8, and 10.
This tip (12558) applies to Windows 7, 8, and 10.
Getting a handle on the weather is something that man has been dreaming of since the dawn of time. While you might not be ...
Discover MoreMany times, in our lives we will be asked, or we will ask, for computer help. Windows 10 offers a quick way of doing this ...
Discover MoreWindows 10 includes the new Voice Recorder app. Ideal for recording lectures, cute things your kids say, musical ...
Discover More2021-01-17 16:03:01
John Mann
On my Windows 10 computer, I can no longer use either the Snipping tool in rectangular mode, or the equivalent tools in Word & Excel 2010. Instead of the screen fading a bit so that I could eaily select the area I wanted to copy, I now get an opaque medium grey overlay of the entire screen, and if I draw a rectangle on that, the resulting screen clip is solid black.
Any suggestions on how to overcome this would be greatly appreciated.
2019-10-16 05:52:27
Florian Schwarz
I am frequently using it. When sending it directly as Email I noticed that it often skips letters when I type fast. Has anyone else faced this problem? Have you found a solution?
2019-05-01 13:37:41
David H.
I *think* this utility is being replaced with something called "Snip & Sketch"....sigh, just when I was getting comfortable with "Snipping Tool" I have another learning curve to go through!
Copyright © 2026 Sharon Parq Associates, Inc.

Comments