When Windows 10 launched, it included a feature that has quietly been hiding from most users. This feature is found within the Notepad app, and it allows you to use a Notepad file as a journal. I find this helpful in using it as a journaling tool, or to take notes on a project. While you have always been able to open a Notepad file to quickly jot down notes, this feature adds an additional element to the file. Every time you open the file, Notepad will add the date and time above where you are about to start typing.
To use a Notepad file as a journaling tool, follow these simple steps:
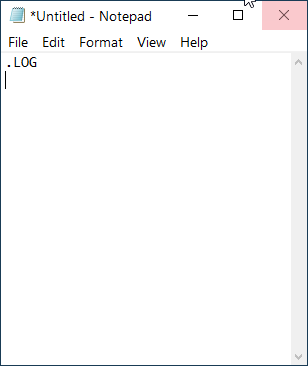
Figure 1. Notepad file being set up for journaling.
Now your file is set up to work as a journaling or logging tool. Every time you open your file, the date and time will be added above where you are about to type. (See Figure 2.)
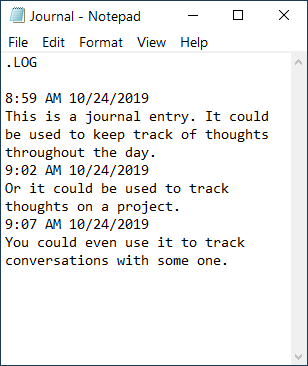
Figure 2. Notepad file setup for journaling, with entries.
A few important tips for using this feature: As long as the ".LOG" stays at the top of the file, each time you open the file the date and time will be added. If you remove the ".LOG," the file will no longer behave in this manner. If you want a return before each entry you will need to manually enter a return once you have finished your entry. For the date and time to be entered, you will need to close the file and then open it again.
Once set up, you will be able to use any Notepad file as a journaling or logging tool. Having the date and time entered allows you to easily go back and find when you wrote your idea down.
![]() This tip (13693) applies to Windows 10.
This tip (13693) applies to Windows 10.
Historical Weather information can give you insight into what you can expect when it comes to temperature, rainfall, and ...
Discover MoreThe Mail app found in Windows 10 allows for a personalized experience. Discover the personalization that you can quickly ...
Discover MoreWindows 10 November 2019 update provides a quick method to add a calendar event. This new method allows you to create an ...
Discover MoreThere are currently no comments for this tip. (Be the first to leave your comment—just use the simple form above!)
Copyright © 2025 Sharon Parq Associates, Inc.
Comments