The Vision settings in the Ease of Access Center deal with the display, cursor & pointer size, Magnifier, color filters, contrast, and the Narrator. To start, press the WINDOWS key, type (without the quotes) “Settings,” and press ENTER. Click the Ease of Access group, and you’ll see the Ease of Access Center: (See Figure 1.)
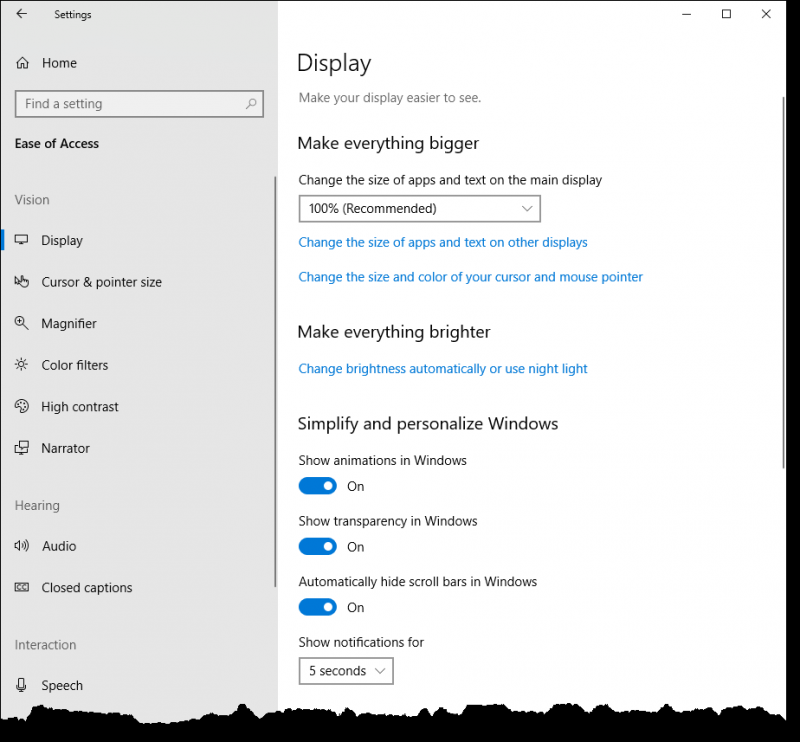
Figure 1. Settings’ Ease of Access Center.
This window opens to the first of the Vision-related Ease of Access settings, viz., the display. Here, you can change the size of apps and text on other displays and change the size and color of your cursor and mouse pointer. You do this by clicking the links of the same name and following the instructions for exactly what it is you’re wanting to do.
You can also adjust the brightness of your monitor and simplify and personalize Windows. Since I have no vision impairments (other than wearing corrective lenses), the defaults are fine for me. I do, however, want to mention a couple of settings you may want to change. One is the setting titled “Automatically hide scroll bars in Windows.” I turn that off because I don’t want to go searching for scroll bars when it’s obvious that the whole thing isn’t fitting within the current window.
The other setting you may want to adjust is the one titled “Show notifications for.” This setting determines for how long a notification stays on your screen before it disappears. The default is five seconds, but if you find that amount of time insufficient to read the notification you can adjust it all the way up to five minutes.
The next group of settings under Vision allows you to adjust the cursor & pointer size. Here you can change the thickness of the cursor when typing, change the pointer’s size and color, and change the touch feedback if you have a touchscreen.
Next comes the Magnifier. You use the Magnifier to zoom in on parts of your display. The Magnifier can run in full screen, in a separate window, or as a lens that follows your mouse pointer around the screen. I’ve found that it takes some experimentation to get comfortable with the Magnifier, but if you invest the time, it will pay off when you try to see extra-small material. It’s also good if you’re displaying your screen in a presentation and others find that certain parts are difficult to see. When you have the Magnifier configured to suit (or even when you’re just experimenting with it), you turn it on by pressing WINDOWS+EQUALS. Pressing WINDOWS+ESC turns it off.
The next Vision group is that for color filters. Ordinarily you’d leave the color filters turned off, but if you have a condition like color blindness you may find that making some adjustments really helps.
The final group of Vision settings deals with the contrast of your monitor. The idea is that by turning on high contrast you make text and apps easier to see by using more distinct colors. If you turn on high contrast (something that gives me a headache, personally), you can also choose a theme to go with it. You can also customize the high contrast colors for the various parts of a window, like text, hyperlinks, disabled text, selected text, button text, and the background.
![]() This tip (13573) applies to Windows 10.
This tip (13573) applies to Windows 10.
Windows 10 has several apps that run in the background that help improve performance and function for your system. Some ...
Discover MoreWindows is rather configurable, especially when it comes to the user interface. Here's how you can modify the way that ...
Discover MoreWindows implements a lot of visual effects that can make your screen and desktop look gorgeous. These good looks come at ...
Discover MoreThere are currently no comments for this tip. (Be the first to leave your comment—just use the simple form above!)
Copyright © 2025 Sharon Parq Associates, Inc.

Comments