Using a Dvorak Keyboard with Windows
While Dvorak keyboards are not enormously popular, there are quite a few out there. If you have one and want to tell Windows to use it, proceed as follows if you are using Windows 10:
- Type "language" (without the quotes) in the Search box which is just left of the taskbar. Click Language Settings from the resulting list of options. Windows displays the Language section of the Settings dialog box. (See Figure 1.)
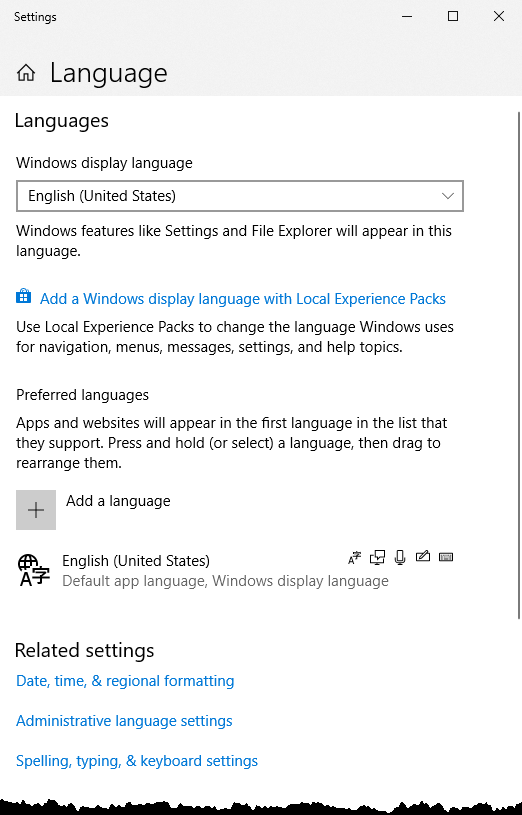
Figure 1. The Language section of the Settings dialog box.
- Under the Languages heading, click the English (United States) link and then click the Options button. (The language link may be different depending on which language your system is using.) Windows displays the Language Options section of the Settings dialog box. (See Figure 2.)
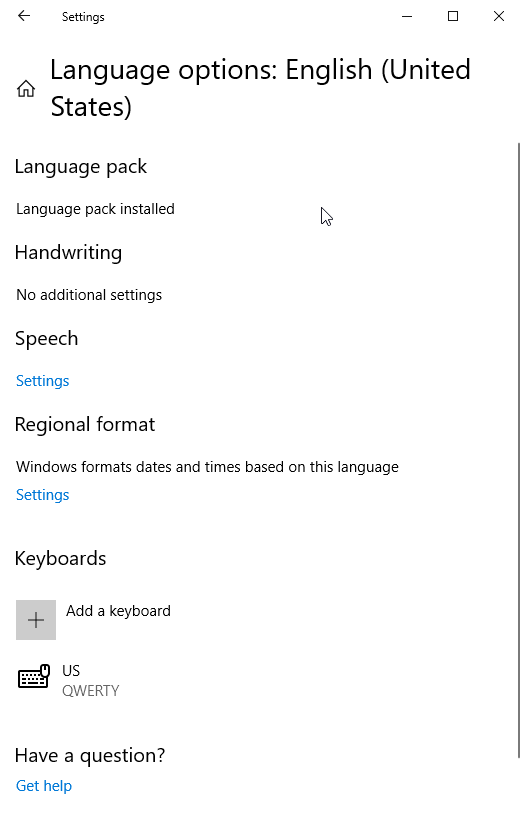
Figure 2. The Language Options section of the Settings dialog box.
- Under the Keyboards heading click Add a Keyboard.
- Scroll through the resulting list and choose the desired Dvorak keyboard. (See Figure 3.)
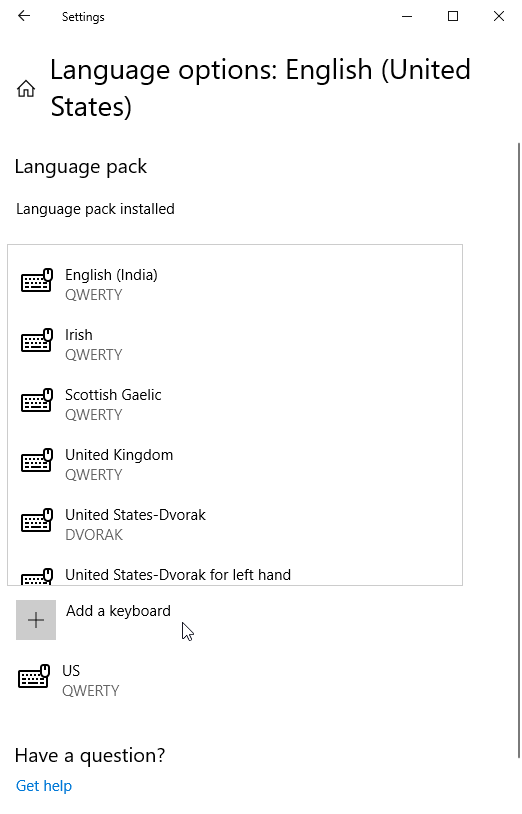
Figure 3. List of keyboard options.
- Close the Settings dialog box.
If you are using Windows 8 follow these steps:
- Display the Control Panel.
- Click the Change Input Methods link (under the Clock, Language, and Region heading). Windows displays the Language page. (See Figure 4.)
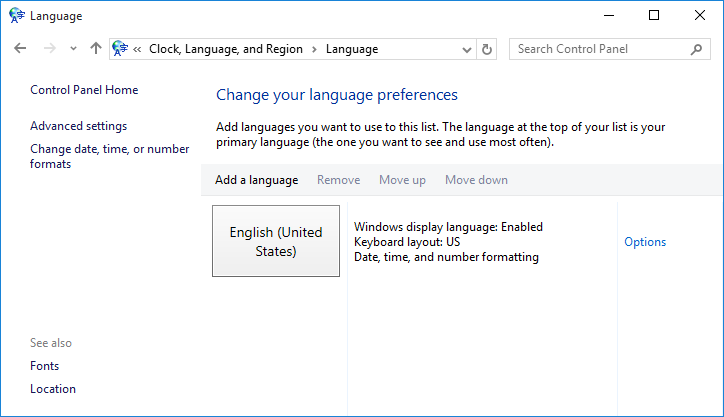
Figure 4. The Language page of the Control Panel.
- Click the Options link to the right of the English (United States) language entry. (It is possible for there to be multiple languages installed on your system.) Windows displays the Language Options page. (See Figure 5.)
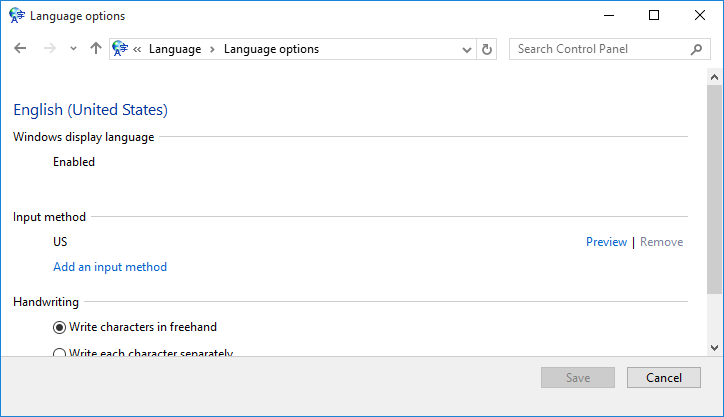
Figure 5. The Language Options page of the Control Panel.
- Click the Add an Input Method link. Windows displays the Input Method page.
- Scroll through the list of options until you find the Dvorak option that suits your needs. (There are three Dvorak options available: normal, left-handed, and right-handed.)
- Click on the desired Dvorak option to select it.
- Click the Add button. The Language Options page again appears, with the Dvorak option visible.
- Click the Save button.
If you are using Windows 7 the steps are a bit different:
- Click Start and then Control Panel. Windows displays the Control Panel dialog box.
- Click the Change Input Methods option (it is under the Clock, Language, and Region heading).
- Click Change Keyboards or Other Input Methods. Windows displays the Keyboards and Languages tab of the Region and Language dialog box. (See Figure 6.)
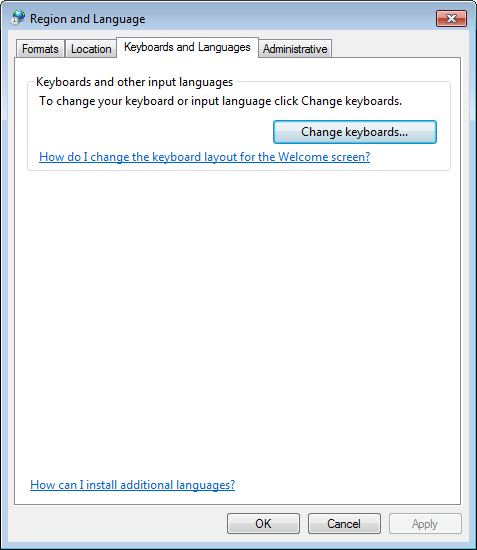
Figure 6. The Keyboards and Languages tab of the Region and Language dialog box.
- Click the Change Keyboards button. Windows displays the General tab of the Text Services and Input Languages dialog box. (See Figure 7.)
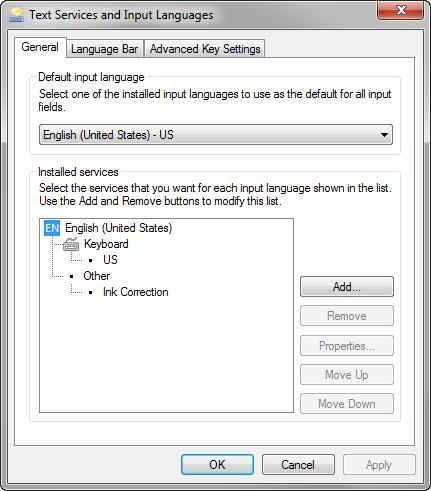
Figure 7. The General tab of the Text Services and Input Languages dialog box.
- Click the Add button. Windows displays the Add Input Language dialog box. (See Figure 8.)
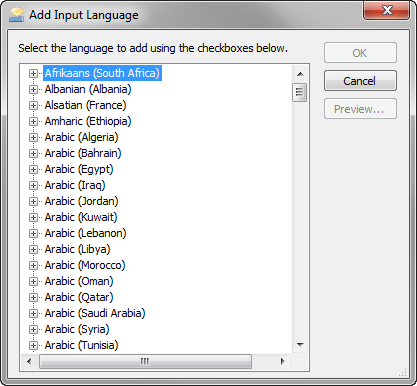
Figure 8. The Add Input Language dialog box.
- Scroll through the list of available languages until you locate the English (United States) entry.
- Click the plus sign at the left of the entry. Windows expands the list of languages to show other options.
- Expand the Keyboard option (by clicking on the plus sign), if necessary.
- Make sure a check mark appears to the left of the desired Dvorak keyboard setups.
- Click on OK.
- Close all the open dialog boxes.
When you restart Windows, the Dvorak keyboard settings will be loaded into Windows and available for use.
Author Bio
Barry Dysert
Barry has been a computer professional for over 35 years, working in different positions such as technical team leader, project manager, and software developer. He is currently a software engineer with an emphasis on developing custom applications under Microsoft Windows. When not working with Windows or writing Tips, Barry is an amateur writer. His first non-fiction book is titled "A Chronological Commentary of Revelation." Learn more about Barry...
How To Enable Jump Lists
Jump lists are handy time savers. Some consider them a privacy issue, though. Whichever way you see it, this tip shows ...
Discover More
Scanning Pictures with a Scanner
If all you have is a hardcopy picture, you can still digitize it by using a scanner. This tip gives a high-level ...
Discover More
Understanding File Types and Extensions
File types (or extensions) are key to using Windows effectively. When you double-click a file in Windows Explorer or File ...
Discover More
Configuring Windows' Secret Start Menu
You can quickly access either Command Prompt or PowerShell by using the Win+X shortcut key command. But which one is ...
Discover More
Customizing What Appears on the Right Side of the Start Menu
You're probably used to seeing your Start menu appear a certain way. But is it the most effective display for how you ...
Discover More
Turning on Inactive Window Scroll
Have you ever needed to scroll through an inactive window while keeping another window active? This tip will show you how ...
Discover More

Comments