A system image is a snapshot of your system disk at a certain point in time. That image, properly stored, can later be used to restore your system. It is not unusual for people to create a system image of a pristine system—including installed software—before any data starts being accumulated on that system. If anything happens to the system that later requires a reinstall of the operating system, the system image is used as the "base line" for the new installation. (And, it saves a ton of time since you don't need to reinstall all the software—it is already on the system image.)
Creating a system image is a fairly straightforward operation and it can save you a lot of time if something catastrophic were to happen to your system. To get started, display the Control Panel. What you click from here depends on which version of Windows you are using:
Regardless of the version of Windows you are using, you'll then see the Create a System Image dialog box, which is the first step in a wizard to help guide you through the process. (See Figure 1.)
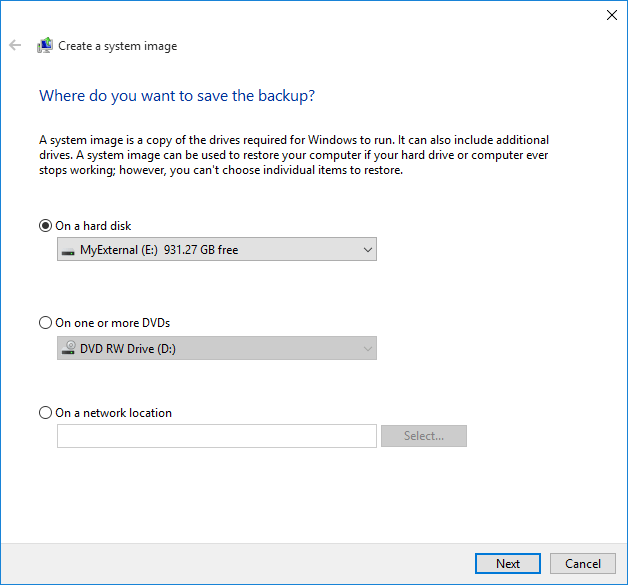
Figure 1. The Create a System Image wizard.
The wizard first asks you where you want to save your system image. You can save it to an NTFS-formatted hard drive (but not the system disk), a set of DVDs, or a shared network drive. You're next given the opportunity to save additional drives with your system image. (If you're building an image simply to use in a restoration process, you probably shouldn't select any other drives as that will just increase the time and space required to build your image.) You'll then be presented with a confirmation screen from which you can commence the build of the image.
After the system image has been built, you are given the option to go on to make a system repair disk. Making a system repair disk is covered under another tip.
![]()
![]()
![]() This tip (12661) applies to Windows 7, 8, and 10.
This tip (12661) applies to Windows 7, 8, and 10.
Windows is quite configurable. It even allows you to change the drive letters associated with your disk drives. Although ...
Discover MoreWhen it comes to files and folders and naming them in there are restrictions. Knowing what is restricted will help you ...
Discover MoreIf you're low on disk space but still want to keep your files online, you might consider moving them to compressed ...
Discover MoreThere are currently no comments for this tip. (Be the first to leave your comment—just use the simple form above!)
Copyright © 2025 Sharon Parq Associates, Inc.

Comments