Some systems are configured such that file extensions are not displayed. So instead of seeing a file whose name is "Data.txt" you only see "Data". This could get confusing if you have different types of files with the same name, like "Data.txt", "Data.jpg", "Data.xml", etc., as they would all show up simply as "Data". To eliminate such confusion, many users turn on the display of file extensions so that they can see the full name of every file.
To turn on the display of file extensions you need to display the Folder Options dialog box. To do this if you are using Windows 7, open Windows Explorer and on its toolbar click on Tools | Folder Options. If you are using Windows 8 or 10, open the File Explorer and click Options at the right side of the ribbon. Regardless of the version you are using, make sure the View tab is displayed in the dialog box. (See Figure 1.)
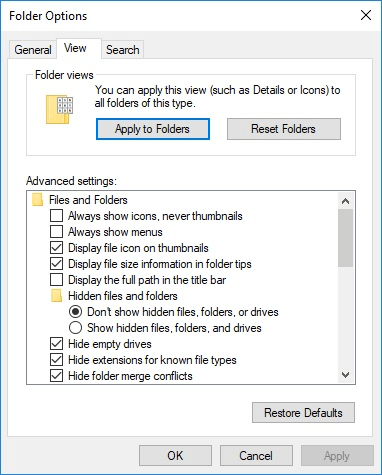
Figure 1. The View tab of the Folder Options dialog box.
The Hide Extensions for Known File Types checkbox determines whether the system should hide extensions for known file types. If you put a checkmark in this box, Windows hides the file extensions; this is the default setting for Windows. If the box is clear, then you'll see the full file name. Mark or clear this box to indicate your preference, then click the Apply to Folders button to apply this setting to all folders. When you are done you can click the OK button.
![]()
![]()
![]() This tip (12372) applies to Windows 7, 8, and 10.
This tip (12372) applies to Windows 7, 8, and 10.
Windows allows a great deal of flexibility in what programs it associates with different types of files. If you want to ...
Discover MorePerforming regular backups of your system offers you peace of mind because you don't have to worry about data loss in the ...
Discover MoreThe DiskPart utility is a low-level command-line program that lets you manage disks, virtual disks, partitions, and ...
Discover MoreThere are currently no comments for this tip. (Be the first to leave your comment—just use the simple form above!)
Copyright © 2026 Sharon Parq Associates, Inc.

Comments