Changing File Explorer's Default Startup Location

Written by Barry Dysert (last updated April 20, 2020)

When you launch File Explorer, its default startup location is determined by a setting that you control. You can have it start at the Quick Access section, or you can have it start at the This PC section. Which you choose is totally up to you and doesn't affect the way File Explorer works at all.

The way you change the default file location is very easy. First, launch File explorer. Then click the View tab and move to the Options button. Note: don't click the arrow under Options, click right on the word Options: (See Figure 1.)

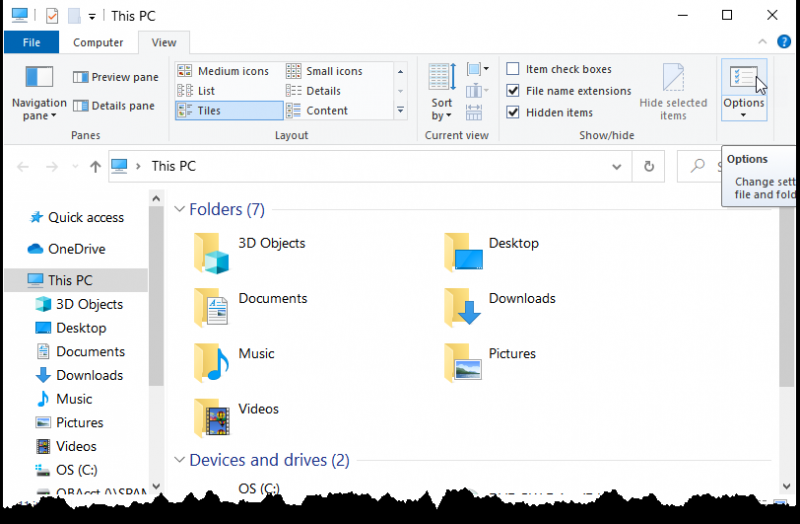
Figure 1. Preparing to set File Explorer's default startup location.

After you click Options, a dialog box will appear, and at the top of the dialog box will be a drop-down list box with the choices "Quick access" and "This PC". (See Figure 2.)

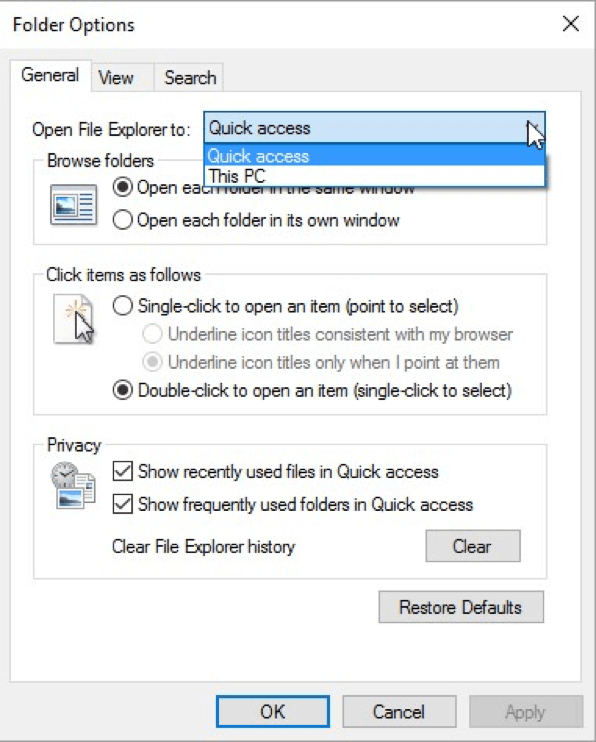
Figure 2. Setting File Explorer's default startup location.

Select one of the two options from the drop-down list and click OK. From now on, whenever you launch File Explorer, it will open at the location you designated.

 This tip (11420) applies to Windows 10.

Author Bio

Barry Dysert

Barry has been a computer professional for over 35 years, working in different positions such as technical team leader, project manager, and software developer. He is currently a software engineer with an emphasis on developing custom applications under Microsoft Windows. When not working with Windows or writing Tips, Barry is an amateur writer. His first non-fiction book is titled "A Chronological Commentary of Revelation." ...

MORE FROM BARRY

Understanding the Start Menu Search Box

The Start Menu Search Box is a great addition to Windows. It can save you a great deal of time by putting frequently used ...

Discover More

Adding File Types to the Search Index

You can fine-tune Indexed Searches by adding file types to the search index. This tip tells you how.

Discover More

Disabling System Restore

Restore points are good to have in case a problem occurs while trying to make changes to your system. If for some reason ...

Discover More
More WindowsTips

Syncing Settings between Computers

When you use a Microsoft account or an Azure Active Directory (Azure AD) account, you can sync settings between the ...

Discover More

Adding Items to the "New" Context Menu

You can add your own items to the "New" context menu, but it does take a bit of effort. This tip explains how to do it.

Discover More

Disabling the Windows 10 Blurred Sign-on Screen

The later updates to Windows 10 introduced blurred background images on the sign-in screen. If you prefer to have the ...

Discover More
Comments

If you would like to add an image to your comment (not an avatar, but an image to help in making the point of your comment), include the characters [{fig}] (all 7 characters, in the sequence shown) in your comment text. You’ll be prompted to upload your image when you submit the comment. Maximum image size is 6Mpixels. Images larger than 600px wide or 1000px tall will be reduced. Up to three images may be included in a comment. All images are subject to review. Commenting privileges may be curtailed if inappropriate images are posted.

What is 1 + 5?

There are currently no comments for this tip. (Be the first to leave your comment—just use the simple form above!)


Newest Tips