Connecting a Bluetooth Keyboard
Written by Eric Wyatt (last updated October 12, 2020)
Previously, we have described what Bluetooth is. No, it's not a dental term, as you can see from the article. It is a way to connect or exchange data over short distances via radio waves. Bluetooth technology has become a growing, popular method to connect devices, ranging from keyboards and mice to speakers and printers.
A Windows user (I'll call him Rick) wanted to know how to connect his new Bluetooth wireless keyboard to his Windows 10 computer. This is a simple process and quite easy. Let's walk through how to connect the devices.
- Press the Windows key and type (without quotes) "Bluetooth & Other Devices", then press Enter. This launches the Bluetooth & Other Devices section of the Settings dialog box. (See Figure 1.)
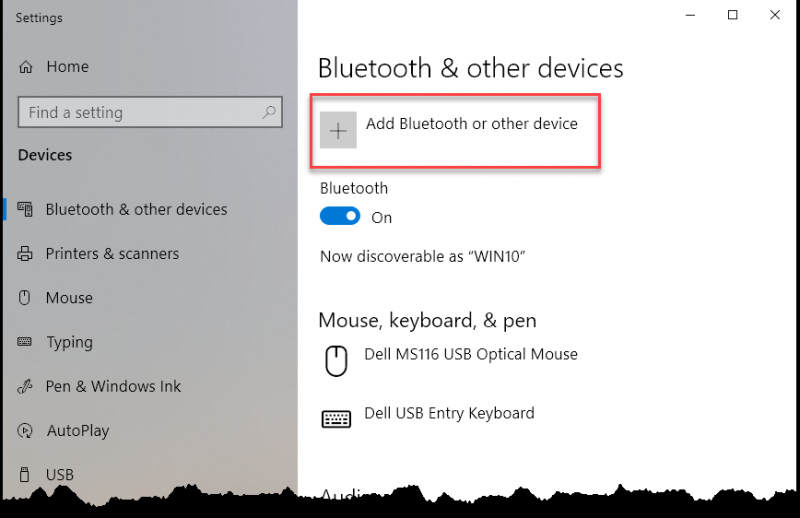
Figure 1. Bluetooth & Other Devices section of the Settings dialog box.
- Click on "Add Bluetooth or Other Device" directly under the Bluetooth & Other Devices header. This opens an "Add a Device" pop-up window directly over the Settings dialog box. (See Figure 2.)
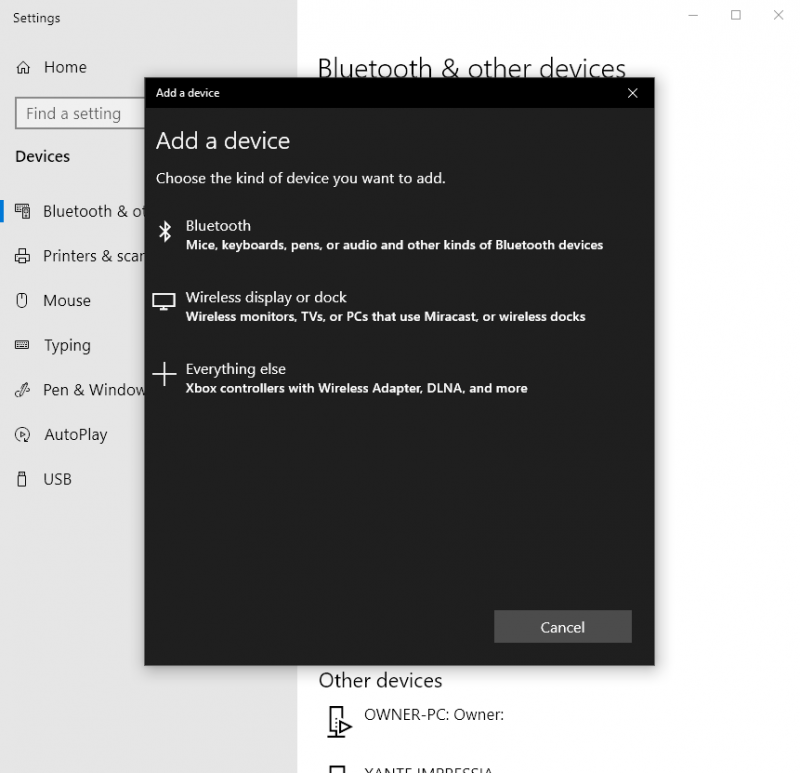
Figure 2. Add a Device window.
- To install a Bluetooth keyboard, click on the top option, "Bluetooth." Your computer starts searching for any discoverable Bluetooth-enabled items. Make sure that your keyboard is on and "discoverable." Sometimes this involves pushing a button on your keyboard; you may need to consult your device's manual on how to do this as each device varies.
- When the keyboard you want to connect is listed in the Add a Device window, click on the device name. The pop-up window then shows that it is trying to connect and may give a PIN you need to enter. (See Figure 3.)
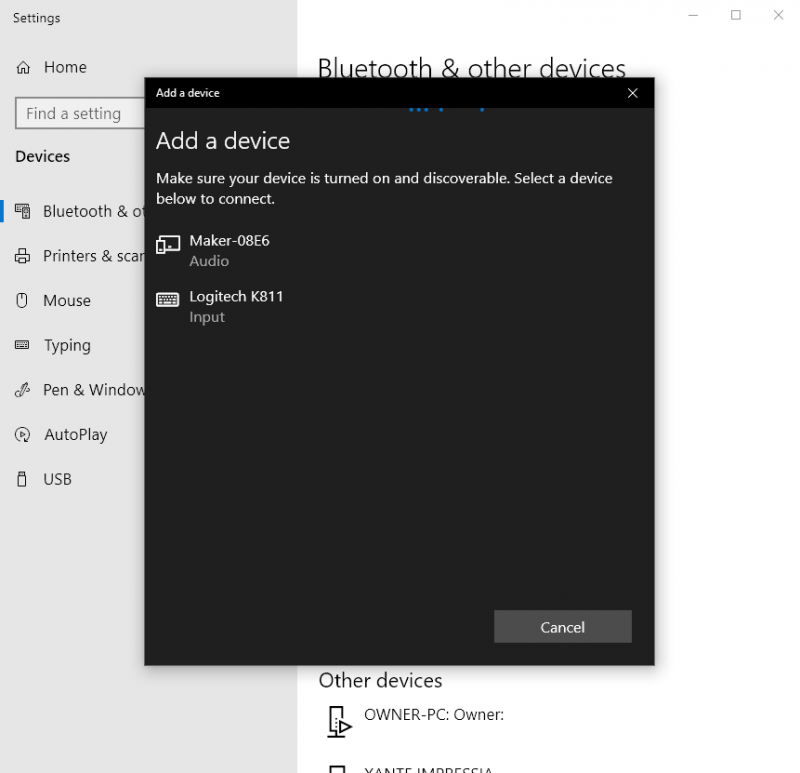
Figure 3. The Add a Device pop-up window showing nearby Bluetooth devices.
- Enter the PIN shown on your screen; you may need to press Enter once you type the PIN. If you connected properly, Windows will tell you that "Your Device is Ready to Go!" (See Figure 4.)
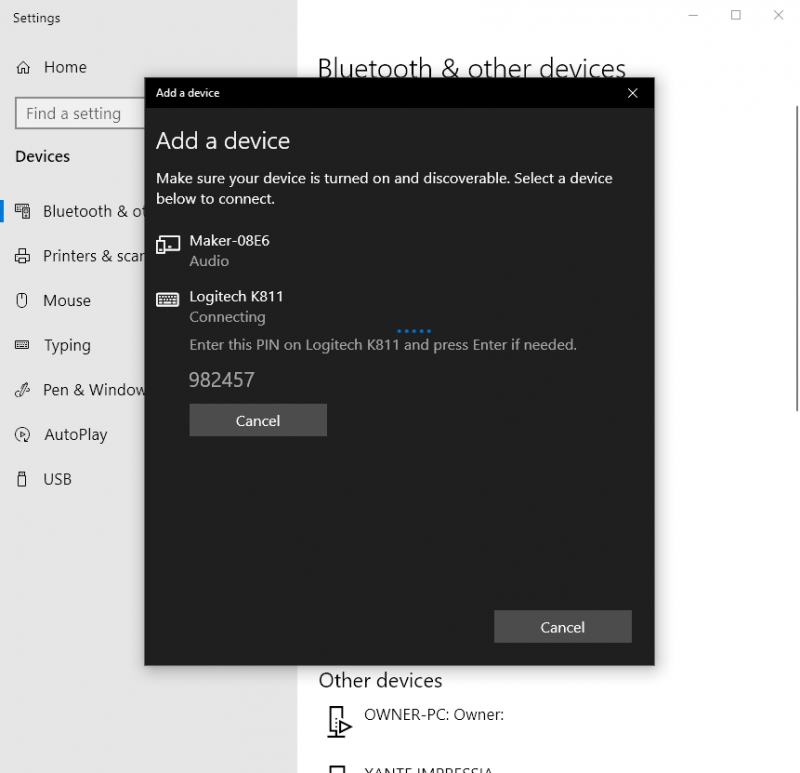
Figure 4. The Add a Device pop-up window shows a PIN needed to connect a Bluetooth Keyboard.
- Click "Done" to close the Add a Device window. You will see the new keyboard listed under the "Mouse, Keyboard, & Pen" section of the dialog box. (See Figure 5.)
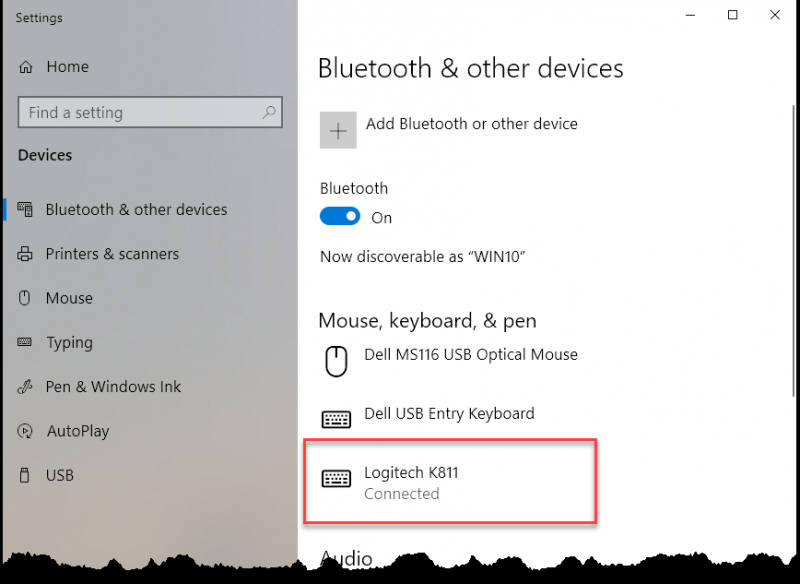
Figure 5. A connected Bluetooth keyboard in the Bluetooth & Other Devices section of the Settings dialog.
- Close the Settings dialog box. Your Bluetooth keyboard should now be connected and ready to use.
Connecting a Bluetooth keyboard is rather quick and easy. Now the hardest thing will be remembering to keep charged batteries in the device. If your batteries do die, no worries—put in a fresh set or charge the keyboard and your computer should connect automatically once the keyboard is powered back up.
 This tip (13788) applies to Windows 10.
Author Bio
Eric Wyatt
Eric Wyatt is a swell guy (or so his friends tell him). He is a formally trained designer and branding expert, bringing a wide range of skills to his Tips.Net articles. Learn more about Eric...
Folder Size Limits
Windows 10 allows for items to be organized into folders and subfolders. What size restrictions does Windows 10 place on ...
Discover More
A More Private Start Menu
If your computer is accessed by multiple people, you may be concerned about privacy. One area where you might want a bit ...
Discover More
Showing File Extensions
All file types have an extension, and Microsoft hides them by default. Learn how to turn file extensions on.
Discover More
Using Powercfg to Change the Name of a Power Scheme
The Powercfg utility allows you to control how power is used on your system. This tip shows you how to use the ...
Discover More
Choosing How to Use Multiple Monitors
Do you have multiple monitors (or a projector) hooked up to your system? Here's how to utilize that second display device ...
Discover More
Connecting a Bluetooth Speaker
Bluetooth speakers allow you to play your computer's audio wirelessly. Connecting a Bluetooth speaker to a ...
Discover More
Comments