Disabling Automatic Driver Installation

Written by Barry Dysert (last updated July 6, 2020)

Windows often tries to be helpful whenever it can. This is particularly true whenever you plug a new peripheral into your computer. Windows automatically attempts to find and install the appropriate driver for the device. If for some reason you don't like this behavior, you can disable automatic driver installation. This procedure only needs to be done once—before you connect a device to your computer.

In the Search box type "Advanced System Settings" (without the quotes) and press Enter. Windows displays the System Properties dialog box. Click the Hardware tab. (See Figure 1.)

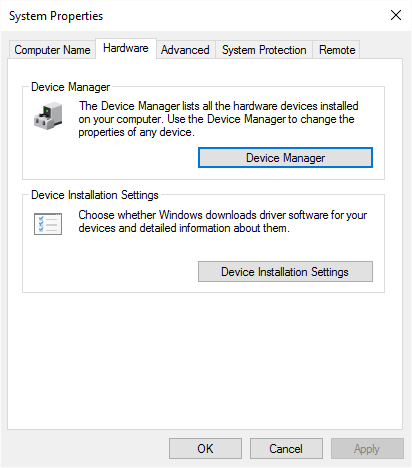
Figure 1. System Properties window.

Click the button labeled Device Installation Settings and you'll see the choices you have for driver installation. (See Figure 2.)

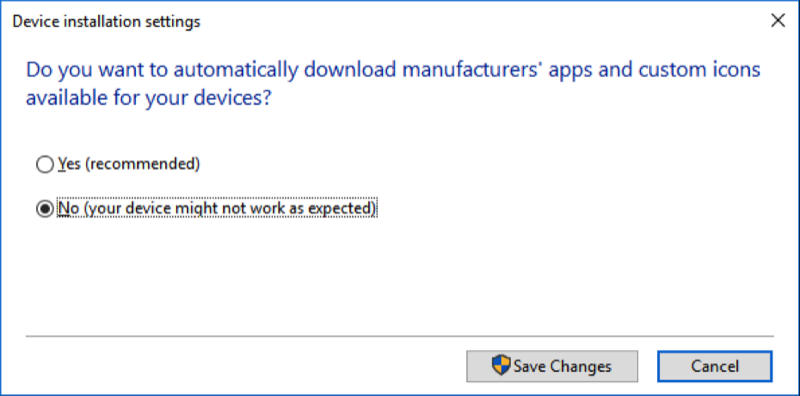
Figure 2. Turning off automatic driver installations.

Now click the "No" radio button and Save Changes. From now on (unless you change it back), Windows will no longer automatically try to install the drivers for new devices.

 This tip (13483) applies to Windows 10.

Author Bio

Barry Dysert

Barry has been a computer professional for over 35 years, working in different positions such as technical team leader, project manager, and software developer. He is currently a software engineer with an emphasis on developing custom applications under Microsoft Windows. When not working with Windows or writing Tips, Barry is an amateur writer. His first non-fiction book is titled "A Chronological Commentary of Revelation." ...

MORE FROM BARRY

Disabling Automatic Updates

If you don't like that Windows automatically downloads and applies updates in the middle of the night, you can gain some ...

Discover More

Deleting a Media Player Playlist

Most people like to keep their Windows Media Player organized. One way to maintain it is to keep track of the various ...

Discover More

PowerShell Input and Output

When dealing with a scripting language like PowerShell, one of the first things you need to learn is how to get data into ...

Discover More
More WindowsTips

Using Powercfg to Export and Import a Power Scheme

You can export to a file your power schemes and then import them later on. The only caveat is that you must be running as ...

Discover More

Specifying How Clicking Works

Do you want to fundamentally change how Windows responds to mouse clicking? You can do so by following the steps outlined ...

Discover More

Using Powercfg to Duplicate an Existing Power Scheme

The Powercfg utility allows you to control how power is used on your system. This tip shows you how to use the ...

Discover More
Comments

If you would like to add an image to your comment (not an avatar, but an image to help in making the point of your comment), include the characters [{fig}] (all 7 characters, in the sequence shown) in your comment text. You’ll be prompted to upload your image when you submit the comment. Maximum image size is 6Mpixels. Images larger than 600px wide or 1000px tall will be reduced. Up to three images may be included in a comment. All images are subject to review. Commenting privileges may be curtailed if inappropriate images are posted.

What is 4 + 7?

There are currently no comments for this tip. (Be the first to leave your comment—just use the simple form above!)


Newest Tips