You may have applications that you want to automatically start every time Windows is started. This is easy to do by using the Task Scheduler. Say that your program is called "C:\EXE\Monitor.exe" and you want it to start every time Windows is started.
First, you need to start the Task Scheduler. The easiest way to do this is to simply use the search capabilities of Windows. Search for "Task Scheduler" (without the quote marks), and then open it once it is located. Ensure that the selected node in the left vertical pane is "Task Scheduler Library." (See Figure 1.)
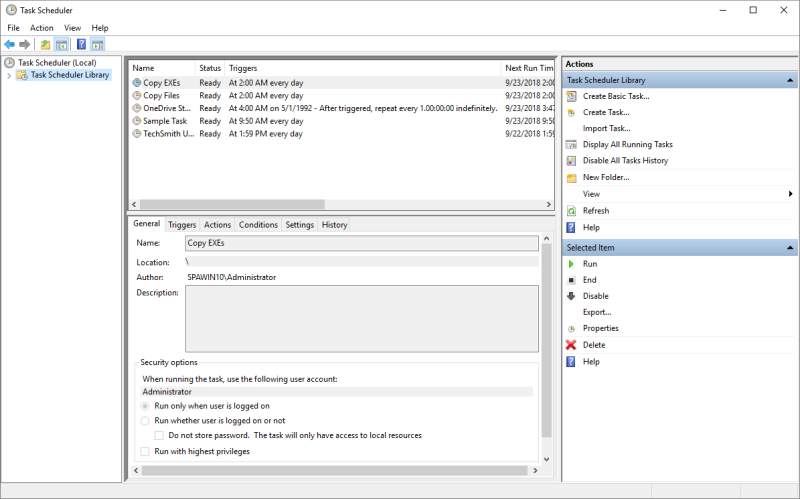
Figure 1. The Task Scheduler main screen.
This main screen is broken into five basic areas. The left vertical pane is the navigation pane, allowing you to create folders and sub-folders in which to keep your scheduled tasks. (I just use the default "Task Scheduler Library.") The top center pane lists all of the scheduled tasks in the node that's been selected in the navigation pane. Note the vertical and horizontal scroll bars on this pane, which implies that it contains a lot of information that you can scroll around to see. The bottom center pane lists the details of the task selected in the upper pane. It contains six tabs that are all related to the task selected in the upper pane. The right vertical pane is split into upper and lower areas. The upper area lets you perform actions on the library selected in the navigation pane and the lower area lets you perform actions on the task selected in the middle of the screen.
To create a scheduled task, select the node in the navigation pane where you want it to reside (again, I normally use the default "Task Scheduler Library") and then, in the upper-right area of the screen, click the "Create Basic Task" link. This starts a wizard that guides you through the creation of your task. Remember, we want to run the program called "C:\EXE\Monitor.exe" each time Windows starts. (See Figure 2.)
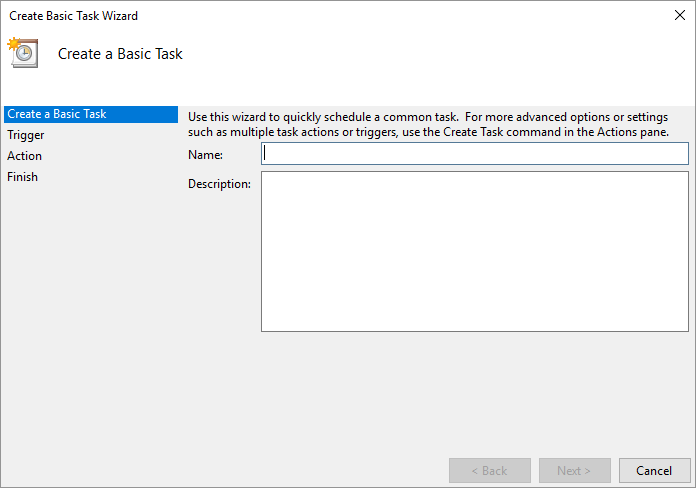
Figure 2. The Create Task Wizard first screen.
Type a name and a short description of what your program does, and then click Next. Windows displays the second step of the wizard. (See Figure 3.)
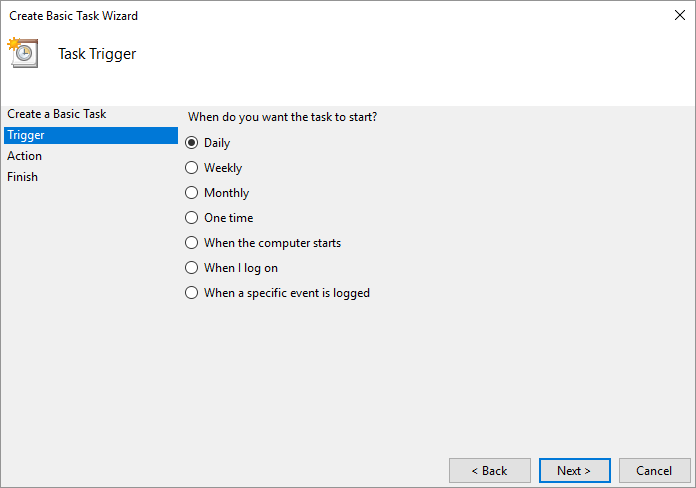
Figure 3. The Create Task Wizard second screen.
This second step is where you indicate when your program is going to run. Since we want the program to run when Windows starts, click the "When the Computer Starts" radio button. Click Next to move on to the third wizard step. (See Figure 4.)
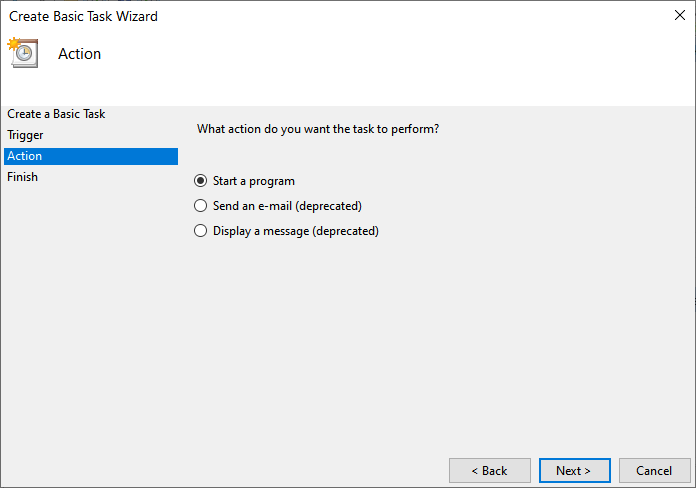
Figure 4. The Create Task Wizard third screen.
This third screen is where you indicate the action you want taken when the task runs. We want to have a program run, so you should click the "Start a Program" radio button. Click Next to move on to the fourth step. (See Figure 5.)

Figure 5. The Create Task Wizard fourth screen.
This fourth screen is where you provide the name of the program that's supposed to run. You can also supply arguments to the program as well as have it start in a particular directory. Type the program name and click Next. (See Figure 6.)
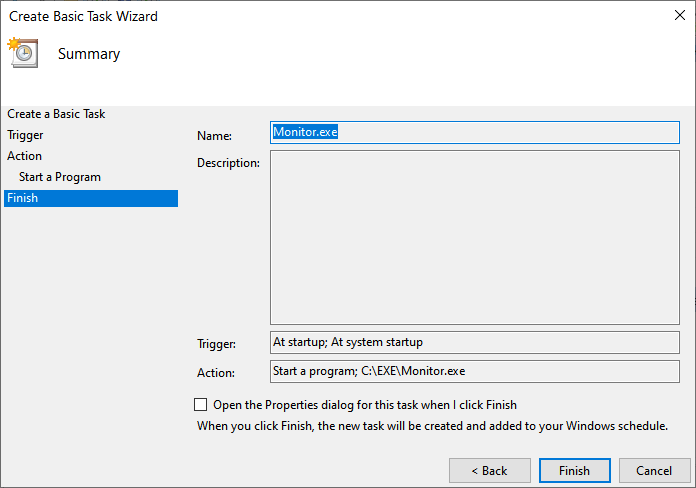
Figure 6. The Create Task Wizard summary screen.
This summary simply summarizes the information you've supplied on the previous screens. Assuming you're satisfied with everything, clicking the Finish button causes your scheduled task to be created. The task is then executed the next time you start Windows.
![]()
![]()
![]() This tip (11895) applies to Windows 7, 8, and 10.
This tip (11895) applies to Windows 7, 8, and 10.
Time is more than hours and minutes. How do you get the taskbar clock to show seconds?
Discover MoreIf you have vision impairments that affect your ability to use your computer, Windows 10's Ease of Access Center can help ...
Discover MoreScreen savers can be works of art to bring some aesthetics to your computer monitor. This tip tells you how to change ...
Discover MoreThere are currently no comments for this tip. (Be the first to leave your comment—just use the simple form above!)
Copyright © 2026 Sharon Parq Associates, Inc.

Comments