Many programs that you may run on your system are designed to create output for a printer. Windows can work with a wide array of printers, but you need to direct the operating system to actually use the printer.
It's pretty easy to add a printer to your system; you start from the Devices and Printers screen which is visible when you click the Start button and then click Devices and Printers on a Windows 7 system. If you are using Windows 10, display the Control Panel and click on View Devices and Printers under the Hardware and Sound heading. You may have to scroll down a bit to find the Printers section. (See Figure 1.)
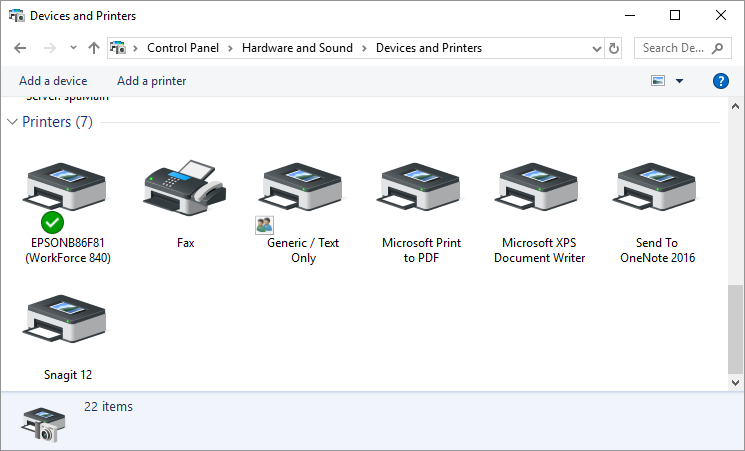
Figure 1. The Devices and Printers screen.
There is a good chance that your Devices and Printers screen already shows a number of different printers defined. If you see one that describes the printer you want to use, then you don't need to add a printer driver. (Makes sense, huh?) If you don't see your printer in the screen, then you will need to add the printer.
Windows classifies printers based on how they are connected to your computer. A printer that is physically connected to your computer is considered a local printer and a printer that is not physically connected is generally referred to as a network printer. The steps you go through to add your printer depend on the type of printer you are trying to connect. If you have a local printer that is connected to your computer using a USB cable, generally all you need to do is turn the printer on and then plug in the USB cable—Windows discovers the printer and takes care of setting everything up. If you, however, have a local printer that is connected using some other type of cable, then you'll need to follow these steps on a Windows 7 system:
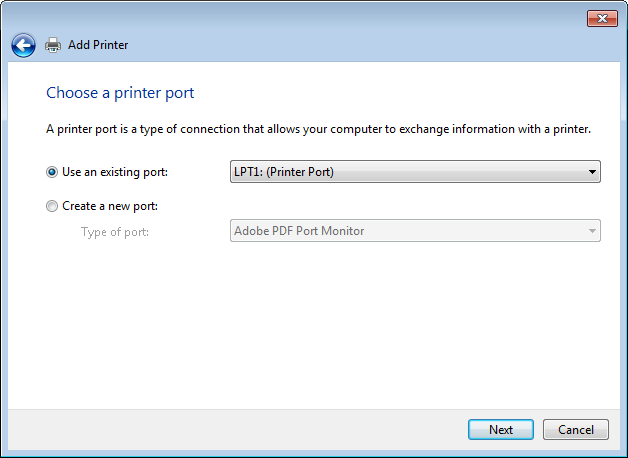
Figure 2. The second step of the Add a Printer wizard.
On a Windows 10 system, click the radio button next to Add a Local Printer or Network Printer with Manual Settings and click the Next button. (See Figure 3.)
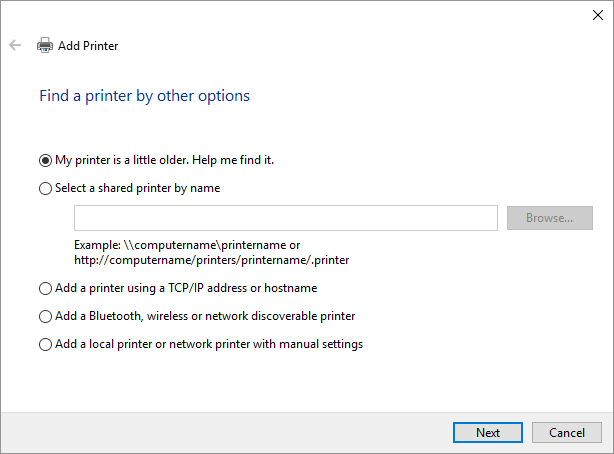
Figure 3. The Find a Printer by Other Options screen.
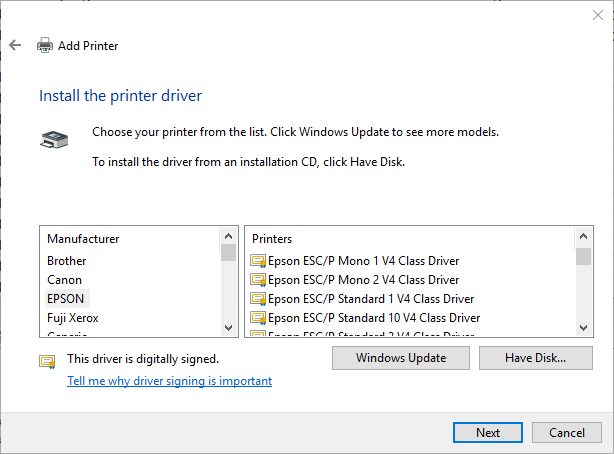
Figure 4. The third step of the Add a Printer wizard.
The other category of printer that can work with Windows is a network printer. The steps to add this type of printer are a bit different:
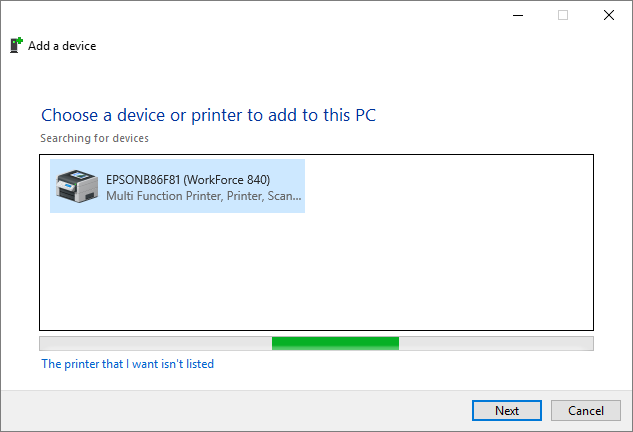
Figure 5. The add a network printer step of the Add a Printer wizard.
You should note that just because Windows can detect network printers doesn't mean that you will be able to connect to each of those printers. In step 5, when Windows attempts to connect to the printer, it may be unsuccessful if the printer is incompatible with Windows or if there are restrictions on how the printer can be used over a network. If you run into such problems, it is best to talk with your network administrator to get them resolved.
![]()
![]() This tip (10719) applies to Windows 7 and 10.
This tip (10719) applies to Windows 7 and 10.
Windows 10 allows for quick and easy printing of your photos at standard photo sizes. You can start printing your photos ...
Discover MoreMany times, it helps to have a PDF of a file that can be distributed electronically when physical printouts are not ...
Discover MoreWindows allows you to define many printers that can be used with your system. Chances are good that one of those printers ...
Discover MoreThere are currently no comments for this tip. (Be the first to leave your comment—just use the simple form above!)
Copyright © 2026 Sharon Parq Associates, Inc.
Comments