Changing your computer's name is a simple task that can make your personal computer a bit more, well, personal. To make the change you'll need to display the System Properties dialog box:
Windows displays the System Properties dialog box; make sure the Computer Name tab is displayed. (See Figure 1.)
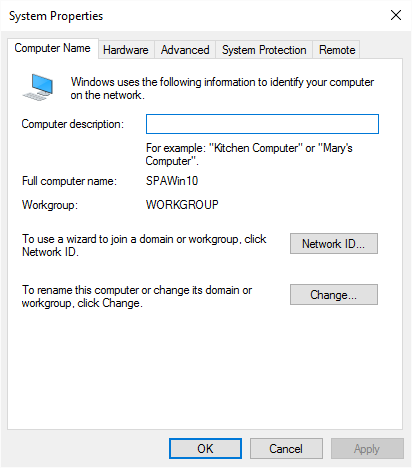
Figure 1. The Computer Name tab of the System Properties dialog box.
To change the name of your computer, click the Change button. Windows displays the Computer Name/Domain Changes dialog box. (See Figure 2.)
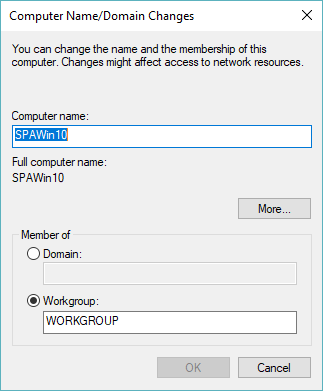
Figure 2. The Computer Name/Domain Changes dialog box.
To change your computer name, replace the contents of the Computer Name field and click OK. You will need to reboot your computer for the name to go into full effect.
Note that you may not have permission to change the name of a company computer. And even if you do, you likely don't have permission to change the record in the domain name server. To change the name of your computer on your company's network, you will probably need to get your network administrator involved.
![]()
![]()
![]() This tip (5830) applies to Windows 7, 8, and 10.
This tip (5830) applies to Windows 7, 8, and 10.
The orientation of your screen is not limited to the default orientation when you connect it to your computer. You can ...
Discover MorePasswords are a great way to protect the content on our computers. What if you want to login to your system without using ...
Discover MoreThe Start menu in Windows 10 allows for you to customize what appears there, such as tiles and recently used apps. You ...
Discover MoreThere are currently no comments for this tip. (Be the first to leave your comment—just use the simple form above!)
Copyright © 2026 Sharon Parq Associates, Inc.

Comments