You typically have a picture associated with your account. You see this picture on the Welcome screen and when you click the Start button. You can use a Windows-supplied picture or use your own. Changing your picture is one of the simplest things to do in Windows, so you might want to change your picture periodically to make life interesting.
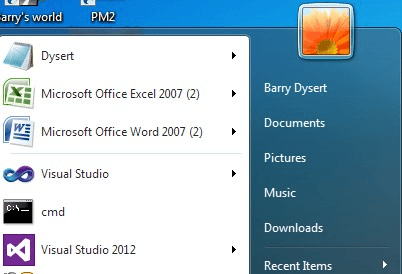
Perhaps the easiest way to change your picture—if you are using Windows 7—is to click the Start button and then click on your existing picture at the top right of the Start menu. The following figure is a cropped version of what my Start menu looks like. Note that my current picture is an orange flower. (See Figure 1.)

Figure 1. The Start menu showing an account picture.
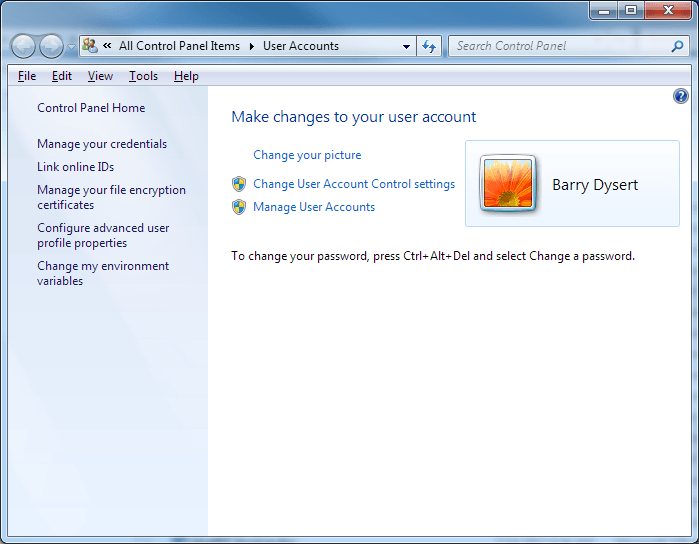
When I click the picture, Windows displays the User Accounts screen in the Control Panel. (See Figure 2.)

Figure 2. The User Accounts screen in the Control Panel.
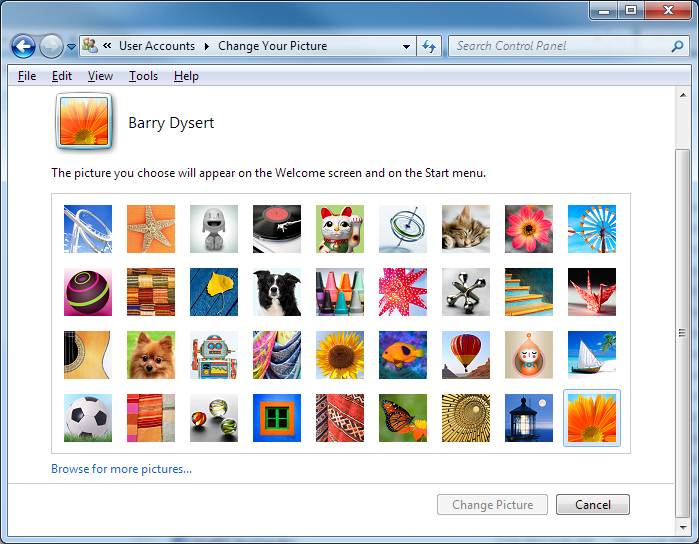
From here I click the Change Your Picture link and Windows shows me all sorts of pictures from which I can choose. (See Figure 3.)

Figure 3. Picking an account picture.
If you click on one of the stock pictures and then click the Change Picture button, your picture is immediately changed. However, if you want to set your own picture instead of using one of the stock ones, you should click the Browse for More Pictures link in the lower left corner of the screen. (You might want to actually use a picture of you for your account.) This opens a browser window, enabling you to look anywhere for your own picture. When you find one you want to use, click the picture and click the Open button. (You can also double-click the desired picture.) Your picture is immediately changed.
The general technique on how you change your account picture is much the same in Windows 8 and Windows 10 as it was in Windows 7. The idea is that you need to get to the Accounts screen where you can actually make the change.
To get to the proper place in Windows 8, display the Start screen and then right-click on the account picture in the upper-right corner of the screen. You then see a Context menu from which you can choose Change Account Picture.
If you are using Windows 10, display the Start menu and right-click on the account picture at the top of the menu area. In the resulting Context menu, choose Change Account Settings.
In both Windows 8 and Windows 10 these steps lead to the Accounts screen. You can then use the controls on the screen (which are very similar to those in Windows 7) to specify what you would like to use as your account picture.
![]()
![]()
![]() This tip (3583) applies to Windows 7, 8, and 10.
This tip (3583) applies to Windows 7, 8, and 10.
Part of managing a computer system that is shared by multiple people is to keep track of all the user accounts on that ...
Discover MoreYou can switch between users (and come back) without having to close down your current workspace. This tip tells you how ...
Discover MoreTo switch users without going through the lengthy reboot process, just sign out. It's not too obvious how to do this, but ...
Discover MoreThere are currently no comments for this tip. (Be the first to leave your comment—just use the simple form above!)
Copyright © 2026 Sharon Parq Associates, Inc.
Comments