Jump lists occur in four different places in Windows. The first place you'll find a jump list is in the Start menu. Right-click it, and you'll see the jump list displayed. (See Figure 1.)
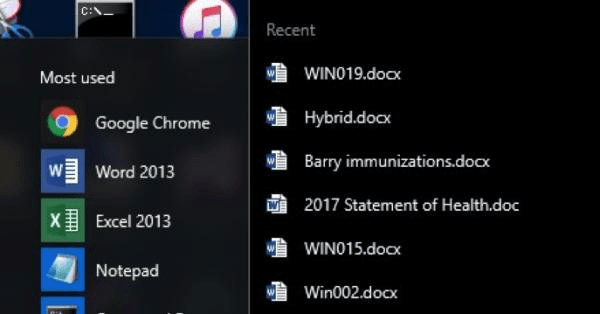
Figure 1. Right-click a Start menu item to see a jump list.
The second place you can find a jump list is in the Taskbar. All you need to do is right-click an item on the Taskbar and, if the application makes recent places available, you'll see the jump list. (See Figure 2.)
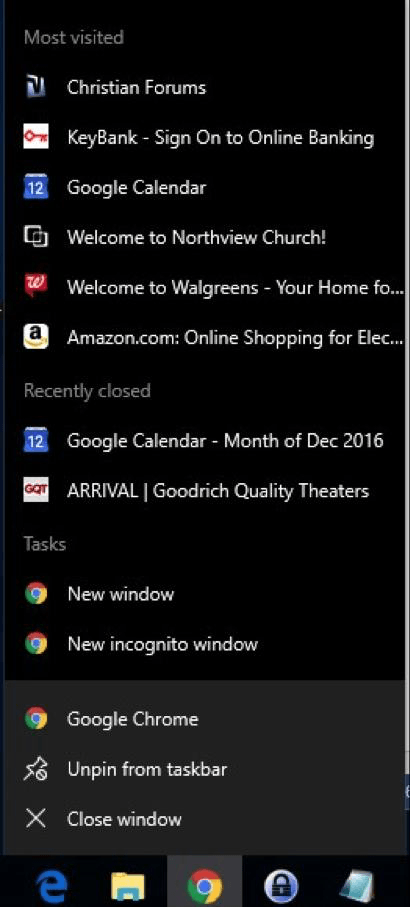
Figure 2. Right-click a Taskbar item to see a jump list.
A jump list can be found in a third place: File Explorer. All you need to do is to click the File tab on the File Explorer ribbon and you'll see the jump list pop into view. (See Figure 3.)
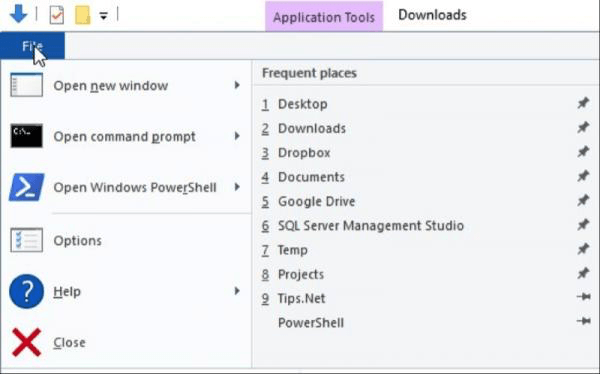
Figure 3. Click the File menu item of File Explorer to see a jump list.
The fourth place for a jump list is also in File Explorer. Click the Quick Access option at the left of the screen and you'll see the jump list "jump" into view. (See Figure 4.)
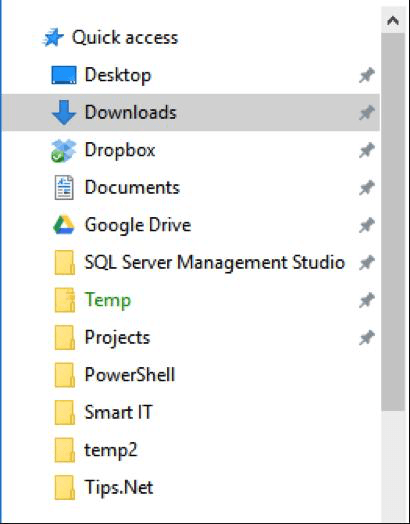
Figure 4. The Quick Access section of File Explorer holds a jump list.
The jump lists in these four places are maintained as shortcuts in three different disk directories:
You can browse to these folders and make any changes to the shortcuts they contain.
To clear the jump lists from the Start menu and the Taskbar, right-click an open area of the desktop and select the Personalize option. In the window that appears, click Start. Scroll the right side of the window down until you see the button labeled "Show Recently Opened Items in Jump Lists on Start or the Taskbar." Click the button off to disable those jump lists. (See Figure 5.)
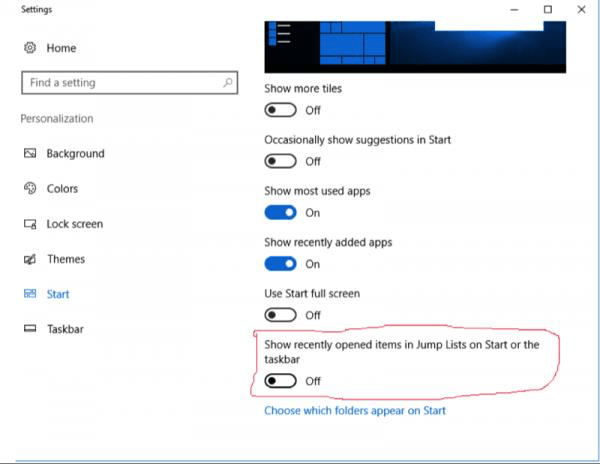
Figure 5. Turning off jump lists on Start and the Taskbar.
To clear the Jump lists from File Explorer, launch File Explorer and go to View | Options. You'll see the Folder Options dialog box. (See Figure 6.)
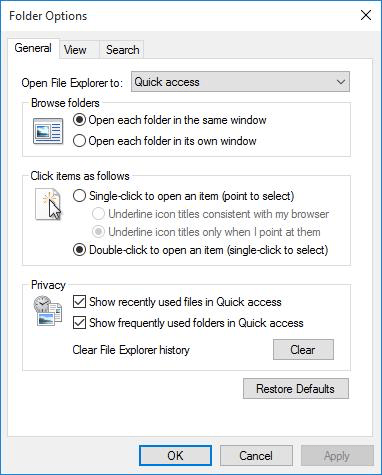
Figure 6. The Folder Options dialog box.
The bottom group contains the Privacy options. Here you can individually set whether to show recently used files and/or folders in Quick Access, and you can clear File Explorer history by clicking the Clear button. Perform the desired actions and click OK.
![]()
![]()
![]() This tip (1910) applies to Windows 7, 8, and 10.
This tip (1910) applies to Windows 7, 8, and 10.
System Protection is an automatic feature of Windows. It uses restore points that can be a virtual lifesaver if an ...
Discover MoreWindows provides a special menu that allows you to easily access many common tools in the operating system. Here's the ...
Discover MoreOften when we are using our computers, we need to remember certain steps that we take, either for ourselves or to show ...
Discover MoreThere are currently no comments for this tip. (Be the first to leave your comment—just use the simple form above!)
Copyright © 2026 Sharon Parq Associates, Inc.

Comments