Changing the Program that Opens a File

Written by Allen Wyatt (last updated August 2, 2021)

Brian has two versions of Excel installed—2007 and 2016. Somehow Excel 2007 has become the default program for opening .XLSX and .XLSM files. The majority of Brian's work is done with Excel 2016 and that is the one he wants for the default. Brian wonders how to change it without uninstalling either version.

When you double-click on a file in Windows, it determines which program to use in order to open the file by consulting an internal "association" table. This table is basically a small database that says "if a file has ABC extension, then use program XYZ to open it."

In Brian's case, Windows has Excel 2007 associated with .XLSX and .XLSM files—when double-clicked, it is the Excel 2007 program that is called in to action. You can easily change the program associated with a particular file extension by following these steps if you are using Windows 7:

  1. Use the Windows Explorer (Win+E) to locate either a .XLSX or .XLSM file on your system.
  2. Right-click the file. Windows displays a Context menu.
  3. Choose Open With. Windows displays the Open With dialog box. (If, instead, you see a secondary set of options, select Choose Default Program to display the Open With dialog box.) (See Figure 1.)
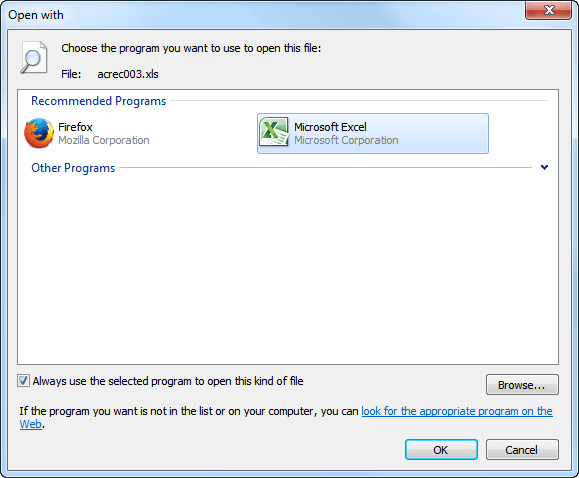
  4. Figure 1. The Open With dialog box.

At the top of the dialog box you see some variation of Excel as the recommended program with which to open the file. The recommendation is always the current program associated with the type of file on which you right-clicked in step 2.

What you want to do is to find the program for Excel 2016. If it isn't visible on the screen (either in the Recommended Programs area or the Other Programs area), click the Browse button and navigate until you find the program file—probably in the c:\Program Files\Microsoft Office\Office16\ folder.

Select the file and then make sure the Always Use the Selected Program to Open this Kind of File check box is selected. When you click OK, Windows changes the association and Excel 2016 will now always open when you double-click that type of file.

The general procedure just described for Windows 7 systems is essentially the same with Windows 8 and 10 systems, but the steps and interface are different.

  1. Use the File Explorer (Win+E) to locate either a .XLSX or .XLSM file on your system.
  2. Right-click the file. Windows displays a Context menu.
  3. Choose Open With. Windows displays a small prompt indicating the program currently associated with the file type. (See Figure 2.)
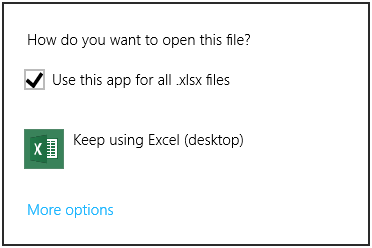
  4. Figure 2. Information about the program associated with a file type.

  5. Make sure the Use this App for All .XLSX Files check box is selected.
  6. Click More Options. Windows expands the number of programs shown.

At this point what you are seeing is essentially the programs (or "apps") that Windows knows about on your system. You need to find the program for Excel 2016. It may be visible in the list, or you may need to click the Look for Another App On this PC option, at the very bottom of the program list. Select the correct program and Windows updates the association.

Regardless of your version of Windows you will, of course, need to perform these steps for each file type understood by Excel: .XLSX, .XLSM, .XLS, .XLSB, .XLTX, etc. Because there are so many associations to change, you might find the second way of changing them. Follow these steps if you are suing Windows 7 or Windows 8:

  1. Display the Control Panel.
  2. Click the Programs heading.
  3. With Windows 7 and Windows 8, click the Make a File Type Always Open in a Specific Program link, under the Default Programs heading. The dialog box now shows all the file associations on your system. (See Figure 3.)
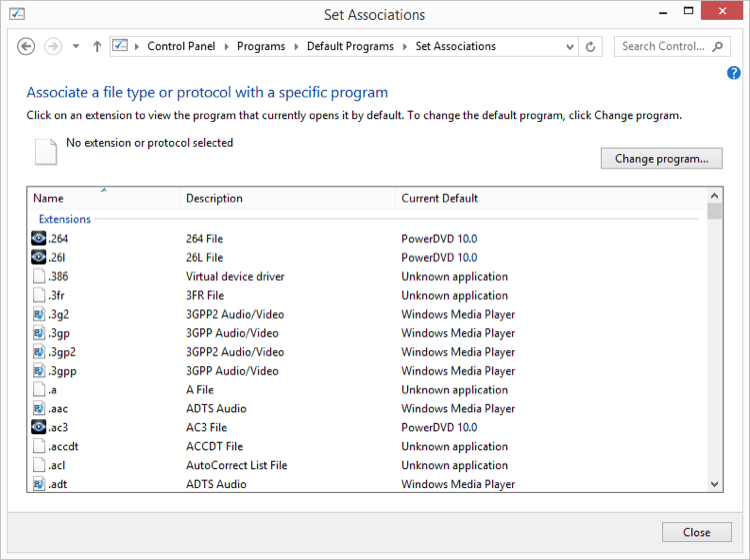
  4. Figure 3. The Set Associations list.

  5. Scroll through the list and click once on the association you want to change. (In other words, look for and click once the filename extension you need to change.)
  6. Click the Change Program button. Windows displays the Open With dialog box (Windows 7) or shows the current program association (Windows 8), as discussed earlier in this tip.
  7. Use the available controls to locate and specify Excel 2016 as the desired program.
  8. Repeat steps 4 through 6 for each of the other associations you want to modify.
  9. Click Close.

With Windows 10 the second method is slightly different. To set which app you want associated with a file type follow these steps:

  1. Click on the Start button in the bottom left corner. Windows displays the Start screen.
  2. Click on the Settings button (it looks like a small gear). Windows displays the Settings dialog box.
  3. Click on the Apps link. The Settings window will open the Apps & Features portion of the Settings Window.
  4. In the list to the left click on the Default Apps link. This will show the Default Apps portion of the Settings Window.
  5. Scroll toward the bottom of and click the Choose Default Apps By File Type. This will display the Choose Default Apps By File Type section of the Settings Window. (See Figure 4.)
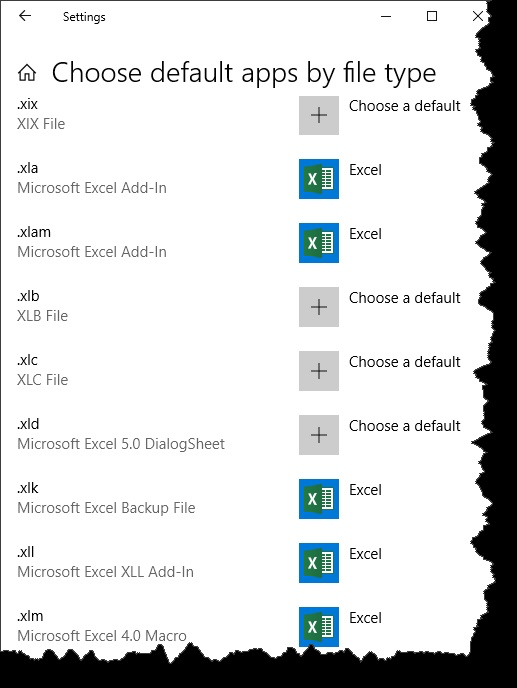
  6. Figure 4. The Choose Default Apps By File Type list.

  7. Scroll through the list and click once on the association to the right of the file extension you want to change. Clicking will open a context menu.
  8. From the Choose an App context menu locate and specify Excel 2016 as the desired program.
  9. Repeat steps 4 and 5 for each of the other associations you want to modify.
  10. Close the Settings window.

 This tip (13379) applies to Windows 7, 8, and 10.

Author Bio

Allen Wyatt

With more than 50 non-fiction books and numerous magazine articles to his credit, Allen Wyatt is an internationally recognized author. He is president of Sharon Parq Associates, a computer and publishing services company. ...

MORE FROM ALLEN

Hiding and Unhiding Rows

When building a worksheet, you may need to hide some of the rows or unhide other, previously hidden, rows. It's easy to ...

Discover More

Adding a User Account

Windows allows you to set up individual user accounts in case there are multiple people using the same computer. Here's ...

Discover More

Using the MROUND Worksheet Function

If you want to round a value to some multiple of a whole number, you'll want to become familiar with the MROUND function. ...

Discover More
More WindowsTips

Improve Performance by Turning Off 3D Effects

Windows does a lot of nuancing to provide the user with a pleasing visual experience. All this attention to detail, ...

Discover More

Changing the Start Screen's Theme

You'll spend a lot of time viewing the Start screen in Windows. If you want to change up things, you can modify which ...

Discover More

Change the Default Name for New Folders

By default, when a new folder is created in Windows 10, the folder is titled "New Folder." Using the Registry, you can ...

Discover More
Comments

If you would like to add an image to your comment (not an avatar, but an image to help in making the point of your comment), include the characters [{fig}] (all 7 characters, in the sequence shown) in your comment text. You’ll be prompted to upload your image when you submit the comment. Maximum image size is 6Mpixels. Images larger than 600px wide or 1000px tall will be reduced. Up to three images may be included in a comment. All images are subject to review. Commenting privileges may be curtailed if inappropriate images are posted.

What is two less than 9?

There are currently no comments for this tip. (Be the first to leave your comment—just use the simple form above!)


Newest Tips