Files have several attributes that are used to control how the file is used within Windows. One of the more important ones is known as the "read-only" attribute. When this is set, you can't accidentally edit the file and overwrite it. Why? Because when it is set, Windows understands that the file can only be read or viewed, not modified.
To set the file's read-only attribute, use Windows Explorer (Windows 7) or File Explorer (Windows 8 and Windows 10) to navigate to the file. Once you can see it, right-click the file and then choose Properties from the resulting Context menu. Windows displays the Properties dialog box for the file. (See Figure 1.)
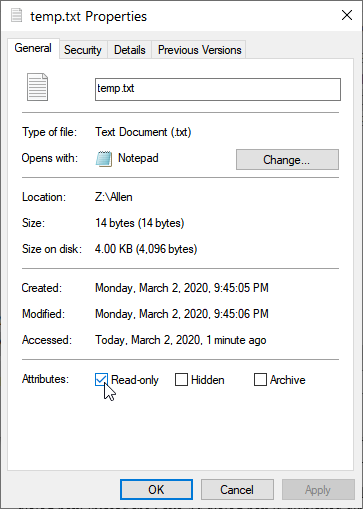
Figure 1. The Properties text box for a file.
Note the Read-Only checkbox, near the bottom of the Properties dialog box. You can set or clear this checkbox according to your desires for the file. When you click OK or Apply, the attribute is changed as you direct.
After the read-only attribute is set, you can try to edit a read-only file, but you will be prevented from saving it. For example, after making my Temp.txt file read-only I opened the file and edited it. When I tried to save the file, I got notification that the operation couldn't be completed because Temp.txt was read-only. (See Figure 2.)
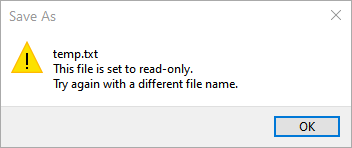
Figure 2. Trying to save a read-only file.
Note that most programs, if they detect that the read-only attribute is set, will allow you to do a "Save As" operation. This means that the file can be saved under a different name, but your original file remains undisturbed.
Marking a file as read-only also affects how you delete files. Most of the time, when you choose to delete a read-only file Windows will dutifully move it to the Recycle Bin. If you choose to empty the Recycle Bin, however, Windows asks you to confirm that you really want to delete the file. (See Figure 3.)
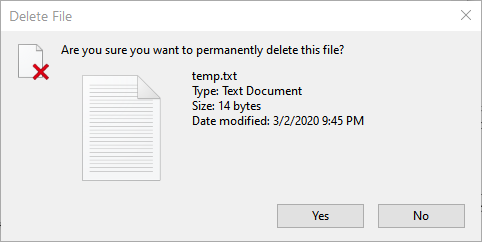
Figure 3. Trying to delete a read-only file.
If you want to really delete the read-only file, click Yes. If you click No (or otherwise close the dialog box), the file is left in the Recycle Bin.
![]()
![]()
![]() This tip (12851) applies to Windows 7, 8, and 10.
This tip (12851) applies to Windows 7, 8, and 10.
Displaying all the files a folder contains is an easy task in Windows. One easy way to do it is by using the Windows ...
Discover MoreMany times, the automatically created Thumbs.db file is more trouble than it's worth. If you want to stop Windows from ...
Discover MoreIf you schedule Robocopy operations, you may want to maintain log files of what happened. In this case, getting familiar ...
Discover MoreThere are currently no comments for this tip. (Be the first to leave your comment—just use the simple form above!)
Copyright © 2026 Sharon Parq Associates, Inc.

Comments