The Downloads folder is, of course, the folder into which your downloaded files are placed, by default. It typically resides at the following location on your system (replace <user> with the appropriate user name on the system):
C:\Users\<user>\Downloads
You may want to move your downloads folder to somewhere else—perhaps to another drive to free up some disk space on drive C:. To do this, use Windows Explorer (Windows 7) or File Explorer (later versions of Windows) to navigate to the folder that contains the Downloads folder. For example, on my system I navigated to the following directory:
C:\Users\bdysert\
I could then see the Downloads folder visible in the Explorer window. I right-clicked the folder and chose Properties from the resulting Context menu. In response, Windows displayed the Downloads Properties dialog box. (See Figure 1.)
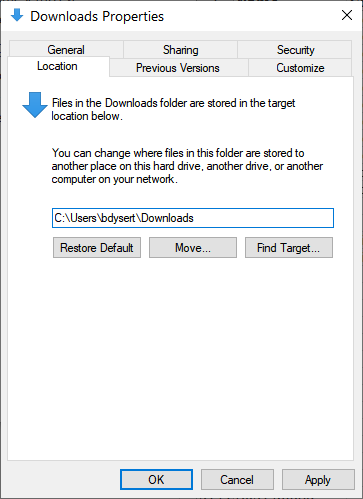
Figure 1. Changing the location of the Downloads folder.
On the Location tab I can specify a path to the folder where I want downloads stored. When I click OK, Windows asks me if I want to move the existing files (the ones I previously downloaded) to the new location. Assuming you're moving the folder to free up disk space on C: you would click Yes to this prompt and your Downloads folder and all that it contains will be moved.
Note that if you ever want to move things back to their default location of "C:\Users\<user>", you can go through the same procedure, but click the Restore Default button on the Location tab of the Downloads Properties dialog box, and everything will be moved back.
![]()
![]()
![]() This tip (12832) applies to Windows 7, 8, and 10.
This tip (12832) applies to Windows 7, 8, and 10.
If you computer communicates over a network or over the Internet, it uses an IP address. This tip explains what an IP ...
Discover MoreMicrosoft's Edge Chromium allows for a powerful new feature called Profiles. These allow for one web browser to be used ...
Discover MoreDo you need to disable printing within Edge Chromium? You can use the Registry Editor to disable or enable printing.
Discover More2020-07-20 09:55:53
Henry Noble
A slightly different procedure is a bit quicker.
Instead of burrowing down in the directory tree to find the user's Downloads file, simply go to the top of the navigation pane (the panel on the left).
A shortcut to Downloads should be there under Quick Access, This PC, or both.
Open the properties of the shortcut, select the Location tab, then make any path adjustments as Barry describes.
Copyright © 2026 Sharon Parq Associates, Inc.

Comments