Just as you can associate an unused drive letter with a network drive, so too can you break that association. Probably the simplest way to do it—if you are using Windows 7—is through Windows Explorer. Launch Windows Explorer and, from its menu, select Tools | Disconnect Network Drive: (See Figure 1.)
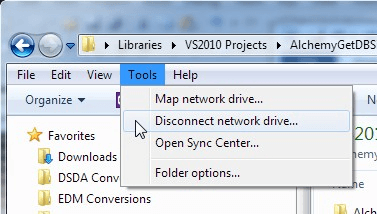
Figure 1. Disconnecting a network drive in Windows 7.
In Windows 8 or Windows 10 you can accomplish the same thing by launching a File Explorer window. At the left side of the window click the Computer group or This PC group. At the top of the window, in the ribbon area, make sure the Computer tab is selected. Click the down-arrow next to the Map Network Drive tool and then click Disconnect Network Drive. (See Figure 2.)
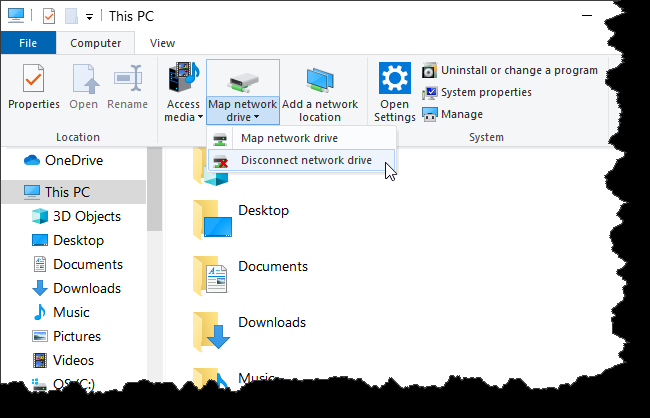
Figure 2. Disconnecting a network drive in Windows 810.
Regardless of the version of Windows you are using, you are presented with a dialog box that shows all of the mapped drives on your system. Click the one you want to disconnect and then click OK. The association is immediately broken.
![]()
![]()
![]() This tip (12677) applies to Windows 7, 8, and 10.
This tip (12677) applies to Windows 7, 8, and 10.
All objects on your computer (e.g., files) have permissions that allow or deny various types of access. This tip shows ...
Discover MoreWindows Explorer is a powerful utility to use for navigating among your files and folders. And it can be customized a ...
Discover MoreIt's simple to use Robocopy when dealing with entire directories. Dealing with directories is what it does best! This top ...
Discover MoreThere are currently no comments for this tip. (Be the first to leave your comment—just use the simple form above!)
Copyright © 2025 Sharon Parq Associates, Inc.

Comments