It's possible to change a Windows user account type at any time. For example, you may want to upgrade a standard account to an administrator account so that you can use that account to manage the system. Or you may want to change a guest account to a standard account when it's realized that a person will be using the system consistently for a long time.
To change a user account type, you must have administrator privileges. (This means that you must be logged into the system with an account that is set up as an Administrator account type.) In Windows 10, follow these steps:

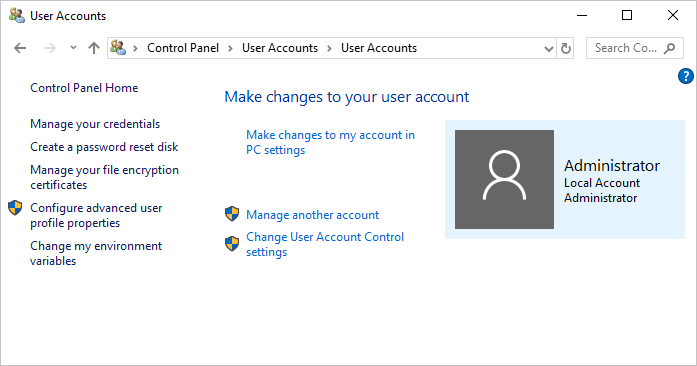
Figure 1. Choosing what to do with user accounts (Windows 10).

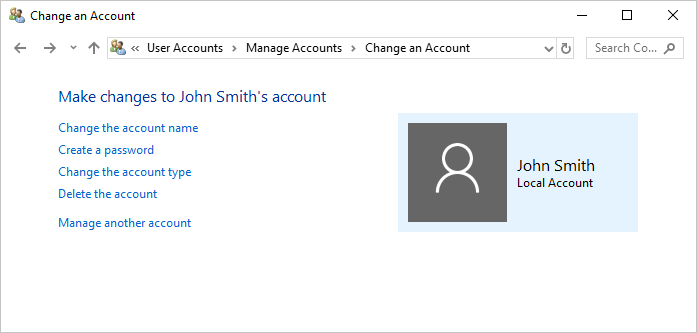
Figure 2. The Change an Account screen.

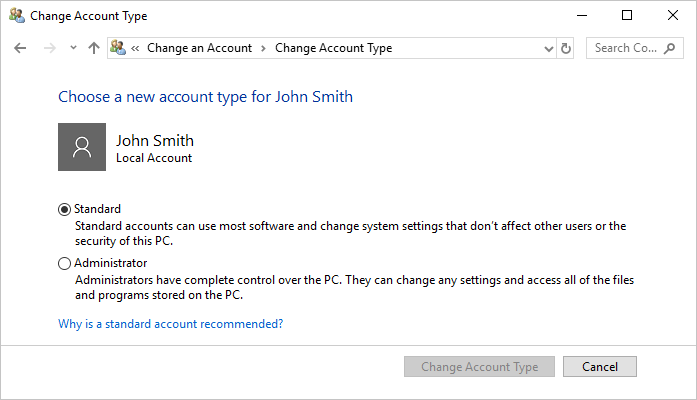
Figure 3. The Change Account Type screen.
At this point, select the type of account that user is to have, and then click Change Account Type. The user's account is immediately affected.
To get to this screen using Windows 7 go to Start | Control Panel | User Accounts and Family Safety | User Accounts. Windows displays a screen that shows information about your user account.
Click the Manage Another Account link and Windows displays the Manage Accounts screen, which shows all the accounts on the current system.
To get to this screen using Windows 8, follow these steps:
![]()
![]()
![]() This tip (12461) applies to Windows 7, 8, and 10.
This tip (12461) applies to Windows 7, 8, and 10.
Add an extra level of security to your computer to protect your data. A PIN allows for added peace of mind and use.
Discover MoreWindows allows you to set up individual user accounts in case there are multiple people using the same computer. Here's ...
Discover MoreYou may want to customize your account so that it uses a picture of your own choosing. This tip tells you how to change ...
Discover MoreThere are currently no comments for this tip. (Be the first to leave your comment—just use the simple form above!)
Copyright © 2025 Sharon Parq Associates, Inc.
Comments