There are several pictures and slide shows that come with Windows, thus letting you change your desktop background ("wallpaper") from the default. You are not limited to what comes with Windows, however. You can use your own pictures as wallpaper just as well.
Almost any type of digital image can be used as wallpaper, e.g., jpg, bmp, png, etc. Perhaps the simplest way to change the background is to use Windows Explorer to navigate to the picture file you wish to use for your background. Right-click on this file and choose Set as Desktop Background from the Context menu.
There are other ways to set the background image as well, but the steps vary a bit depending on the version of Windows you are using.
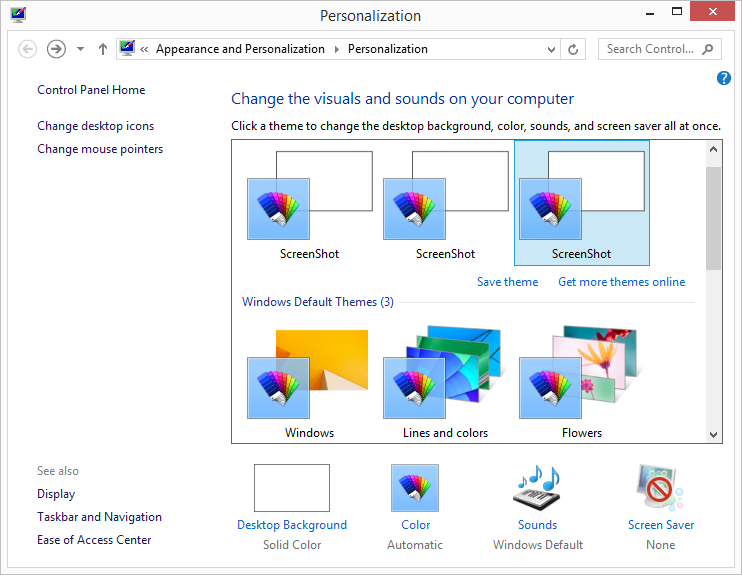
You can change the background by right-clicking on an empty spot on the desktop and choosing Personalize from the Context menu, then clicking Desktop Background. Or, if you prefer, you can get to the same place by displaying the Control Panel and clicking the Change Desktop Background link under the "Appearance and Personalization" category. Either way, you should see the Personalization window. (See Figure 1.)

Figure 1. The Personalization window.
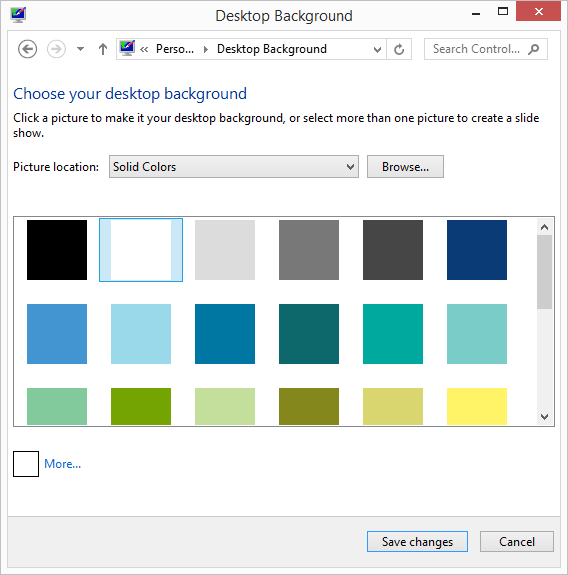
By clicking the Desktop Background link in the lower-left area, you'll be taken to the Desktop Background window. (See Figure 2.)

Figure 2. The Desktop Background window.
From here you would click the Browse button and navigate to the picture(s) you want to use for your wallpaper. You can create a slide show of your pictures by selecting more than one. Clicking Save Changes sets the wallpaper to the picture(s) you chose.
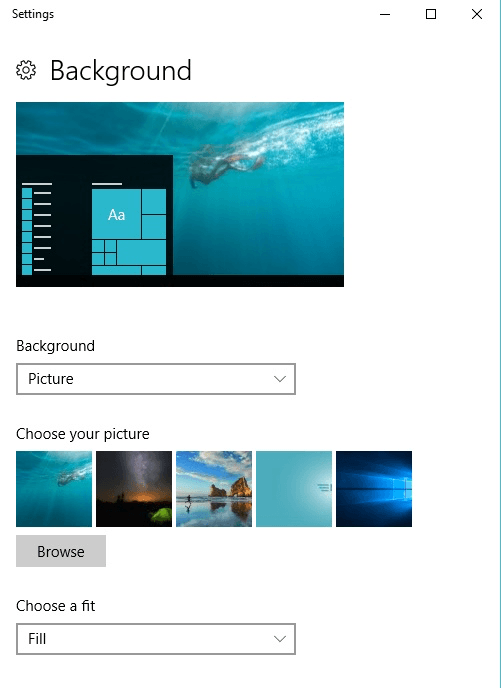
Things changed a bit in Windows 10. You can no longer get to the proper area by using the Control Panel. Instead, just right-click an empty spot on the desktop and, from the resulting Context menu, choose Personalize. Windows displays the Settings dialog box. (See Figure 3.)

Figure 3. Changing your background image in Windows 10.
If necessary, you should use the Background drop-down list to choose Picture. When you do, you can then click the Browse option. This allows you to navigate to the picture(s) you want to use for your wallpaper. You can create a slide show of your pictures by selecting more than one. Clicking Save Changes sets the wallpaper to the picture(s) you chose.
When you are done changing your wallpaper, you can dismiss the Settings dialog box.
![]()
![]()
![]() This tip (12117) applies to Windows 7, 8, and 10.
This tip (12117) applies to Windows 7, 8, and 10.
When you work on your computer late at night the glow from your computer monitor can affect your sleep. Why not setup ...
Discover MoreIt may not always be a good thing to have Windows automatically restart your computer after an update. This tip tells you ...
Discover MoreWindows 10 includes many features that are not enabled by default. Discover how to turn on or off the optional features ...
Discover MoreThere are currently no comments for this tip. (Be the first to leave your comment—just use the simple form above!)
Copyright © 2025 Sharon Parq Associates, Inc.
Comments