It's a simple matter to have a batch file run at a scheduled time. In fact, you can run any program you wish at a scheduled time. You use the Task Scheduler, which is a utility built into Windows that allows you to schedule tasks. How you start the Task Scheduler depends on the version of Windows you are using.
Once started, click the Task Scheduler Library option in the left pane. (See Figure 1.)
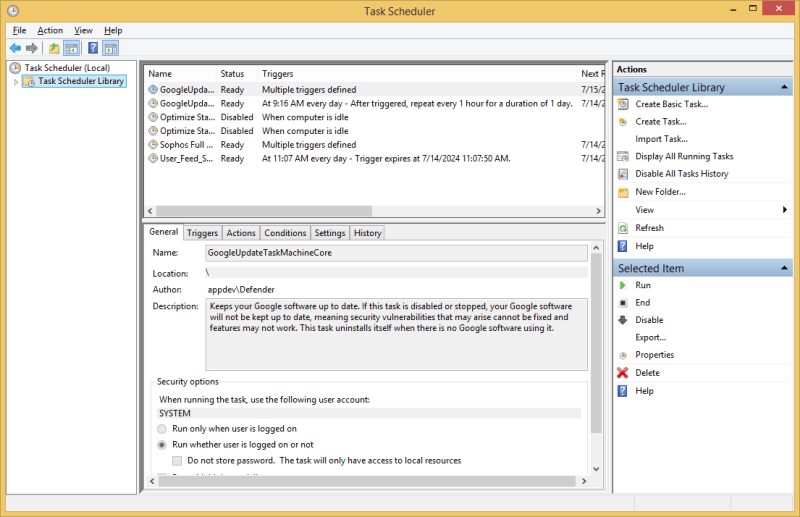
Figure 1. The Task Scheduler main screen.
The main screen is essentially broken down into four areas. There is a vertical pane on the left which serves as a navigation pane if you separate your tasks into different folders. There is a vertical pane on the right which contains two areas. The top one gives you access to Actions that can be performed on the navigation item selected in the left pane. The bottom area of the right vertical pane gives you access to actions that can be performed on the task that's selected in the middle area of the screen.
This middle area is the fourth area and it, too, is broken into two horizontal areas. The top horizontal area lists the names of the scheduled tasks, their status, what triggers them, and several other items. The bottom horizontal area shows the details of whatever task is selected above.
Let's say that you want to create a task to run a batch file to synchronize two folders, and that you want this task run every day at 2:00 am. You start by clicking the "Create Basic Task" option in the top area of the right vertical pane. This launches the Create Basic Task wizard, where you can start to fill in your information. (See Figure 2.)
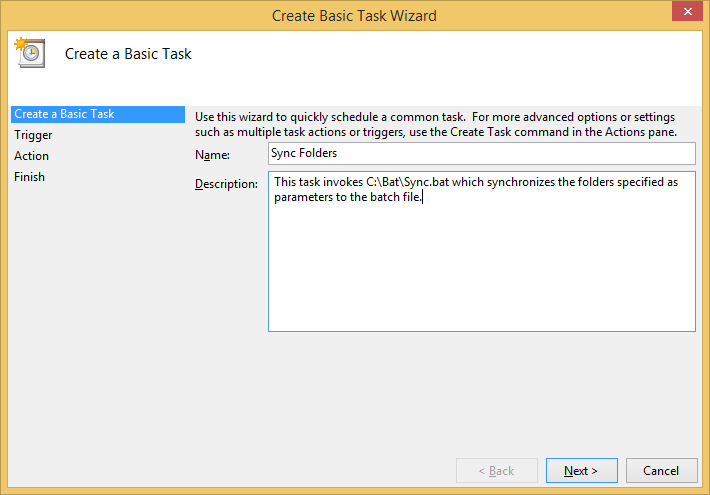
Figure 2. The Create Basic Task Wizard dialog box.
When supplying a name and description for the task, it is the name that is key. (It is mandatory, while the description is optional.) Try to make the name of your task as descriptive as possible, especially within the first several characters. This is so that you'll later be able to easily find it from the Task Scheduler's main screen.
After filling in the name and description, click the Next button, which takes you to step 2. (See Figure 3.)
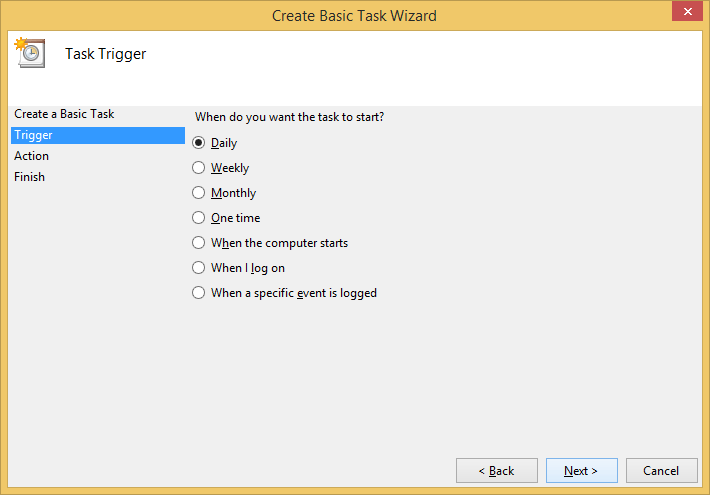
Figure 3. Creating a basic task, step 2.
Step 2 is to define what will trigger your task to start. You have choices among several types of triggers. You can trigger your task based on a schedule (Daily, Weekly, Monthly, or One Time), when the computer starts, when a user logs on to the system, or when a particular event is logged in the system event log. Since I want my task to run every day at 2:00 am, I choose the Daily radio button.
Clicking Next at this point takes you to the third step of the wizard. (See Figure 4.)
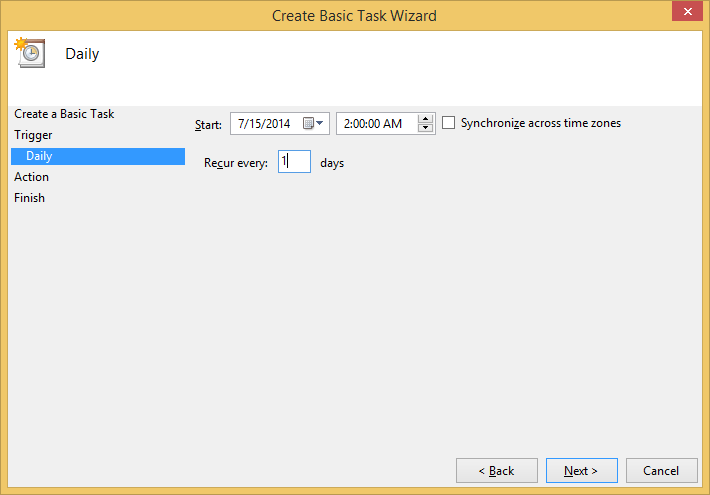
Figure 4. Creating a basic task, step 3.
Here you are prompted for the criteria specific to whatever trigger you chose. Since I chose "Daily," I am prompted for the date/time of when the task should start, as well as how often it should recur.
Clicking Next again proceeds to the fourth step of the wizard. This is where you specify exactly what you want the task to do. (See Figure 5.)
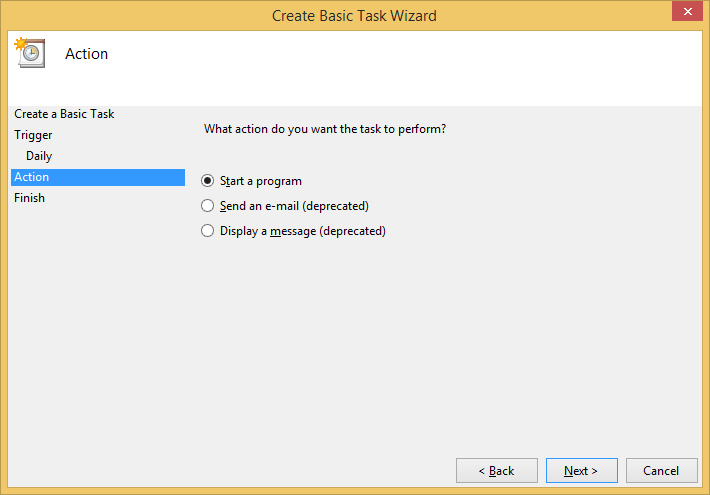
Figure 5. Creating a basic task, step 4.
In this particular case, I want to run a batch file, which is simply viewed as a program by Windows. Thus, I need to choose the "Start a Program" option, and then click Next. (See Figure 6.)
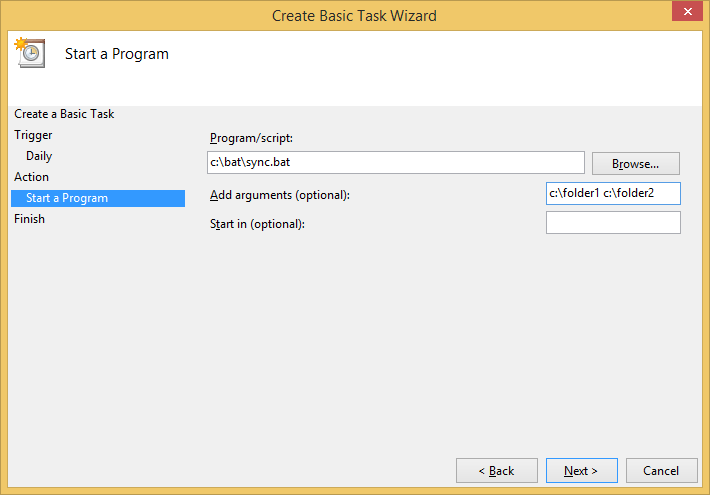
Figure 6. Creating a basic task, step 5.
In this step you are asked for the details of the program you're going to run. The "program" I'm going to run is the batch file named "sync.bat", which is located in the "C:\bat" folder. I specify that information in the "Program/Script" box. Since this batch file is designed to synchronize two folders, I specify the names of the two folders as arguments. These will be passed to sync.bat as %1 and %2.
When you click Next one last time, you're presented with a summary screen that reminds you of what all you picked in the process of going through the wizard. (See Figure 7.)
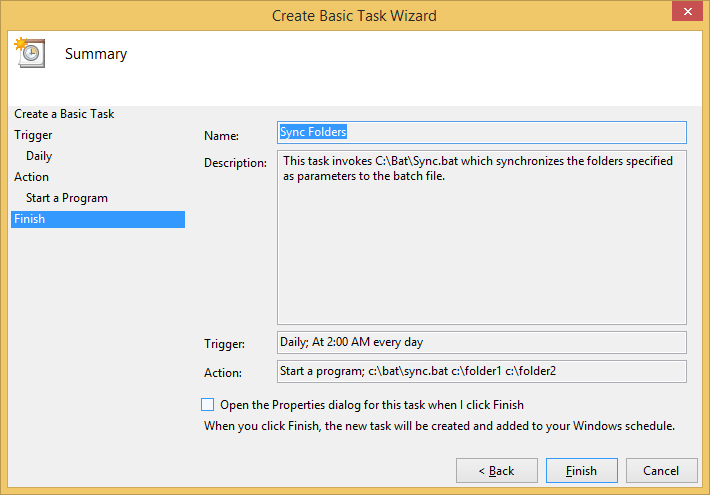
Figure 7. Creating a basic task, step 6.
Click the Finish button and you'll be taken back to the main screen, where you'll see your task ready to run at the appointed time.
![]()
![]()
![]() This tip (13223) applies to Windows 7, 8, and 10.
This tip (13223) applies to Windows 7, 8, and 10.
Sometimes your batch file needs to accept an unknown number of parameters. This is easy to deal with if you know about ...
Discover MoreThis tip is part of a series that talks about Windows batch files. It introduces a few more commands you can use in your ...
Discover MoreThis tip is part of a series that talks about Windows batch files. It introduces a few more commands and special ...
Discover More2018-02-10 13:56:12
Mathew
Sorry Barry, but there are security issues with just running the bat file like that!
Copyright © 2026 Sharon Parq Associates, Inc.

Comments