One of the features introduced in Windows 7 was called, strangely enough, Peek. This feature is actually pretty descriptive, as it allows you to "peek" through whatever is open on your desktop to see a buried window or the entire desktop.
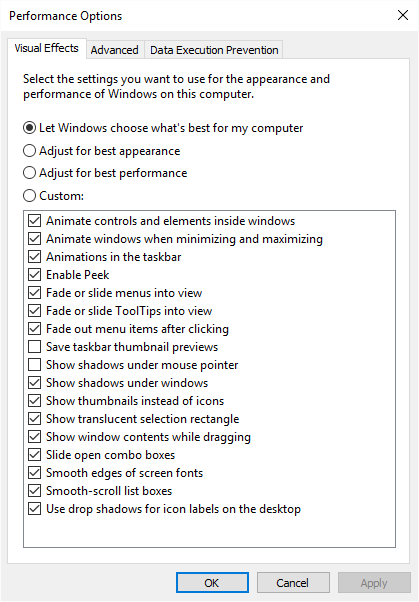
As long as you have the Aero interface enabled on your system—which is the standard condition on most Windows systems—you can use Peek. (The Aero interface is enabled automatically when you personalize your system to use an Aero theme.) You can see if Peek is enabled by following these steps:

Figure 1. The Visual Effects tab of the Performance Options dialog box.
Scroll through the list of settings looking for one entitled "Enable Aero Peek." This controls whether the Peek feature works on your system or not. Assuming you do want it enabled, make sure the check box is selected, and then click OK on each of the open dialog boxes to close them.
To use Peek, simply move your mouse pointer over one of the task buttons on the Taskbar. In short order (after about half a second) you should see the window used by that task appear on the screen, provided it was previously covered by other windows. When you move the mouse pointer off of the task button, the task's window again reverts to its previously hidden condition.
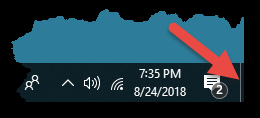
With Windows, you can also see the entire desktop using Peek by simply moving the mouse pointer over the Show Desktop button, at the right end of the Taskbar. (See Figure 2.)

Figure 2. The Windows 10 Show Desktop Button.
Note that with Windows 7, the words "Show desktop" are displayed when you hover the mouse over the small vertical bar at the very far right of the task bar.
You don't want to click the Show Desktop button; that will minimize all the open windows. Instead, just hover over the button and, in a jiffy, Windows fades all the open windows from view so you can see the desktop clearly. (And, helpfully, it leaves outlines of each window on the screen so you can see where they were before fading them out.) Move the mouse pointer away from the Show Desktop button and all the faded windows reappear.
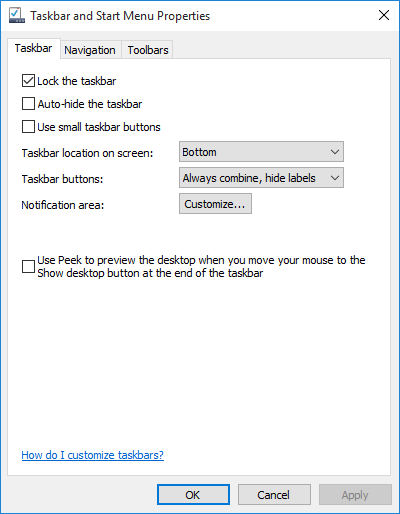
If, for some reason, you cannot use Peek to display the desktop as just described, it could be because this particular feature is turned off on your system. (This assumes, of course, that Aero Peek is turned on, as already described at the beginning of this tip.) Here's how to make sure the feature is turned on:

Figure 3. The Taskbar tab of the Taskbar and Start Menu Properties dialog box.
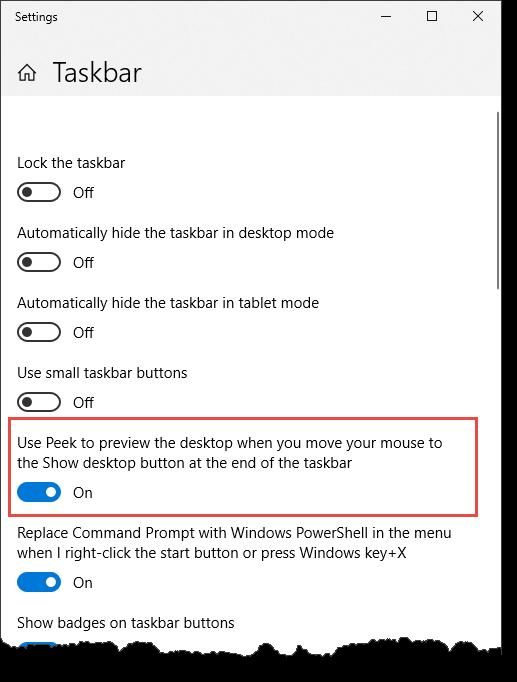
If you are using Windows 10, perhaps an easier way to make sure the feature is turned is to type "Taskbar" (without the quotes) in the Search box. Windows displays the Taskbar section of the Settings dialog box. Make sure the "Use Peek to preview the desktop when you move your mouse to the Show desktop button at the end of the taskbar" button is turned on. (See Figure 4.)

Figure 4. The Taskbar section of the Settings window.
![]()
![]() This tip (13167) applies to Windows 7 and 10.
This tip (13167) applies to Windows 7 and 10.
USB storage devices can be extremely helpful. They can also allow people to copy and access your information through the ...
Discover MoreTime is more than hours and minutes. How do you get the taskbar clock to show seconds?
Discover MoreDoes your screen's motion appear choppy or less than smooth? You can improve the smoothness of motion on your screen by ...
Discover MoreThere are currently no comments for this tip. (Be the first to leave your comment—just use the simple form above!)
Copyright © 2026 Sharon Parq Associates, Inc.
Comments