The Windows 10 Action Center basically replaces (or enhances) the previous Notification Area which, in turn, replaced the System Tray. The Action Center notifies you of various events that you can address or dismiss at your discretion. To invoke the Action Center window, click the "call out" icon to the right of the clock in the Taskbar: (See Figure 1.)
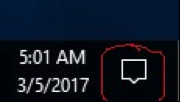
Figure 1. The empty "call-out" icon.
This launches the Action Center window, which is a pane that appears along the right side of your display. (Besides clicking the "call out" icon, you can also launch Action Center via Win+A.) If you have notifications, the "call out" icon will appear to have text in it. As you can see from the above figure, my icon is empty, which means that any notifications I may have, have all been seen.
If you invoke the Action Center, you'll see all of the notifications you've received that you haven't cleared, and you'll also gain access to some quick one-click settings: (See Figure 2.)
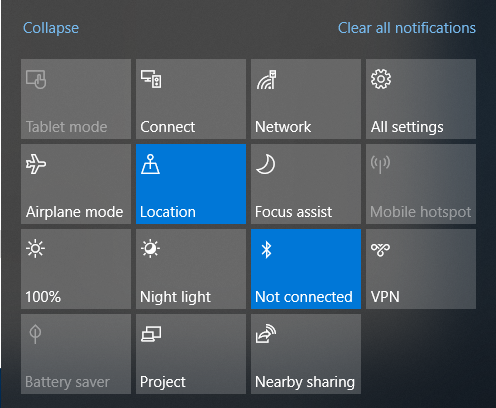
Figure 2. The one-click settings menu.
Covering all of these settings is beyond the scope of this tip, but there are a few noteworthy items. First of all, the upper-left corner of this menu has a Collapse link. By clicking this link you can collapse the menu down to just one line, leaving more room for your notifications to appear. (When the menu is collapsed, the Collapse link is replaced by an Expand link so that you can bring the full menu back.)
The upper-right corner of the menu presents a link for you to clear all of your notifications. Any notifications that you have are displayed above this menu, but once you've seen them you can clear them by clicking this link.
Below the "clear all notifications" link is a menu button for "All settings." This provides another way to bring up the Settings window versus using either the Start button or by typing into the search box.
If you ever use Airplane Mode (which stops all wireless communication, such as Wi-Fi, cellular, and Bluetooth), you can easily access it via the "Airplane mode" menu button.
The Brightness button (the gray one that says 100%) lets you dynamically change the brightness of your monitor. Similarly, "Night light" provides an interesting ambience to the lighting scheme. The blue button to the right of that is for Bluetooth, and (obviously) to its right is a button to let you manage virtual private networks (VPNs).
On the bottom row we see that my "Battery saver" is disabled (I'm plugged in). The next button to the right is to let you quickly indicate how to deal with multiple screens. Finally, the "Nearby sharing" button lets you send files, links, photos, and more to nearby PCs over Bluetooth.
![]() This tip (13585) applies to Windows 10.
This tip (13585) applies to Windows 10.
Computers have names that are used to identify them. Using Command Prompt (CMD) you can change your computer's name.
Discover MoreDid you know that Windows automatically starts extra programs whenever you boot your system? If you want to see which ...
Discover MoreWant to make sure that Windows is trim and fit, using only those features you routinely use? Here's how to enable or ...
Discover MoreThere are currently no comments for this tip. (Be the first to leave your comment—just use the simple form above!)
Copyright © 2026 Sharon Parq Associates, Inc.
Comments