When working on a desktop or using any Windows system out "in the wild," you may want to connect to an external screen. This screen can either be a second monitor or, perhaps, a projector you need for that critical presentation.
Windows makes it easy to hook up to an external screen and to control how that screen behaves relative to the main screen. After you've physically connected the second screen using whatever cable is appropriate to your computing device and the screen, simply press Win+P. You end up with a series of four choices displayed at the right side of your screen. (See Figure 1.)
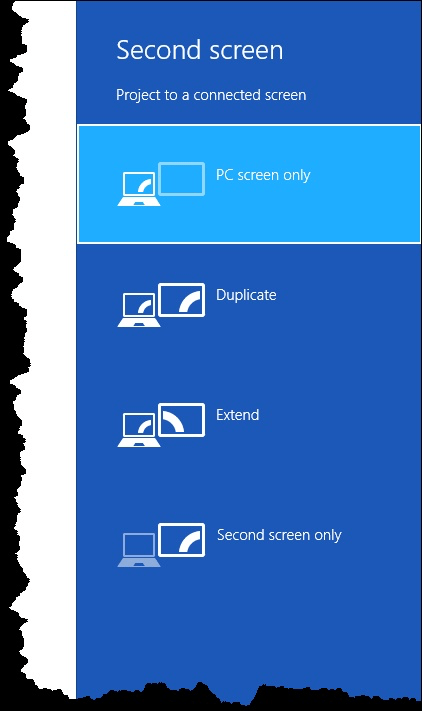
Figure 1. Choices for working with a second screen.
Note that the four choices control how the second screen is used by Windows. You can choose to ignore the second screen, use only it, mirror (duplicate) the screens, or use the second screen as an extension of the first. In most cases you'll want to choose duplicate or extend.
After you click on the option you want to use, Windows starts using the device as you direct and you can go on working as you normally would with Windows.
![]()
![]() This tip (13077) applies to Windows 8 and 10.
This tip (13077) applies to Windows 8 and 10.
Bluetooth speakers allow you to play your computer's audio wirelessly. Connecting a Bluetooth speaker to a ...
Discover MoreDo you want to fundamentally change how Windows responds to mouse clicking? You can do so by following the steps outlined ...
Discover MoreYou may have created a new power scheme for whatever reason, but when it has outlived its usefulness, you want to delete ...
Discover MoreThere are currently no comments for this tip. (Be the first to leave your comment—just use the simple form above!)
Copyright © 2026 Sharon Parq Associates, Inc.
Comments