Choosing a Power Management Plan
It's obvious that your computer uses power; it has to in order to operate properly. You can, however, minimize the amount of power your computer uses by changing Windows' power settings. You can access those settings in this manner:
- Display the Control Panel.
- At the left side of the screen click the Hardware and Sound heading. Windows displays the Hardware and Sound screen.
- Under the category of Power Options, click the Change Power-Saving Settings option. Windows displays the Power Options screen. (See Figure 1.)
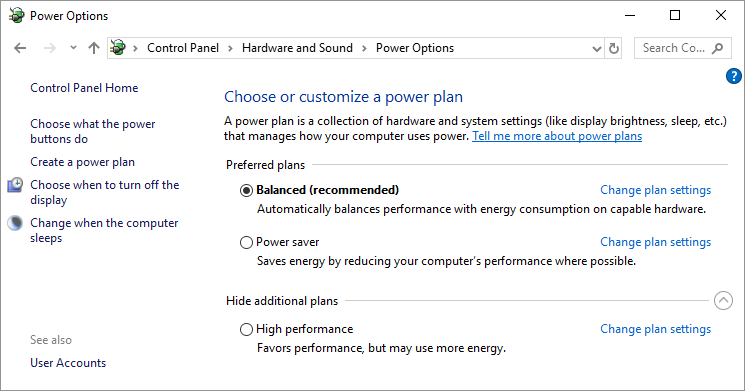
Figure 1. The Power Options screen.
- Pick one of the power management plans available on the screen.
Most modern computers allow Windows to control both the computer itself (including the hard drive) and the display monitor. These components can be set to automatically "turn off" after varying amounts of inactivity. Windows offers three power management plans that you can select in step 4:
- Balanced. This is typically the plan recommended for desktop systems. It turns off the display monitor after 10 minutes and puts the computer to sleep after 30.
- Power Saver. This plan works great for laptop and mobile systems. It turns the display off after 5 minutes and puts the computer to sleep after 15.
- High Performance. This plan is designed for systems that may require a lot of unattended computational time, where you don't really want the computer to pause what it is working on. It turns off the display monitor after 20 minutes and never puts the computer to sleep.

 This tip (10716) applies to Windows 7 and 10.
Author Bio
Allen Wyatt
With more than 50 non-fiction books and numerous magazine articles to his credit, Allen Wyatt is an internationally recognized author. He is president of Sharon Parq Associates, a computer and publishing services company. Learn more about Allen...
Noting Changes at the Left of the Text
The Track Changes feature allows you to easily see where changes have been made in a document. Resolve those changes, and ...
Discover More
Microsoft Excel VBA Guidebook
Creating Excel macros allows you to extend your productivity with Excel. Visual Basic for Applications (VBA) is the ...
Discover More
Showing a Dynamic Number Range in a Header
If you are creating a reference document of some type, you may want to include in the header of that document an ...
Discover More
Using Powercfg to Query an Existing Power Scheme
This tip shows you how to use the command-line Powercfg utility to query a given power scheme from your current environment.
Discover More
Adjusting the Mouse for Left-Handed Users
Since Windows is so customizable, it should come as no surprise that Microsoft has made accommodations for left-handed ...
Discover More
Generating a Power Efficiency Diagnostics Report
Your computer uses power to operate, and Windows has a great impact on how much power it uses. You can use a hidden ...
Discover More
Comments