Built into Windows is a utility called the Windows DVD Maker. As the name implies, it allows you to create a video DVD from your existing videos and digital photos. The utility even lets you have menus, a scene selection page, and allows a slide show with music.
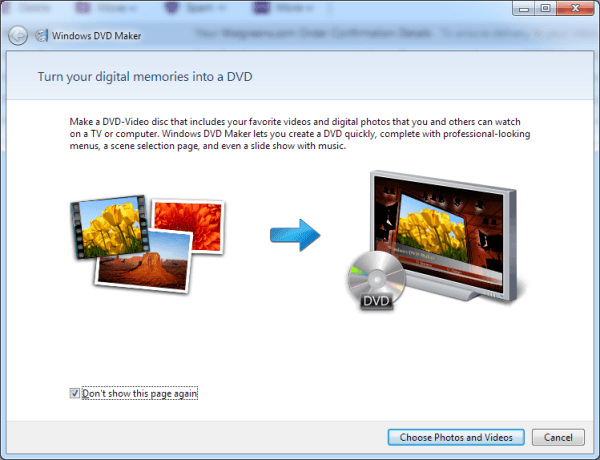
To use Windows DVD Maker, click the Start button, type DVD Maker, and press Enter. You'll shortly see the Windows DVD Maker dialog box. (See Figure 1.)

Figure 1. Start page of Windows DVD Maker.
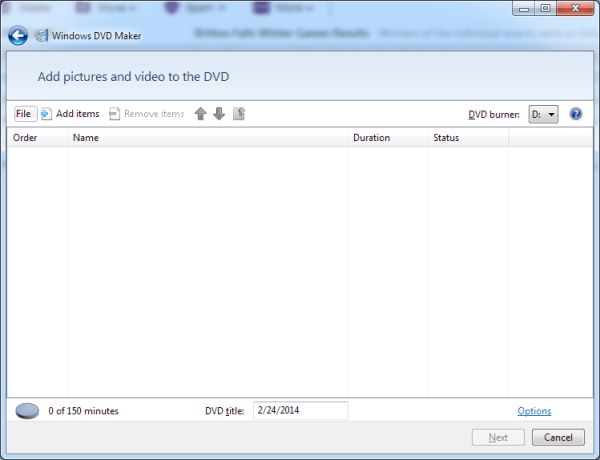
Click the button labeled "Choose Photos and Videos," and you'll be shown a screen that allows you to pick what you want placed on the DVD. (See Figure 2.)

Figure 2. Adding pictures and videos to your DVD.
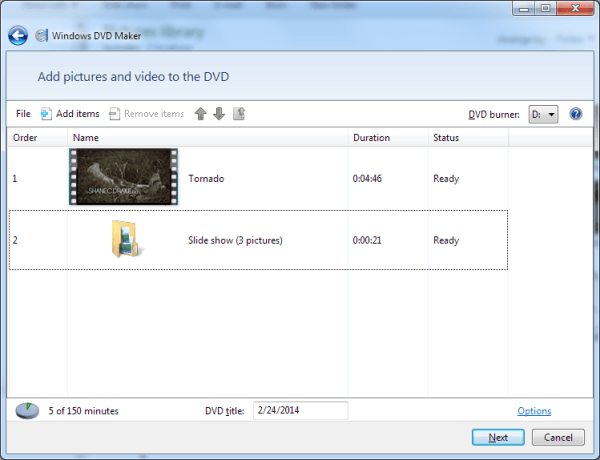
Let's say I have a video in a .wmv file and a few .jpg files, all of which I want to put on my DVD. So I click the Add Items button and I'm prompted to enter the names of the files that contain my video and .jpgs. When I've added all four items, the file selection screen starts to fill out a bit. (See Figure 3.)

Figure 3. After adding pictures and videos to your DVD.
Notice that the individual .jpg files are stored in a folder (called "Slide Show"). If you want to look at the individual photos stored in this folder, double-click the folder. This then enables you to adjust the order of the individual photos, as desired. Return to the overall view by clicking the Back to Videos button (which looks like a folder with an up-arrow superimposed on it).
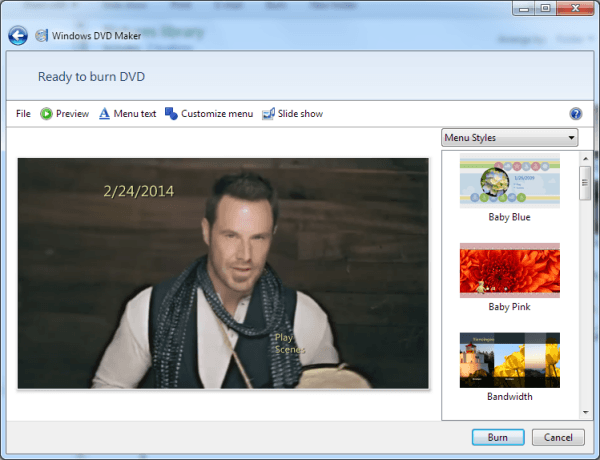
After you have your files ordered the way you want them, click the Next button. This takes you to the final screen where you can preview what is about to be burned to the DVD. (See Figure 4.)

Figure 4. Ready to burn your DVD.
Before finalizing your DVD, though, you can use the controls at the right side of the dialog box to modify the menu style, customize the menu text, or see the slide show. Click the Burn button and your DVD is burned to contain your information. When done, the DVD can be played in any standard DVD player.
Unfortunately, Microsoft dropped Windows DVD Maker from Windows 8 and it still is missing in Windows 10. For those versions of Windows you'll need to locate and download a third-party utility. (There are many available that a quick Internet search will turn up.)
![]() This tip (13025) applies to Windows 7.
This tip (13025) applies to Windows 7.
Playing DVDs on your system could be as simple as merely inserting the disc into the drive. But at worst, it's only one ...
Discover MoreIf you want to show what's on your computer screen through a projector so that others can see it, the process is about as ...
Discover MoreISO files provide a digital copy of what is stored on an optical disc. Windows allows you to treat these files as if they ...
Discover MoreThere are currently no comments for this tip. (Be the first to leave your comment—just use the simple form above!)
Copyright © 2026 Sharon Parq Associates, Inc.
Comments