Windows provides a number of built-in apps, all accessible through the Start screen (Windows 8) or the Start menu (Windows 10). In addition, you can add other apps by visiting the online Microsoft Store. Some apps are self-contained, only interacting with you when you are running the app. Other apps can notify you when things are happening. For instance, your e-mail app may let you know when you receive e-mail or a weather app may let you know if a weather warning is issued.
The number of different notifications you receive can be, at times, overwhelming. Fortunately, Windows allows you to manage from which apps you want to receive notifications. If you are using Windows 8, this is handled through your system's PC Settings area. You can bring up this area in several ways:
With the PC Settings area displayed, click Notifications at the left side of the screen. At the right side of the screen you can then specify, on an app-by-app basis, if you want to receive notifications or not. (See Figure 1.)
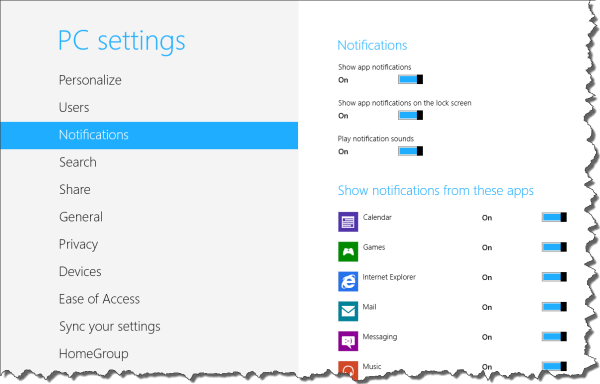
Figure 1. Windows allows you to control which apps provide notifications.
In addition, at the top of the right side of the screen you can specify where and how you want to receive your notifications.
If you are using Windows 10, the process of changing notifications is handled just a bit differently. The easiest way to bring up the proper settings area is to type, in the search box, "notifications." Among the search results you should see an option for "Notifications & Actions Settings." This is the option you want to choose. When you do so, you'll see the Settings dialog box appear. (See Figure 2.)
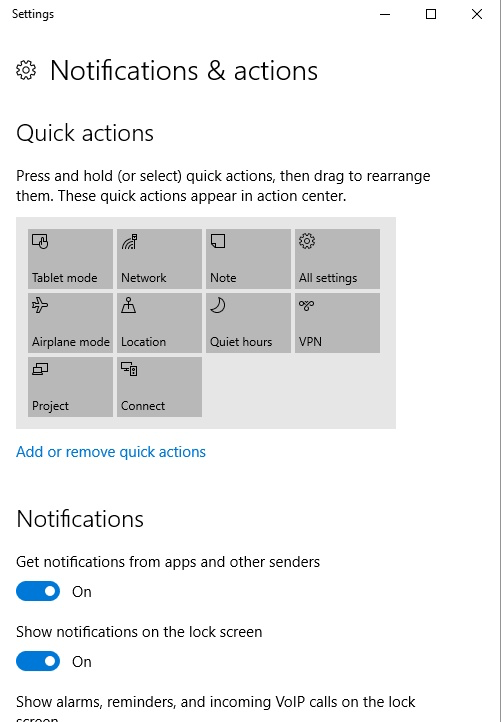
Figure 2. The Windows 10 Settings dialog box for changing notifications.
In order to control which apps send you notifications, scroll down in the dialog box. Just as in Windows 8 you'll find the ability to set, on an app-by-app basis, if you receive notifications or not. When you are done with the settings, close the dialog box and your changes should be immediately implemented.
![]()
![]() This tip (12980) applies to Windows 8 and 10.
This tip (12980) applies to Windows 8 and 10.
If your computer is accessed by multiple people, you may be concerned about privacy. One area where you might want a bit ...
Discover MoreScreen resolution is a key attribute of your monitor. You usually have choices for resolution, which provides you with a ...
Discover MoreWhen you buy a new computer, it typically has some obscure name that doesn't accurately reflect your personality. Or ...
Discover MoreThere are currently no comments for this tip. (Be the first to leave your comment—just use the simple form above!)
Copyright © 2026 Sharon Parq Associates, Inc.
Comments