The Windows Task Scheduler is a tool that allows you to have tasks automatically execute at certain times or when certain events occur. For example, you could use the Task Scheduler to synchronize certain folders every day at 2:00 a.m. Or you could set it up to run a program every hour on the hour. You can even have the Task Scheduler send an e-mail every time a certain user logs in. You can have multiple tasks set up to run at various times and under various conditions.
To launch the Task Scheduler if you are using Windows 7, go to Start | All Programs | Accessories | System Tools | Task Scheduler. If you are using Windows 8 or Windows 10, type "Task Scheduler" (without the quotes) in the Search box and press enter. Windows displays the Task Scheduler dialog box. (See Figure 1.)
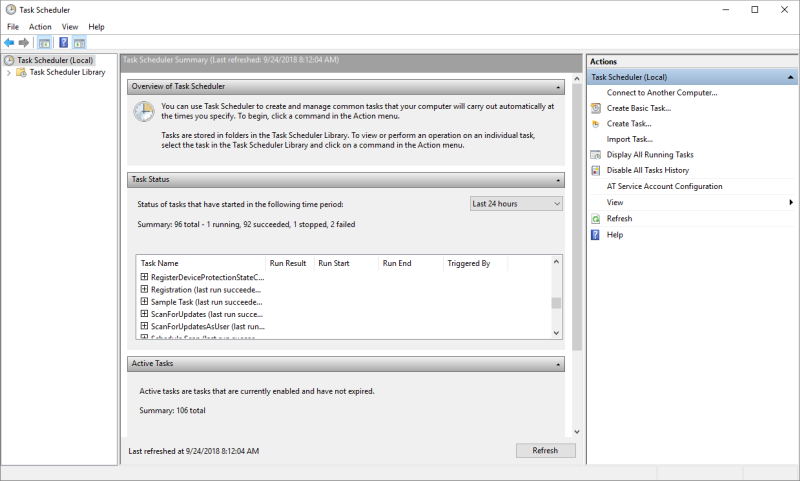
Figure 1. The Task Scheduler dialog box.
This window allows you to check the status of tasks, create tasks, display running tasks, etc. For example, I have a task named "Sample Task". To check on its status I click the plus sign next to that task's name and I am presented with details about the task's history. (See Figure 2.)

Figure 2. Checking a task's status.
Here we see that the last time the task ran it finished successfully. Its last run started on 9/23/2018 at 09:50:00 a.m. and ended 9/24/2018 at 7:41:00 a.m. It was caused to run (i.e., it was triggered) by a time schedule (versus some system event).
To see additional details about a task, click on the Task Scheduler Library option at the left side of the Task Scheduler dialog box. This causes the middle pane to change so that we can look in more detail at the task. (See Figure 3.)
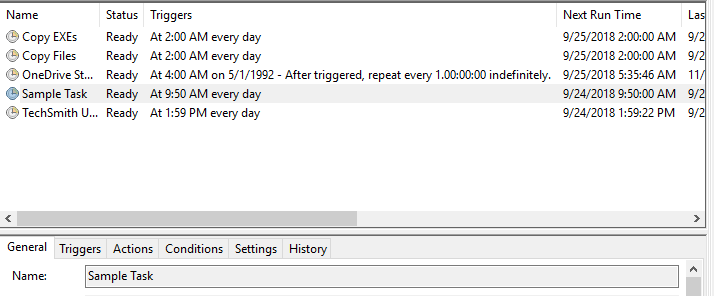
Figure 3. Getting more detail about a scheduled task.
This view tells us that the task is ready to run again and that it will commence at 2:00 a.m. every day. Note the tabs below the upper screen. By clicking these tabs you're able to see what triggers (causes) the task to start, what actions it will perform, the conditions under which the task runs, various settings that are in effect when the task runs, and the task's history.
For information about how to create a task, see the tip Scheduling a Program to Run on a Schedule.
![]()
![]() This tip (12441) applies to Windows 7 and 10.
This tip (12441) applies to Windows 7 and 10.
In another tip you learned a bit about the Windows Task Scheduler. There may be times, however, when you want to perform ...
Discover MoreIf you have certain programs that you want to have run automatically, you can use Windows Task Scheduler to quickly set ...
Discover MoreWindows makes it easy to define tasks and to run them on a regular schedule. If you later want to modify or delete a ...
Discover MoreThere are currently no comments for this tip. (Be the first to leave your comment—just use the simple form above!)
Copyright © 2026 Sharon Parq Associates, Inc.

Comments