Creating a disk partition can be an effective way to better utilize your disk space. A disk partition is a portion of a disk set aside for normal use and referenced by its own name. By partitioning your disk you can better control what files go where. For instance, many people have a partition that Windows uses for startup, installations, etc., and another partition for user data.
You create a partition by using the Disk Management utility. How you start the utility depends on the version of Windows you are using.
The Disk Management dialog box looks the same regardless of the version of Windows you are using. (See Figure 1.)
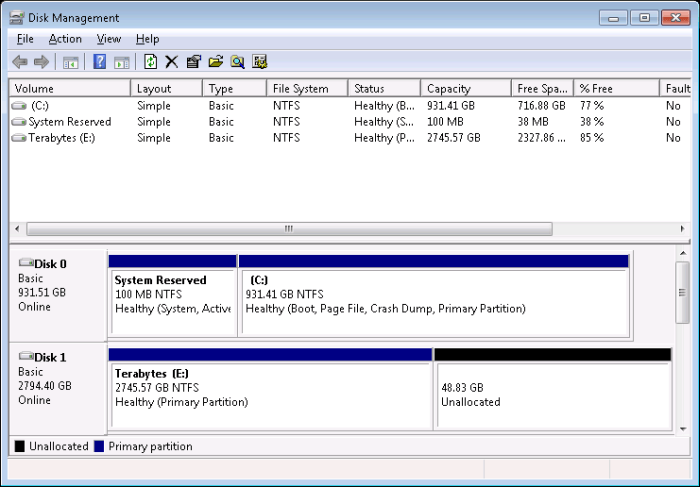
Figure 1. The Disk Management dialog box.
As shown in the figure, I have two physical disks: Disk 0 (my "C:" drive) and Disk 1 (my "E:" drive). Note also that the second physical disk (Disk 1) has 48.83 GB of unallocated space. I can create a new partition for that space by right-clicking it and selecting "New Simple Volume" from the resulting Context menu. This invokes the New Simple Volume wizard. The wizard lets you set the following values for your new partition:
After finishing the wizard, I now have a new partition on Disk 1, known as drive T:, that I can reference just like any other disk drive. (See Figure 2.)
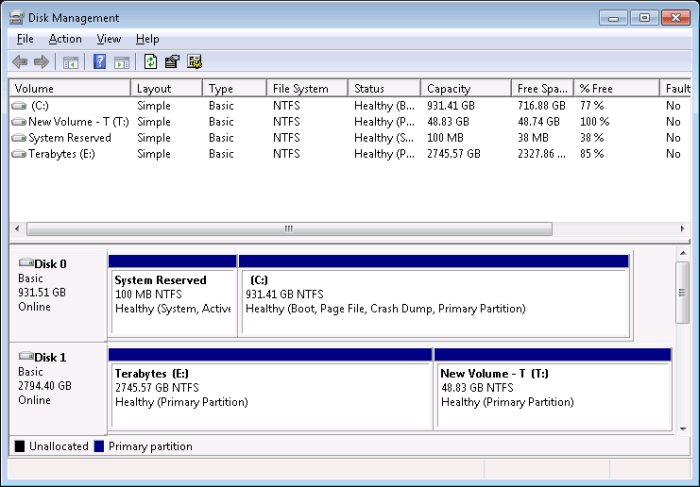
Figure 2. The Disk Management dialog box, showing the newly partitioned hard drive.
Once you have created the partition, you will want to format it. (You cannot use a partition within Windows unless you first format it.) The easiest way to do this is within the Disk Management utility, right-click on the partition you just created and then choose Format from the resulting Context menu.
![]()
![]()
![]() This tip (12244) applies to Windows 7, 8, and 10.
This tip (12244) applies to Windows 7, 8, and 10.
Disk drives, in Windows, can have names. You can easily use Windows Explorer to change the name of a disk drive on your ...
Discover MoreIs your desktop getting messy, with icons strewn everywhere? One way to help manage the plethora of icons on your desktop ...
Discover MoreIn the general course of using your system, you will likely create many new files. It's a good idea to organize your ...
Discover MoreThere are currently no comments for this tip. (Be the first to leave your comment—just use the simple form above!)
Copyright © 2026 Sharon Parq Associates, Inc.

Comments