The sheer size of the Registry and the amount of information that it contains makes it mandatory that you know what you want to edit before you begin poking around. When it comes to configuring Windows (and thereby changing the Registry), you can browse through the different parts of the Control Panel and decide what you want to change as you find it.
Because the Control Panel provides a contextual framework for understanding what you are changing, it is not unusual to find a new capability, have it catch your imagination, and then make some changes based on your discovery. Not so with the Registry; the Registry Editor doesn't provide any contextual framework, and the contents of the Registry itself are closer to a pile of raw data than to anything understandable by a mere mortal. While you can snoop through the Registry, the chance of intuitively finding something to change is remote. Thus, you must know what you want to do before you start your editing trek.
Many times, you can determine what you should edit by reviewing an application's documentation or talking to a program's support staff. Unfortunately, no comprehensive guide exists to possible Registry entries, and anyone who claims to have a comprehensive guide is pulling your leg.
When you want to find information in the Registry, you are left with the antiquated search capabilities of the Registry Editor. (You would think that because there are so many things in the Registry and that it is such an integral part of Windows that Microsoft would have provided some super-fancy search function. Alas, this is not the case; it's very disappointing.)
To use the Registry Editor's search command, follow these steps:

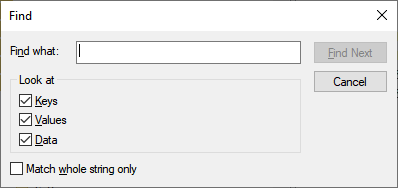
Figure 1. The Find dialog box.
That's it. The Registry Editor attempts to find what you are looking for, and the search may take a while. (The Registry contains tons of information that it takes a while to look through.) If a match is found, it is highlighted in one of the Registry Editor's windows, depending on where the information was found.
Remember: It is always better to be safe than sorry when it comes to the Registry. If you are going to make changes, make sure you back up the Registry before you do so.
![]()
![]()
![]() This tip (10955) applies to Windows 7, 8, and 10.
This tip (10955) applies to Windows 7, 8, and 10.
Every key value in the registry has a data type. This tip explains the available data types supported in the registry.
Discover MoreThe Registry is the central depository of configuration information used by Windows and by programs running on your ...
Discover MoreWindows wouldn't function if it weren't for the Registry, and many system tweaks involve editing it. Before making such ...
Discover MoreThere are currently no comments for this tip. (Be the first to leave your comment—just use the simple form above!)
Copyright © 2026 Sharon Parq Associates, Inc.
Comments