By now we've all heard the mantra a hundred times: "Always back up your data." Well, Windows 10 makes it easy and even goes a bit beyond a mere backup. Using File History, you can have multiple versions of files available to you constantly, just in case you accidentally delete a file or edit it into oblivion. The only downside is that you have to have an external drive connected to your computer at all times (or use a reliable network drive). So instead of remembering to back up everything every week or so, you can have Windows taking snapshots of changed files on an ongoing basis, so you'll always have recent backups.
Let's say you have an external drive connected as drive E: and you want to use it for your file history. Type "Control Panel" (without the quotes) in the search box to the left of the task bar and press Enter. Windows displays the Control Panel. Under the System and Security heading, select Save Backup Copies of your Files with File History. Windows displays the File History window. (See Figure 1.)
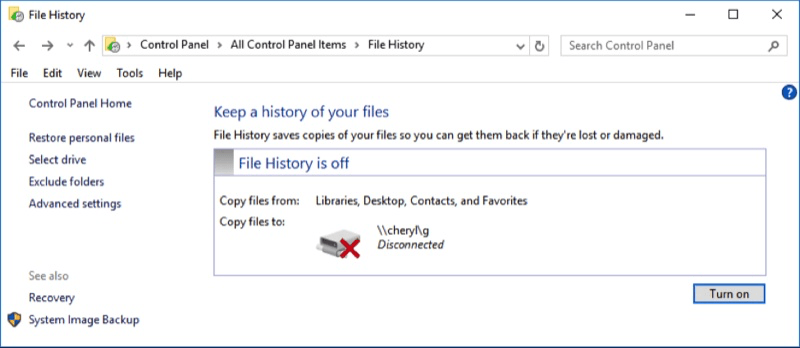
Figure 1. The File History window.
The first thing to do is to select a drive, so click Select Drive on the left. Your computer will search for available drives and present you with the Select Drive window. (See Figure 2.)
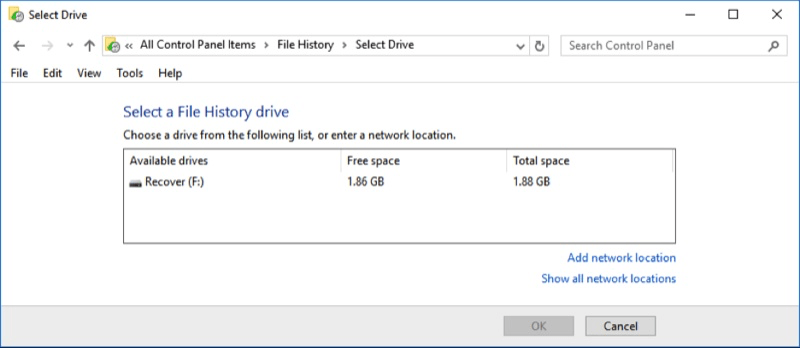
Figure 2. The Select Drive window.
Click the line containing your E: drive, and then click OK. After a moment you'll again see the File History window. (See Figure 3.)
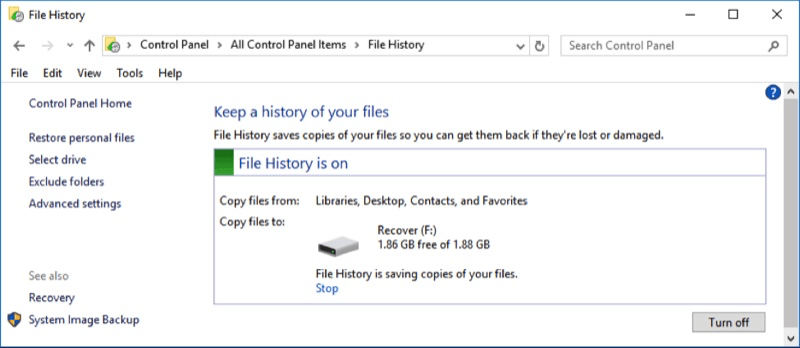
Figure 3. Associating a drive for File History.
As you can see, File History is now on, and it's using your E: drive as the backup location. What's happening in the background is that Windows is copying your files to your E: drive (so in reality you need a drive much bigger than my 114GB drive).
If you click the Advanced Settings link on the left, you have the opportunity to configure how File History does its work. (See Figure 4.)
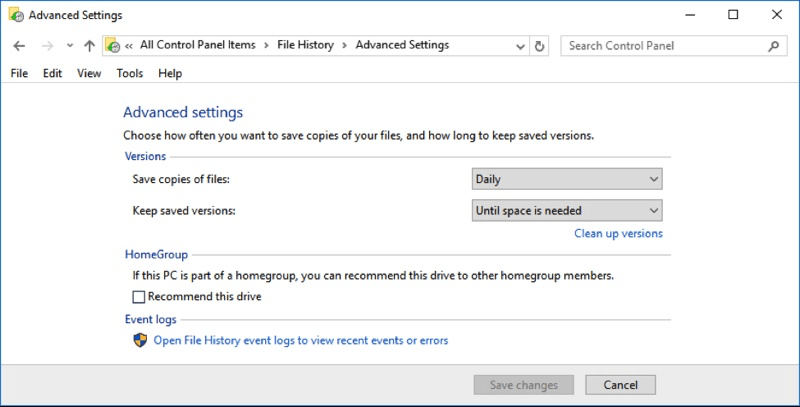
Figure 4. Modifying the advanced File History settings.
Here you can set up how frequently File History is run, from Daily down to every 10 minutes. You can also tell it how it should keep the saved versions of files by pulling down the "Until space is needed" drop down. If you make changes, be sure you click Save Changes, which will take you back to the main File History window.
Once your files have been copied to E:, you can then use the Restore Personal Files link (from the File History window) to get a file back in case you've corrupted or deleted your primary file. Just click the Restore Personal Files link and you'll be able to navigate to the file you want restored.
File History is a good, automatic way to ensure that you always have a recent backup of your files. Apart from needing an external drive to use it, I see no reason why not.
![]() This tip (775) applies to Windows 10.
This tip (775) applies to Windows 10.
Robocopy is a robust file copy utility built into Windows. If you have a lot of file management to do that can't easily ...
Discover MoreWindows Explorer is a powerful utility to use for navigating among your files and folders. And it can be customized a ...
Discover MoreYou can improve your efficiency at navigating the file system by using the Quick Access view. This tip shows you how to ...
Discover MoreThere are currently no comments for this tip. (Be the first to leave your comment—just use the simple form above!)
Copyright © 2026 Sharon Parq Associates, Inc.

Comments