Whether you're on a network of PCs or you're at home using a VPN (Virtual Private Network) to access your work computer, chances are you'll want to use the Remote Desktop capability of Windows. Before you can do that, though, you must set up the destination computer to allow it. (Note that Remote Desktop is only available for Professional, Business, and Ultimate versions of Windows. If you're running the Home edition, you don't have this capability.)
The first thing to do is to explicitly set the configuration setting that allows Remote Desktop. This is done by using the Search capabilities of Windows to search for "remote desktop" (without the quotes). As you search, Windows displays a number of possible results. You want to look for the entry named "Allow Remote Connections to This Computer." Click that item, and Windows displays the For Developers section of the Settings window. (See Figure 1.)
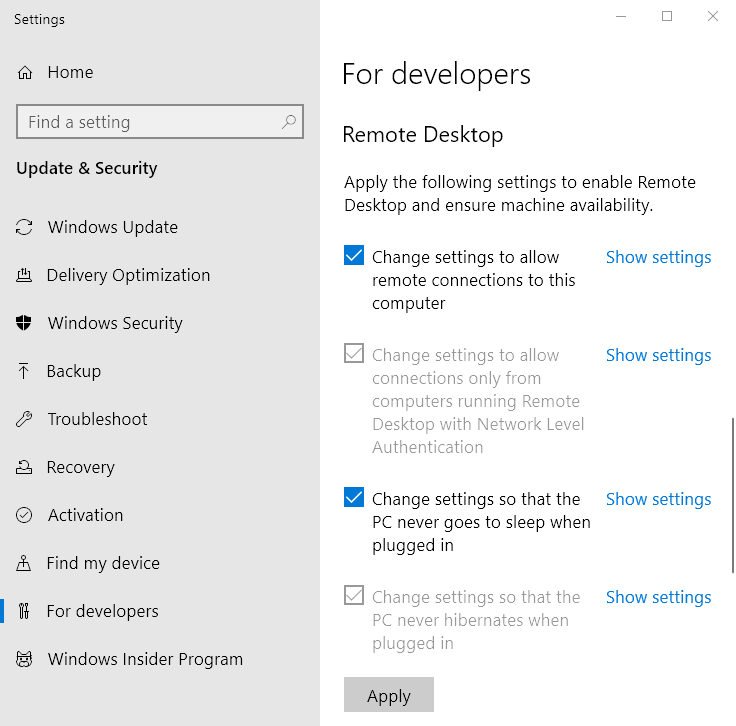
Figure 1. The Remote Desktop section of the Settings window.
Under the Remote Desktop heading, click the Show Settings link to the right of the Change Settings to Allow Remote Connections to This Computer checkbox. Windows displays the Remote tab of the System Properties dialog box. (See Figure 2.)
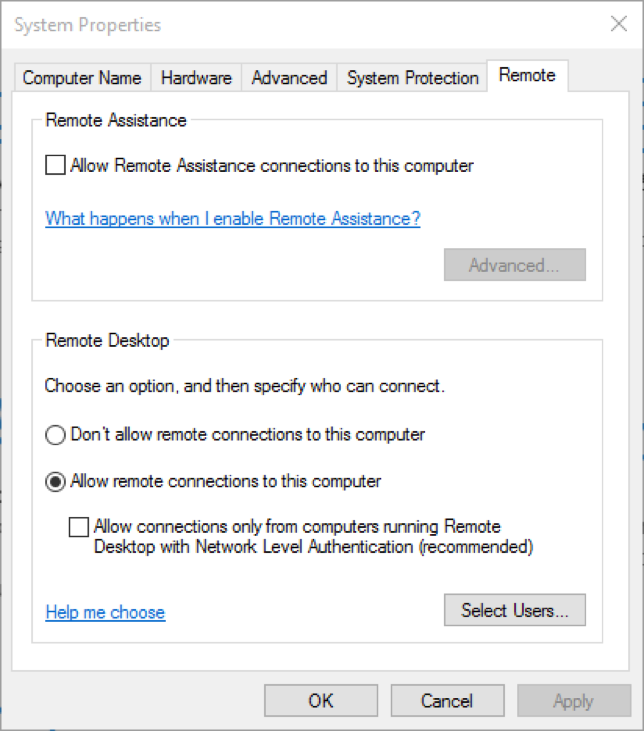
Figure 2. The Remote tab of the System Properties dialog box.
Click the radio button in the lower half of this dialog that says to "Allow Remote Connections to this Computer," then click OK.
There's one more thing you must do to ensure that your computer will be available when you want to remotely connect to it: You have to turn off its sleep mode. (If the computer is asleep it won't detect the incoming remote request.) You turn off sleep mode by going to the power options.
To adjust the power options, start by displaying the Control Panel. Click the Hardware and Sound heading, and then, under the Power Options heading, click the Change When the Computer Sleeps link. Windows displays an area of the Control Panel similar to the following. (See Figure 3.)
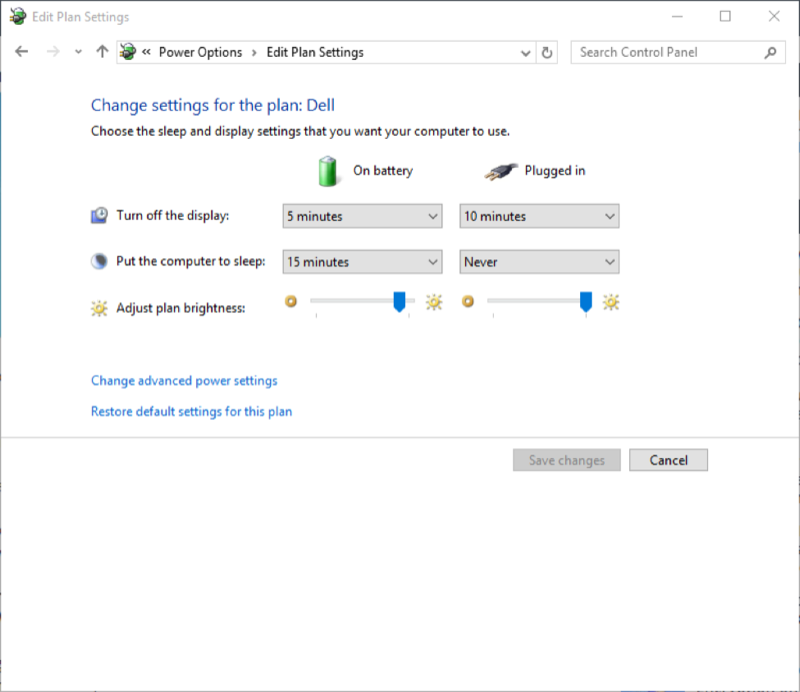
Figure 3. Editing plan settings.
Note that in the figure, I have set Windows so that when it's plugged in, the computer will "Never" go to sleep. Set your system to be the same and click the Save Changes button. Now, assuming your networks are properly configured, you should be able to remote into the computer with no problem.
![]()
![]()
![]() This tip (3167) applies to Windows 7, 8, and 10.
This tip (3167) applies to Windows 7, 8, and 10.
Your computer is typically running scores of processes behind the scenes of the relatively few windows you may have open. ...
Discover MoreDo you turn your computer on and off all the time? Do you really know if this is good for your computer or not?
Discover MoreYou may often need to work with many files at the same time. For example, you may wish to copy or delete a set of files. ...
Discover MoreThere are currently no comments for this tip. (Be the first to leave your comment—just use the simple form above!)
Copyright © 2025 Sharon Parq Associates, Inc.

Comments